Contrary to popular belief, a perfect bake isn’t about blindly trusting your oven’s dial or even a separate thermometer. The real key is understanding your oven as a dynamic thermal system. This guide demystifies why your oven’s temperature constantly fluctuates due to heating cycles and thermal mass, providing diagnostic techniques to truly master your appliance for consistent, predictable results.
You followed the recipe to the letter. You measured every ingredient with precision, preheated the oven, and set the timer. Yet, the result is another baking disappointment: a cake with burnt edges and a gooey center, cookies that are unevenly browned, or a pie crust that’s stubbornly pale. The frustration is immense, especially when the culprit seems to be the one tool you’re supposed to trust: your oven. Many bakers assume buying a standalone oven thermometer is the ultimate solution, but that only tells part of the story. It shows you the temperature *at one moment*, in *one spot*, but it doesn’t explain the ‘why’ behind the inconsistency.
The problem is more profound than a simple miscalibrated dial. Your oven isn’t a static heat box; it’s a dynamic environment constantly fighting entropy. It operates on a principle of thermal cycling, where the heating element turns on to overshoot the target temperature and then turns off, letting the temperature fall below the target before cycling back on. This constant fluctuation is normal, but it’s the primary reason for inconsistent results. The real issue isn’t that your oven is “wrong,” but that most bakers don’t understand its fundamental behavior.
But what if the solution wasn’t just to correct the temperature, but to master the system itself? This guide takes a diagnostic approach, treating your oven like a piece of high-performance machinery. Instead of just offering tips, we will delve into the physics of heat transfer, thermal mass, and airflow. We will equip you with the knowledge to diagnose your oven’s unique personality—its hot spots, its cool zones, and its heating rhythm. By understanding the ‘why’ behind the uneven browning and unpredictable rising, you can move from being a passive recipe-follower to an active, informed baker who gets consistently perfect results, regardless of the appliance’s quirks.
This article provides a complete diagnostic roadmap. We will explore how to test your oven’s true temperature, understand the critical role of your bakeware, master preheating and rack placement, and implement professional techniques to guarantee even cooking every single time.
Table of Contents: A Diagnostic Guide to Your Oven’s Performance
- How to Test Your Oven’s True Temperature Using Sugar?
- Glass vs Metal Pans: Which Material requires a Temperature Adjustment?
- Why You Should Wait 15 Minutes After the Preheat Beep?
- The Rotation Technique That Saves Your Sponge Cake form Uneven Rising
- Top, Middle, or Bottom: Where to Place Pizza for a Crispy Crust?
- Rice vs Ceramic Weights: What Provides the Best Support for Crusts?
- Why You Must Not Open the Oven Door for the First 20 Minutes?
- Roasting Vegetables: How to Achieve Perfect Caramelization Without Buying Expensive Equipment?
How to Test Your Oven’s True Temperature Using Sugar?
Before you can fix a problem, you must accurately diagnose it. Simply placing a single oven thermometer inside gives you a single data point, not a complete picture. Ovens don’t heat evenly; they have hot spots, cool zones, and a fluctuating temperature cycle. According to appliance manufacturers, it’s perfectly normal for an oven’s internal temperature to swing. In fact, an internal analysis from GE Appliances states that ovens can fluctuate by ±30°F from the set temperature during a normal heating cycle. This means your oven set to 350°F could be operating anywhere between 320°F and 380°F.
To truly understand your oven’s unique heating “fingerprint,” you need a method that maps out these variations. A surprisingly effective and low-cost diagnostic tool is granulated sugar. Sugar (sucrose) has a very specific melting point: 366°F (186°C). By observing how sugar melts on a baking sheet, you can create a precise map of your oven’s temperature landscape. Where the sugar is fully melted, your oven reached at least 366°F. Where it’s burnt, you have a significant hot spot. Where it remains granular, you’ve found a cool zone.
This method provides a visual, undeniable diagnostic of your oven’s performance, going far beyond what a single thermometer can tell you. It reveals not just an average temperature, but the pattern of heat distribution, which is critical for knowing where to place your pans and when to rotate them. It’s the first step in calibrating the baker to the oven, not just the oven’s dial.
Action Plan: Your Oven’s Sugar Test Diagnostic
- Preparation: Set your oven rack to the middle position and preheat to 400°F (204°C) to ensure temperatures will exceed sugar’s melting point. Line a baking sheet with parchment paper for easy cleanup.
- Setup: Sprinkle 1 cup of granulated sugar as evenly as possible across the entire surface of the parchment-lined baking sheet.
- Execution: Once the oven is fully preheated (wait about 15 minutes after the beep), place the baking sheet inside. Bake for exactly 10 minutes. Do not open the door during this time.
- Analysis: Remove the sheet immediately. Observe the pattern. Melted areas show where the oven reached at least 366°F. Burnt or caramelized areas indicate significant hot spots (well above 400°F). Unmelted areas reveal your oven’s cool zones.
- Integration: Take a photo or draw a diagram of the melt pattern. This is your oven’s heat map. Use it to inform future pan placement, avoiding hot spots for delicate cakes and utilizing them for things that need a good crust.
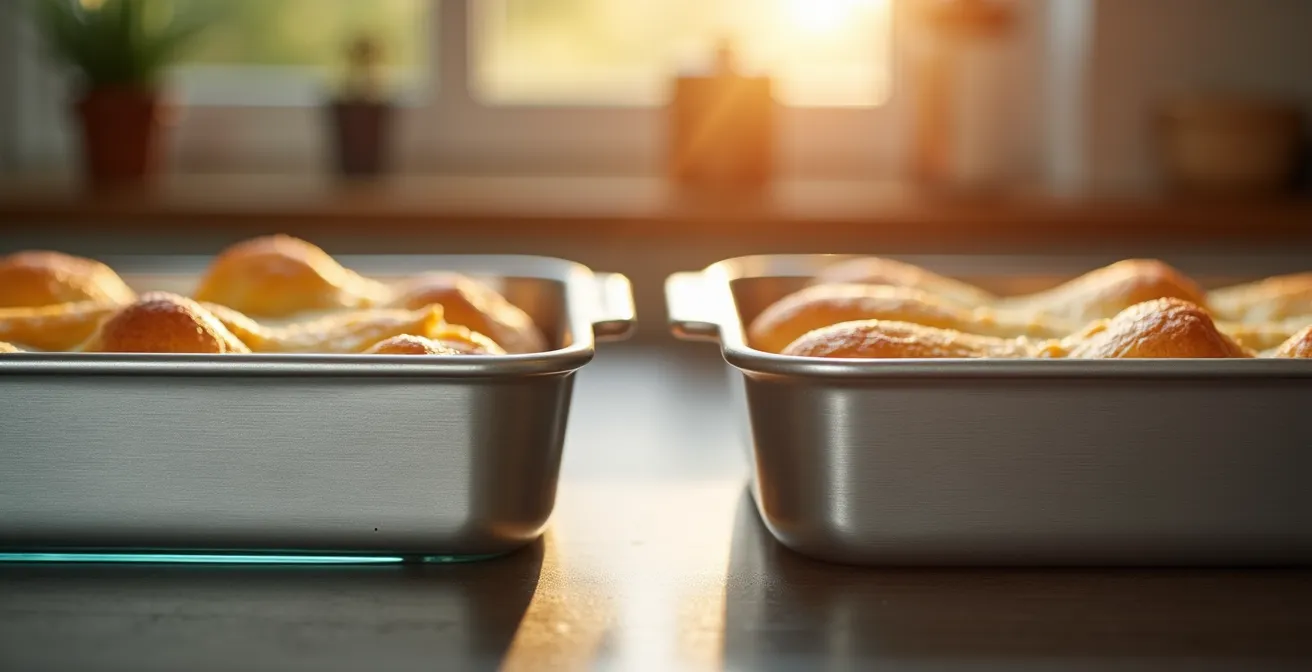
Glass vs Metal Pans: Which Material requires a Temperature Adjustment?
The temperature displayed on your oven’s dial is only one part of the heat-transfer equation. The other critical variable is the pan you’re using. Different materials absorb and radiate heat in fundamentally different ways, and failing to account for this is a common source of baking failures. The choice between glass and metal is not just aesthetic; it’s a technical decision that directly impacts how heat reaches your food. Metal, particularly aluminum, is an excellent heat conductor. It heats up quickly and transfers that heat efficiently to your batter or dough, promoting rapid rising and browning.
Glass and ceramic, on the other hand, are insulators. They take longer to heat up, but once they do, they retain heat far more effectively than metal. This property, known as high thermal retention, means they continue to radiate intense heat even after being removed from the oven. If you use a glass dish for a recipe written for a metal pan without adjusting the temperature, the exterior of your bake will likely become over-browned or even burnt before the interior has a chance to cook through. This is why many experienced bakers recommend reducing the oven temperature by 25°F when substituting a glass dish for a metal one.
This table breaks down the thermal properties of common bakeware materials, clarifying why temperature adjustments are necessary. Understanding this relationship between material and heat transfer is key to preventing burnt bottoms and undercooked centers.
| Material | Heat Conductivity | Heat Retention | Temperature Adjustment | Best For |
|---|---|---|---|---|
| Metal/Aluminum | Very High | Low | No adjustment | Cookies, pastries |
| Glass/Pyrex | Low | Very High | Reduce by 25°F | Casseroles, pies |
| Dark Metal | Very High | Medium | Reduce by 25°F | Crusty breads |
| Cast Iron | Medium | Extremely High | Reduce by 25°F | Cornbread, pizza |
| Ceramic | Low | High | Reduce by 25°F | Slow-baked dishes |
Why You Should Wait 15 Minutes After the Preheat Beep?
The preheat beep on your oven is one of the most misleading signals in the kitchen. It doesn’t mean your oven has reached a stable, even temperature. It simply indicates that the air at the sensor’s location has hit the target temperature *for the first time*. As we’ve established, ovens work in cycles. At the moment the beep sounds, the oven’s walls and racks are often still significantly cooler than the air. The heating element has just turned off after a powerful initial blast, and the overall thermal environment is anything but stable. Putting your food in at this exact moment is a recipe for disaster.
When you place a cool pan of dough into this volatile environment, it acts as a massive heat sink, causing the air temperature to plummet immediately. Furthermore, simply opening the door releases a huge amount of heat. Studies have shown that opening the oven door for just 30 seconds can cause the temperature to drop by 50-100°F. If the oven isn’t fully saturated with heat, it will struggle to recover, leading to pale, undercooked results. Waiting an additional 10-15 minutes *after* the beep allows the oven to complete several more heating cycles. This process thoroughly heats the oven’s walls and racks, building up a reservoir of radiant heat. This stored energy is called thermal mass.
Case Study: The Pizza Stone as a Thermal Stabilizer
A perfect illustration of thermal mass is the use of a pizza stone or baking steel. These dense objects take a long time to heat up, but once they reach the target temperature, they hold a tremendous amount of heat. This stored thermal energy acts as a buffer, stabilizing the oven’s overall temperature. When the door is opened, the stone’s radiant heat helps the oven recover much faster. Even if you aren’t baking pizza, keeping a stone on the bottom rack permanently adds thermal mass to your oven, helping to regulate the temperature swings of the natural heating cycle and creating a more stable baking environment for everything you cook.
By waiting, you ensure that the heat lost when you open the door is quickly replaced not just by the heating element, but by the radiant heat from the oven’s super-heated interior surfaces. This creates a stable thermal environment, which is crucial for the oven spring needed in cakes and breads.
The Rotation Technique That Saves Your Sponge Cake form Uneven Rising
Even in a perfectly preheated, thermally stable oven, no appliance provides perfectly even heat. All consumer-grade ovens have hot and cool spots due to their design, the location of the heating elements, and airflow patterns (or lack thereof). Your sugar test in the first step will have revealed your oven’s specific heat map. The professional solution to counteract this inherent imbalance is not a fancy piece of equipment, but a simple, disciplined technique: rotation. However, *how* and *when* you rotate is critical. Rotating at the wrong time can do more harm than good.
For delicate baked goods like sponge cakes, soufflés, or custards, the initial baking period is crucial for setting their structure. Opening the oven door too early introduces a rush of cool air and a physical jolt, which can cause them to collapse spectacularly. The general rule is to wait until the item is at least two-thirds of the way through its baking time. By this point, the internal protein and starch structure has set enough to withstand the brief change in temperature and movement. For cookies and roasted vegetables, which are more robust, rotating at the halfway point is ideal to ensure even browning.
The rotation itself must be methodical. It’s not just about turning the pan. * For a single pan on one rack: Rotate it 180 degrees. The side that was at the back of the oven (often a hot spot) is now at the front. * For two pans on different racks: This requires a two-part move. Rotate each pan 180 degrees, AND swap their rack positions. The pan that was on the top rack moves to the bottom, and vice versa. This accounts for both front-to-back and top-to-bottom temperature differences. This disciplined technique ensures that every part of your food is exposed to the different heat zones within your oven for an equal amount of time, guaranteeing a uniformly risen cake and perfectly even browning.
Top, Middle, or Bottom: Where to Place Pizza for a Crispy Crust?
The position of your oven rack is not an arbitrary choice; it’s a tool for controlling the type of heat your food receives. An oven delivers heat in two primary ways: convective heat from the circulating hot air and radiant heat emanating directly from the heating elements. Each rack position emphasizes a different type of heat transfer, and knowing which to use is key to achieving specific results, from a crispy pizza crust to a perfectly golden-brown casserole.
The middle rack is the workhorse of the oven. It offers the most even balance of heat, with good air circulation and a safe distance from the intense, direct heat of the top and bottom elements. This makes it the default position for most cakes, cookies, and standard bakes where even cooking is the priority. The top rack, positioned closest to the upper heating element (or broiler), is the zone of intense radiant heat from above. This is ideal for browning. If you want to finish a gratin with a bubbly, golden crust or quickly brown the top of a casserole, moving it to the top rack for the last few minutes is the perfect technique.
Conversely, the bottom rack is closest to the lower heating element, providing powerful radiant heat from below. This is the secret to a crisp, well-browned bottom crust on pizzas and breads. Placing a pizza (ideally on a preheated stone or steel) on the lowest rack ensures the base gets a powerful blast of heat, cooking it quickly and creating that coveted crispy texture before the toppings have a chance to overcook or burn. As professional bakers know, using the lower rack for large roasts in a convection oven or the center for most dishes in a conventional oven provides optimal results. Leveraging these distinct heat zones turns your oven from a simple box into a versatile cooking tool.
Rice vs Ceramic Weights: What Provides the Best Support for Crusts?
Blind baking a pie or tart crust—baking it before adding the filling—is essential for preventing a soggy bottom. The process requires “pie weights” to keep the crust from puffing up and slumping down the sides of the pan. While many home bakers reach for dried beans or rice as a cheap and convenient option, from a thermal dynamics perspective, this is a flawed choice. The goal of a pie weight is not just to weigh the dough down, but also to help it cook. This is where understanding heat transfer becomes critical.
Dried rice and beans are poor conductors of heat; they act as insulators. While they prevent the crust from puffing, they also shield it from the oven’s heat, slowing down the baking process and often resulting in a pale, under-baked bottom. Commercial ceramic or metal pie weights are engineered specifically for this task. They are excellent heat conductors. They absorb heat from the oven and transfer it directly into the dough, actively helping the crust to set and brown evenly. This results in a crisper, more thoroughly baked crust in less time.
The difference is not trivial; it’s the difference between an adequate crust and a professional-quality one. While the initial cost of purpose-made weights is higher, their reusability is infinite, and their thermal performance is vastly superior. An even more effective, albeit pricier, option is a “chain mail” disk, which offers superior metal conduction for restaurant-quality results. Understanding this principle—choosing a material that conducts heat rather than one that insulates—is another example of how mastering the physics of your oven leads to better baking.
This comparative analysis from a technical review of oven performance highlights the effectiveness of different materials.
| Weight Type | Heat Transfer | Reusability | Cost | Effectiveness |
|---|---|---|---|---|
| Ceramic beads | Excellent – conducts heat | Infinite | $15-25 | Professional results |
| Dried rice/beans | Poor – insulates | Limited (gets stale) | $2-5 | Adequate for occasional use |
| Chain mail disk | Superior – metal conduction | Infinite | $40-60 | Restaurant quality |
| Sugar (granulated) | Moderate | Single use | $1-2 | Emergency option only |
Why You Must Not Open the Oven Door for the First 20 Minutes?
The urge to peek is a powerful one for any baker. But opening the oven door, especially during the first 20 minutes of baking, is one of the most detrimental actions you can take. This goes beyond the simple issue of heat loss. It’s about disrupting the two critical physical processes that give baked goods their structure and volume: oven spring and structural setting. As America’s Test Kitchen explains in a technical analysis on oven calibration, this is rooted in the very nature of how ovens function.
Ovens are inaccurate. Since all ovens cycle on and off to maintain temperature, even the best models will periodically deviate from the desired target by at least a few degrees throughout cooking.
– America’s Test Kitchen, ThermoWorks Blog on Oven Calibration
During the first phase of baking, the heat causes gases within the batter or dough (from yeast, baking soda, or steam) to expand rapidly. This is the “oven spring” that gives cakes their height and bread its airy crumb. At the same time, the proteins and starches are beginning to set, forming a delicate, semi-solid scaffold. This structure is extremely fragile. When you open the oven door, you trigger a catastrophic chain of events. A rush of cooler, drier air floods the cavity, causing the surface of your bake to cool and set prematurely, while the sudden drop in temperature halts the oven spring in its tracks. The physical jolt of the door can be enough to make the unstable internal structure collapse, resulting in a dense, sunken cake.
Resisting the urge to open the door for at least the first two-thirds of the bake time (often around 20-25 minutes for a standard cake) is non-negotiable. You must trust the process and the physics at play. Allowing the oven to do its work undisturbed in this critical initial phase is the only way to ensure a light, airy texture and a properly risen final product. A window and an oven light are your best friends; use them instead of the handle.
Key Takeaways
- Your oven’s temperature is not static; it constantly fluctuates due to thermal cycling, which is the primary cause of inconsistent results.
- The material and color of your baking pan (metal vs. glass) and its position in the oven (top, middle, bottom) are critical variables that control heat transfer.
- Achieving a stable thermal environment by waiting 15 minutes after the preheat beep and never opening the door during the first 20 minutes is essential for oven spring and structure.
Roasting Vegetables: How to Achieve Perfect Caramelization Without Buying Expensive Equipment?
The principles of mastering your oven’s heat are not limited to delicate cakes. They are just as crucial for achieving a seemingly simple goal: perfectly caramelized roasted vegetables that are deeply browned and tender, not steamed and soggy. The enemy of caramelization is moisture. The Maillard reaction and caramelization—the chemical processes that create complex, savory flavors and browning—can only occur in a dry, high-heat environment. Many common roasting practices inadvertently create a steamy environment, sabotaging the result.
A key professional technique is to manage moisture *before* the vegetables even enter the oven. Tossing cut vegetables with salt about 30 minutes before roasting draws a significant amount of water out of their cells through osmosis. Patting them completely dry with paper towels after this pre-salting step removes this surface moisture. Another counter-intuitive tip is to use the cheapest, thinnest, darkest baking sheet you own. Expensive, heavy-gauge, insulated baking sheets are designed to prevent burning, but for roasting, you *want* rapid, aggressive heat transfer. A thin, dark pan absorbs and transfers heat much more efficiently. For even better results, invert the baking sheet and roast on its flat bottom; this improves air circulation all around the vegetables.
Finally, respect the oven’s thermal capacity. Don’t overcrowd the pan. Spreading the vegetables in a single layer with ample space between each piece allows hot air to circulate freely and moisture to evaporate quickly. Crowding the pan traps steam, effectively steaming the vegetables instead of roasting them. By starting with a high heat (425°F / 218°C) to kickstart the browning process, you are applying all the diagnostic principles we’ve discussed: managing variables outside the oven (moisture), choosing the right tool for maximum heat transfer (thin, dark pan), and optimizing the oven’s environment (space for air circulation).
By moving beyond simply following a recipe’s temperature and time, and instead adopting a diagnostic approach, you transform your oven from an unpredictable black box into a reliable, high-performance tool. Start by mapping your oven’s unique heat profile and apply these principles consistently to achieve perfect results every time.