The gap between home and restaurant cooking isn’t about secret ingredients, but mastering the science behind five core technical pillars.
- Precise knife cuts and deliberate heat control are essential for ensuring even cooking and maximizing flavor through chemical reactions like Maillard.
- An organized process (mise-en-place) and accurate measurement by weight (not volume) are non-negotiable for reducing errors, saving time, and achieving consistent results.
Recommendation: Stop blindly following recipes and start understanding the ‘why’—how heat, salt, and fat truly interact—to intuitively elevate every dish you create.
You follow the recipe to the letter. You buy high-quality ingredients. You plate it carefully. Yet, when you take that first bite, there’s a gap. It’s good, but it’s not *great*. It lacks the polished texture, the depth of flavor, the unmistakable finesse of a restaurant dish. This is a common frustration for intermediate home cooks, a plateau where passion meets a seemingly invisible wall. Many believe the solution lies in more complex recipes or exotic ingredients, but that’s rarely the case.
The truth, as every culinary professional knows, is that restaurant-quality results don’t come from a recipe list. They come from a deep understanding of technique—the “physics of the kitchen.” It’s about controlling heat with intention, understanding how a simple knife cut changes flavor, and knowing why a pinch of salt at the wrong time can ruin a dish. It’s about moving from a recipe follower to a process master.
This guide will not give you another recipe. Instead, it will give you something far more valuable: a culinary instructor’s insight into the foundational principles that separate the amateur from the professional. We will deconstruct the common mistakes you might not even know you’re making and reveal the deliberate techniques to fix them. By focusing on five core areas—precision cutting, heat management, process and preparation, ingredient chemistry, and finishing sauces—you will learn to think like a chef and finally close that gap between your kitchen and theirs.
For a different kind of classic, the following video offers a moment of musical inspiration. While not a cooking tutorial, it’s a remastered favorite that’s sure to energize your time in the kitchen.
To navigate this deep dive into professional culinary methods, we have broken down the core concepts into distinct, actionable sections. This structure will guide you through the science and art of advanced home cooking, one technique at a time.
Table of Contents: A Deep Dive into Restaurant-Quality Cooking Techniques
- Why Poor Knife Cuts Lead to Uneven Cooking and Muted Flavors?
- How to Control Pan Temperature to Avoid Steaming Your Steak?
- Cooking with Mise-en-place vs Chaos: Which Method Actually Saves Time?
- The Salt Timing Mistake That Dries Out Your Mushrooms
- How to Fix a Broken Pan Sauce Using Only Water and Agitation?
- When to Lower the Heat to Finish Cooking Without Burning?
- Why a Digital Scale is More Accurate Than Cup Measures for Patisserie?
- The Mistake That Ruins Sautéed Mushrooms and How to Avoid It Every Time
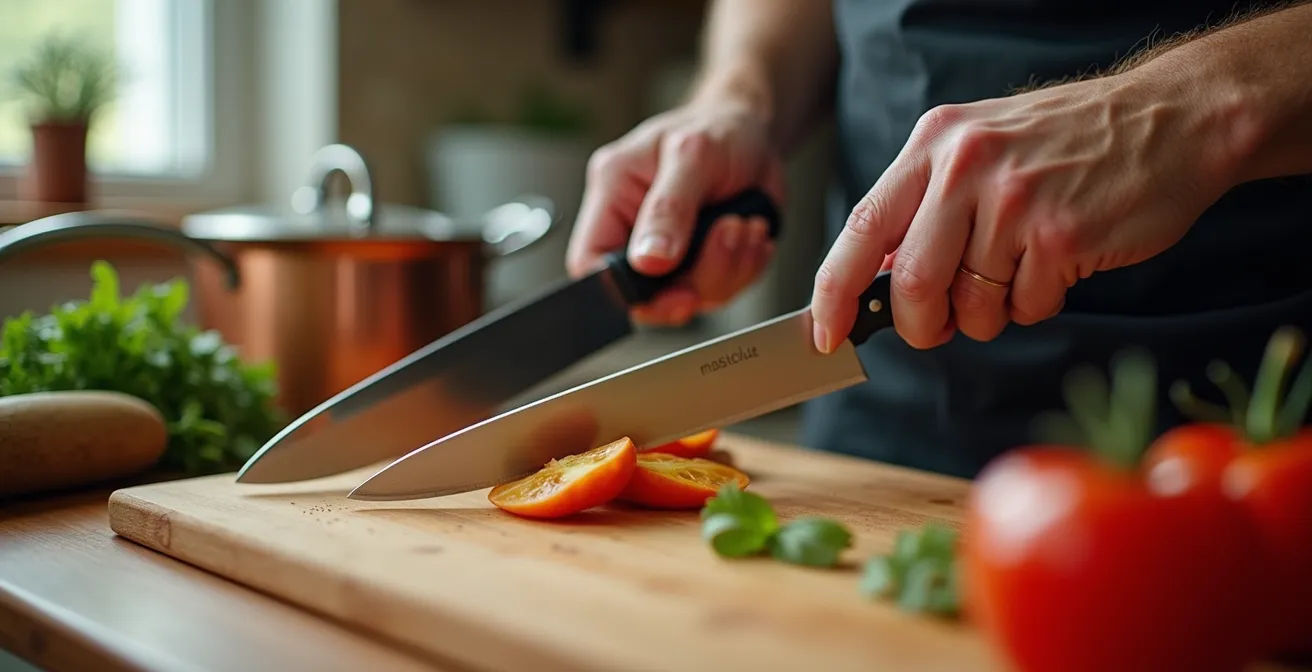
Why Poor Knife Cuts Lead to Uneven Cooking and Muted Flavors?
In a professional kitchen, knife skills are the absolute foundation. This isn’t about flashy, rapid-fire chopping; it’s about precision and consistency. When you chop vegetables into random shapes and sizes, you guarantee they will cook unevenly. The small pieces will turn to mush while the large chunks remain raw in the center. This inconsistency not only creates a poor texture but also muddles the flavor profile of the final dish, as different parts of the same ingredient release their sugars and aromas at different rates.
The science is simple: cooking is a transfer of heat, and geometry dictates the speed of that transfer. A uniform cut ensures every piece of food requires the same amount of time to cook through. Furthermore, the type of cut directly impacts flavor. According to research on the science of cutting, different knife cuts can increase an ingredient’s surface area, which directly influences the release of flavor compounds. A fine brunoise will taste more intense in a raw salsa than a rustic chop because more of its cells are ruptured, releasing their contents.
To start building this fundamental skill, focus on consistency over speed. Master these essential practices:
- Master the claw grip: Protect your fingers by tucking the fingertips of your non-dominant hand under your knuckles, using them to guide the blade.
- Practice the rock chop: For herbs and aromatics, use the knife’s natural curvature. Keep the tip of the knife on the cutting board and rock the blade up and down, which is more efficient and less tiring.
- Execute uniform dice: The key to a perfect dice is starting with uniform planks (planches), then sticks (bâtonnets), and finally cubing them crosswise. Whether it’s a 1/4-inch or 1/2-inch dice, consistency is the goal.
- Learn the bias cut: Slicing vegetables like carrots or celery at a 45-degree angle dramatically increases their surface area, making them ideal for stir-fries and quick sears where you want maximum flavor absorption and browning.
Treating your knife work as a deliberate first step, rather than a mindless chore, is the first major leap toward professional-level cooking. It’s a non-negotiable part of the “physics of the kitchen.”
How to Control Pan Temperature to Avoid Steaming Your Steak?
One of the most common home cooking failures is the grey, steamed steak. You wanted a deep brown, flavorful crust, but you ended up with a sad, rubbery piece of meat. The culprit is almost always a lack of heat control. Searing isn’t just about browning; it’s about initiating a specific chemical process known as the Maillard reaction. This reaction, which creates hundreds of new aroma and flavor compounds, only happens at high temperatures. Scientific research confirms that effective searing occurs between 350-450°F (177-232°C). Below this range, the moisture from the food will cool the pan’s surface, causing the food to boil and steam in its own juices instead of searing.
The key is to preheat your pan properly—and patiently. A heavy-bottomed pan (like cast iron or carbon steel) is your best tool, as it holds heat effectively. But how do you know when it’s ready without a special thermometer? Professionals rely on sensory feedback.
The Chef’s Secret: The Water Droplet Test
Professional chefs use a simple, reliable method to gauge pan temperature. When you flick a few drops of water into a heating pan, watch their behavior. If they sizzle and evaporate immediately, the pan is hot but not ready. If they form small, rolling balls that glide across the surface like mercury, the pan has reached the perfect state. This phenomenon, part of the Leidenfrost effect, indicates the pan is between 320-356°F (160-180°C)—the ideal range to start the Maillard reaction without instantly burning your oil or butter. This technique eliminates guesswork and ensures consistent searing every time.
This is the “physics of the kitchen” in action. A properly heated pan creates a vapor barrier that the food glides on, preventing sticking and promoting that coveted golden-brown crust.
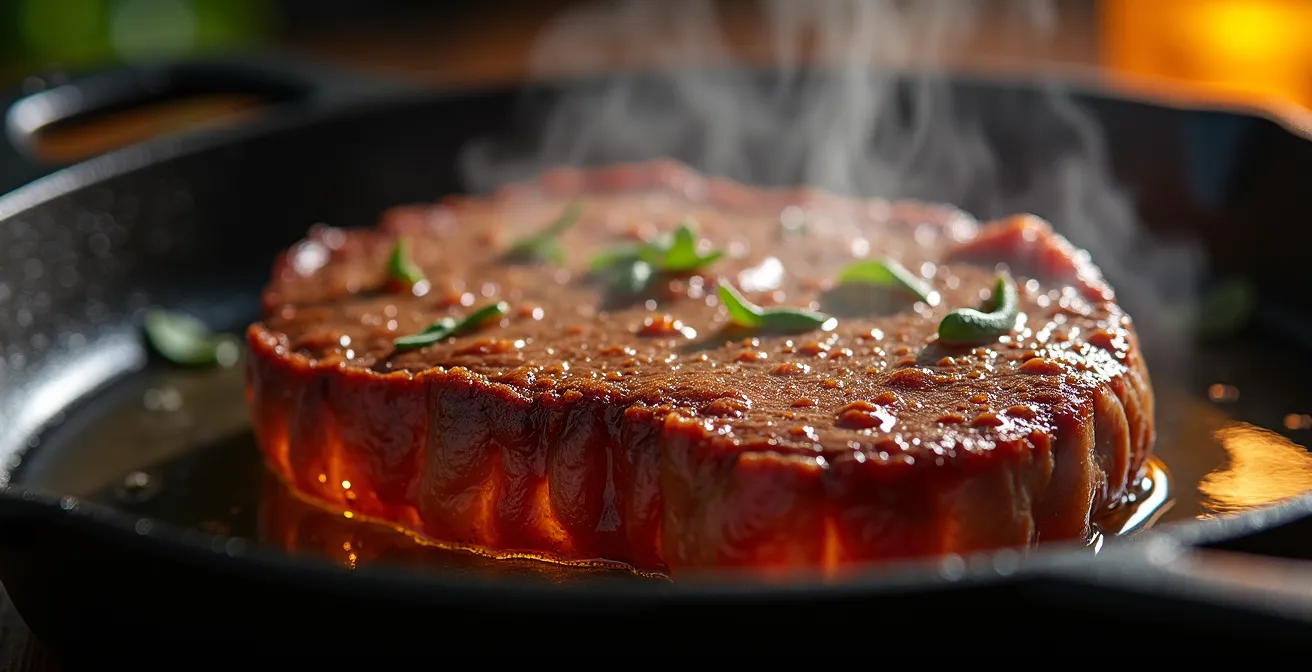
As you can see, the intense heat transforms the surface of the meat, creating a complex crust that is worlds away from a steamed texture. Once you’ve achieved this initial sear, you can then manage the heat to cook the interior perfectly. This control is a hallmark of a deliberate cook.
Cooking with Mise-en-place vs Chaos: Which Method Actually Saves Time?
“Mise-en-place” is a French culinary phrase that means “everything in its place.” For a professional chef, it is a sacred ritual. It involves preparing and arranging all necessary ingredients—chopped vegetables, measured spices, portioned proteins—before starting the active cooking process. The home cook, often in a rush, is tempted to chop as they go, searching for spices while onions are burning in the pan. This “improvised” method feels faster, but it is a classic illusion. In reality, it leads to stress, mistakes, and ultimately, more time and a worse result.
The data is clear: preparing everything upfront is more efficient. A structured workflow minimizes the “cognitive load” of cooking, allowing you to focus on the technique itself rather than frantically searching for the next ingredient. This reduces the error rate significantly—no more overcooked garlic because you were busy dicing a tomato.
The following table, based on common kitchen observations, breaks down the time impact of both methods for a standard stir-fry or similar recipe.
| Aspect | Mise-en-place Method | Improvised Method | Time Impact |
|---|---|---|---|
| Prep Time | 15-20 min upfront | 0 min upfront | +15-20 min initially |
| Active Cooking | 10-15 min focused | 25-35 min scattered | -10-20 min saved |
| Clean-up Time | 5-7 min (clean as you go) | 15-20 min (accumulated mess) | -8-13 min saved |
| Mental Load | Low (everything ready) | High (constant decisions) | Better focus on technique |
| Error Rate | 5-10% mistakes | 25-35% mistakes | Fewer burned items |
| Total Time | 30-42 min | 40-55 min | 10-13 min total saved |
Beyond the simple mechanics of time, mise-en-place transforms the cooking experience from chaotic to calm and controlled. As Chef Anthony Frazier from Escoffier Online notes, it’s a mental tool as much as a physical one.
Mise-en-place is not just organization, it’s a psychological tool that offloads mental ‘what’s next?’ processing, freeing up cognitive resources to focus on the actual cooking technique, tasting, and adjusting.
– Chef Anthony Frazier, Escoffier Online Culinary Arts
Adopting this practice is adopting a professional mindset. It’s the difference between reacting to a recipe and commanding it.
The Salt Timing Mistake That Dries Out Your Mushrooms
Mushrooms present a unique challenge: they are packed with water. In fact, most common mushrooms contain 80-90% water. This is the key piece of information you must respect when cooking them. The most common mistake home cooks make is adding salt to the pan at the beginning, along with the mushrooms and oil. This seems logical—salting seasons the food—but with mushrooms, it is a recipe for disaster. Salt is hygroscopic, meaning it draws out moisture through a process called osmosis.
When you salt mushrooms early, you are essentially signaling them to release their massive water content into the pan. Instead of searing in the hot fat, the mushrooms begin to boil and steam in their own liquid. This results in pale, rubbery, and disappointingly bland mushrooms. You are not sautéing; you are stewing. The desired nutty, earthy flavors that come from the Maillard reaction never get a chance to develop because the pan temperature is constantly being driven down by the released water.
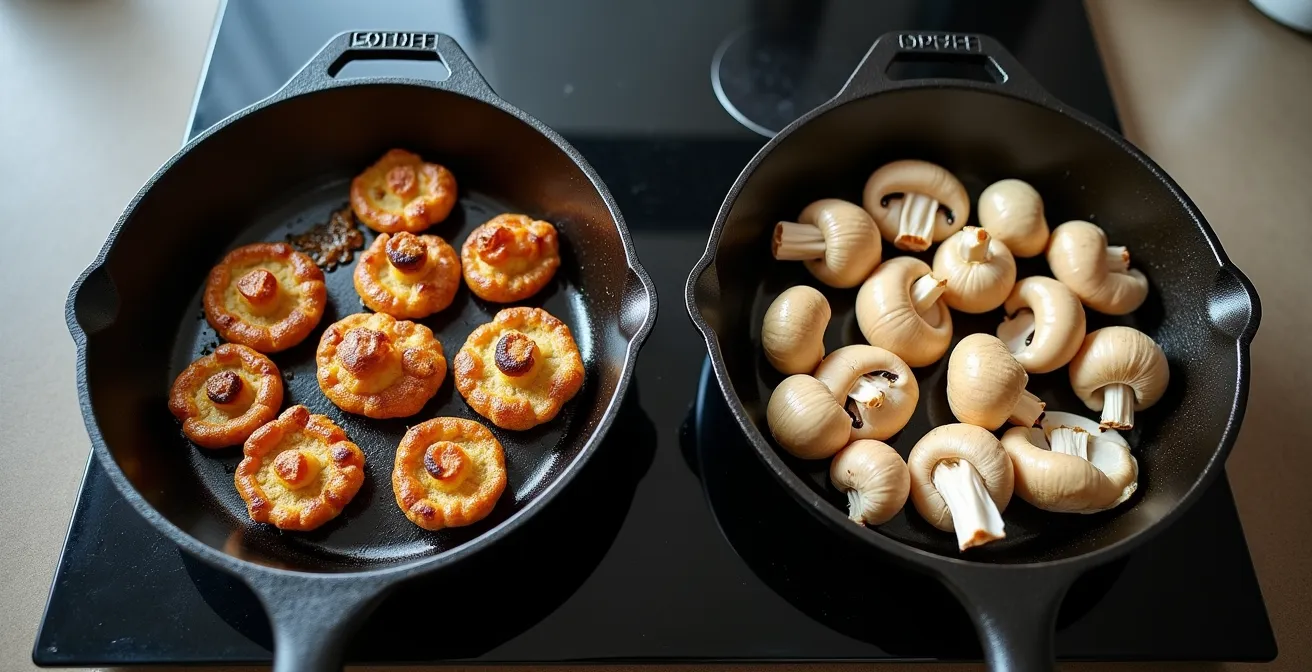
The visual evidence is undeniable. The mushrooms on the left, salted at the end, achieved a beautiful golden-brown color. The ones on the right, salted early, are pale, shrunken, and sitting in a pool of their own liquid.
The Epicurious Salt Timing Experiment
To prove this point, Epicurious conducted a controlled experiment. Two identical batches of mushrooms were sautéed in identical pans. One batch was salted immediately, the other was salted only after browning had occurred. The results were definitive: the early-salted mushrooms took a full three minutes longer to cook, ended up with a tougher, less pleasant texture, and had a noticeably weaker flavor. This simple experiment perfectly demonstrates that to achieve a proper sear, you must control moisture, and with mushrooms, that means holding the salt until the very end.
Understanding this simple piece of food science—the interaction between salt and water—is a perfect example of mastering the “physics of the kitchen.” It’s a small adjustment that yields a massive improvement in the final product.
How to Fix a Broken Pan Sauce Using Only Water and Agitation?
You’ve perfectly seared a piece of chicken, deglazed the pan with wine, and started to whisk in your butter to create a luscious pan sauce. Then, disaster strikes. The sauce suddenly splits into a greasy, curdled mess. This is a “broken” sauce, and it happens when an emulsion—a stable mixture of fat and water—fails. It’s a discouraging moment that can make a home cook want to give up and just serve the dry protein. But for a professional, it’s not a disaster; it’s a problem with a solution.
An emulsion works by suspending microscopic droplets of fat within a liquid, often with the help of an emulsifier (like mustard or egg yolk). It breaks when the fat droplets coalesce, either because the temperature is too high or too low, or because the fat was added too quickly. The key to fixing it is to re-establish that suspension. While many will tell you to start over, a trained chef knows a simple rescue technique using just cold water and vigorous agitation.
The principle is to shock the system and physically break the fat back down into smaller droplets that can be re-suspended. Here is the professional protocol to save that sauce.
Your Action Plan: Rescuing a Broken Emulsion
- Remove from heat: The very first step is to take the pan off the burner immediately to stop the problem from getting worse.
- Add cold water: Add 1 to 2 tablespoons of cold (not warm) water to the broken sauce. The temperature shock helps the fat begin to solidify slightly, making it easier to re-emulsify.
- Whisk vigorously: Begin whisking with force in a circular motion. Your goal is to physically break the large globules of fat into smaller and smaller droplets.
- Assess and add a liaison (if needed): If the sauce is still resistant, add a small amount of a powerful emulsifier off the heat. A teaspoon of cold heavy cream or a tiny piece of cold butter can help bring it back together.
- Return to heat slowly: Once the emulsion starts to reform, you can slowly return the pan to very low heat, whisking constantly, to bring it to serving temperature.
Knowing how to fix a broken sauce is more than just a party trick. It’s a fundamental skill that demonstrates a true understanding of how ingredients interact. It turns a potential failure into a moment of control and confidence.
When to Lower the Heat to Finish Cooking Without Burning?
Achieving a perfect, deep-brown crust while ensuring the inside of your protein is cooked to the correct temperature is one of the great balancing acts of cooking. Too often, the home cook, in pursuit of that beautiful sear, leaves the heat on high for too long. The result is a steak that is burnt on the outside and raw on the inside, or a piece of chicken with a blackened skin and an undercooked center. This happens because high, direct heat is excellent for surface reactions (Maillard) but terrible for gentle, even, internal cooking.
The intense energy of high heat cooks the surface much faster than the heat can penetrate to the center of the food. To cook the food all the way through on high heat, you would have to completely carbonize the exterior. The professional solution is not to find a magical “medium” temperature, but to use two distinct stages of heat: an initial high-heat sear for flavor and color, followed by a transition to low, gentle heat to finish the cooking process evenly.
This technique separates the goal of crust development from the goal of reaching the correct internal temperature. It gives you precise control over both variables, which is the definition of professional cooking.
The Restaurant Two-Stage Heating Technique
Professional kitchens use a two-stage method for almost all seared proteins, from thick-cut steaks to duck breasts and chicken thighs. The process begins with an initial sear in a very hot pan (425-450°F) for just 1-2 minutes per side—only long enough to develop the crust. The entire pan is then immediately transferred to a preheated oven at a much lower, more stable temperature (around 300°F). The gentle, indirect heat of the oven allows the protein to cook through evenly without any risk of burning the surface. This method results in a reported 95% consistency in doneness, compared to an estimated 60% consistency when trying to cook the item through using only a single, high-heat source.
This two-stage approach—sear-then-finish—is a core principle of heat management. You can apply it at home by searing on the stovetop and finishing in your oven. It requires a little more planning but guarantees a far superior, more consistent, and more professional result.
Why a Digital Scale is More Accurate Than Cup Measures for Patisserie?
Nowhere is the difference between amateur and professional cooking more apparent than in baking and patisserie. While savory cooking allows for some improvisation, baking is a science of chemistry where ratios are paramount. A common reason home baking fails is the reliance on volume measurements—cups, tablespoons, teaspoons. While convenient, cups are a wildly inaccurate way to measure dry ingredients. A “cup of flour” is not a fixed unit of mass.
The amount of flour in a cup depends on how you scoop it, whether it’s sifted or compacted, the humidity in the air, and even the brand of flour. Professional baking studies demonstrate that cup measurements can vary by up to 25%. An extra 25% of flour will result in a dry, dense cake, while 25% less could cause it to collapse. This is why professional bakers and pastry chefs *never* use cup measures for dry ingredients. They use a digital scale and measure by weight (grams or ounces). Weight is an absolute, objective measure that is unaffected by density or packing.
This table illustrates the dramatic potential for error when using volume instead of weight.
| Ingredient | 1 Cup Volume Range | Weight (grams) | Variance |
|---|---|---|---|
| All-Purpose Flour | 120-150g | 125g exactly | ±20% volume |
| Granulated Sugar | 190-210g | 200g exactly | ±5% volume |
| Brown Sugar (packed) | 200-250g | 220g exactly | ±12% volume |
| Cocoa Powder | 85-120g | 100g exactly | ±29% volume |
| Honey | 320-360g | 340g exactly | ±6% volume |
As you can see with cocoa powder, the difference can be nearly 30%, which is more than enough to ruin a delicate chocolate mousse or cake. Investing in a simple digital kitchen scale is arguably the single most important step you can take to immediately improve the consistency and success of your baking. It removes guesswork and allows you to follow recipes with the scientific precision they demand. It’s a tool of control, not complication.
Key Takeaways
- Technique Over Recipe: True culinary skill comes from understanding the ‘why’ behind the steps, not just following a list of instructions.
- Control Your Variables: Professional cooking is about deliberately controlling heat, moisture, time, and ingredient ratios to produce a consistent, high-quality result.
- Invest in Core Skills: Mastering foundational techniques like knife work, heat management, and mise-en-place provides a greater return than any single piece of equipment or exotic ingredient.
The Mistake That Ruins Sautéed Mushrooms and How to Avoid It Every Time
We’ve already established that salting mushrooms too early leads to a watery, steamed mess. Now, let’s build on that knowledge and construct the complete, foolproof professional protocol for achieving perfectly golden-brown, intensely flavorful sautéed mushrooms every single time. The secret lies in a counter-intuitive technique that focuses on removing the mushroom’s inherent moisture *before* introducing the fat that will brown it.
This method is often called the “dry sauté.” It directly confronts the mushroom’s high water content and turns it from a problem into a manageable part of the process. As food writer Rachel Lessenden explains, it’s about working with the ingredient’s nature, not against it.
The counter-intuitive ‘dry sauté’ technique – starting mushrooms in a completely dry, hot pan – boils off their external moisture first. Only when they start to squeak and brown do you add the fat, which can then focus solely on flavor development instead of fighting with water.
– Rachel Lessenden, Foodie Magazine
This method requires patience, but it guarantees a superior result. By driving off the water first, you ensure the fat you add later is used exclusively for browning and flavor development, leading to a much deeper, nuttier taste and a firm, pleasant texture. Follow this protocol exactly:
- Start with a dry pan: Heat a wide, heavy-bottomed pan over medium-high heat. Do not add any oil or butter yet.
- Add mushrooms in a single layer: Do not crowd the pan. This is crucial. If the mushrooms are piled on top of each other, they will steam. Cook in batches if necessary.
- Let them sit: Allow the mushrooms to sit undisturbed for 2-3 minutes. You will see them start to release their moisture. You may hear a sizzle that turns into a more watery sound.
- Cook until the water is gone: Continue cooking, stirring occasionally, until all the released water has evaporated and the pan is dry again. The mushrooms will begin to squeak against the pan—this is the audio cue that the water is gone.
- Now add the fat: Only at this point should you add your butter or oil. The mushrooms will immediately begin to absorb the fat and start to brown properly.
- Salt at the very end: Sauté until they are beautifully golden-brown, then season with salt in the last 30 seconds of cooking.
- Add aromatics last: Add delicate aromatics like garlic or fresh thyme after the browning is complete, cooking just until fragrant to prevent them from burning.
This is the epitome of a deliberate technique. It’s a process born from understanding the material science of the food itself. By mastering this, you are no longer just cooking mushrooms; you are engineering the perfect sauté.
Start applying these principles not as rigid rules, but as a new way of thinking in the kitchen. Pick one technique—perhaps heat management or mise-en-place—and focus on it for a week. Notice the difference in the process and the result. This is how you transform your cooking from a craft of imitation into an art of creation.