In summary:
- Tough stir-fry meat is caused by a catastrophic loss of heat in the wok, usually from overcrowding, which results in steaming instead of searing.
- The “velveting” technique is not just a marinade; it’s a professional par-cooking method that protects the meat and ensures it’s 70% cooked before the final stir-fry.
- Professionals never cook everything at once. They use a “component cooking” workflow: par-cooking meat, stir-frying vegetables in batches, and combining everything only at the very end.
- Mastering the workflow—managing heat, preparing all ingredients beforehand, and assembling rapidly—is the real secret to achieving takeaway-quality results at home.
You’ve followed the recipe to the letter. You marinated the chicken in cornstarch and egg white, got your wok screaming hot, and tossed everything together. Yet, the result is the same old story: tough, dry, chewy pieces of chicken swimming in a watery sauce. It’s a frustration every home cook knows. You see the effortless grace of a takeaway chef and wonder what magic they possess that you don’t. The secret you’re missing isn’t a magical ingredient; it’s a fundamental misunderstanding of the process.
Most online recipes focus on the “what”—the velveting marinade—but they completely ignore the “why” and the “how.” They fail to explain that velveting is just one small part of a larger, disciplined system designed for speed and heat management. The real trade secret isn’t a recipe; it’s a workflow. It’s about understanding the massive heat difference between a professional kitchen and your home stove, and using techniques to bridge that gap.
Forget just learning a marinade. To get that silky, tender chicken, you need to start thinking like a line cook. This means understanding why your wok becomes a stew pot, why you must cook in stages, and why your sauce should be mixed before the first ingredient even hits the pan. This guide will walk you through the professional wok cooking workflow, piece by piece. We’ll deconstruct the process, from preparation to the final toss, so you can finally stop braising your stir-fry and start searing it to perfection.
To help you navigate these professional techniques, we have broken down the entire workflow into a logical sequence. This summary outlines the key stages we will cover, from managing heat to achieving that elusive smoky flavour.
Summary: The “Velvetting” Technique: How to Get Takeout-Tender Chicken at Home
- Why Cooking Too Much at Once Turns Stir-Fry into Braised Stew?
- Premixing Sauces: Why You Don’t Have Time to Measure While Cooking?
- Diagonal Cutting: Why Surface Area Matters for Fast Cooking Veggies?
- How to Restore a Rusted Carbon Steel Wok in 3 Steps?
- Meat Out, Veg In: Why You Must Cook Components Separately?
- Pasta Risks: How to Cook Noodles in Sauce Without Getting a Starchy Gloop?
- How to Master the Wrist Flick to Toss Vegetables Safely?
- Wok Hei at Home: How to Achieve Smoky Flavor Without a Commercial Burner?
Why Cooking Too Much at Once Turns Stir-Fry into Braised Stew?
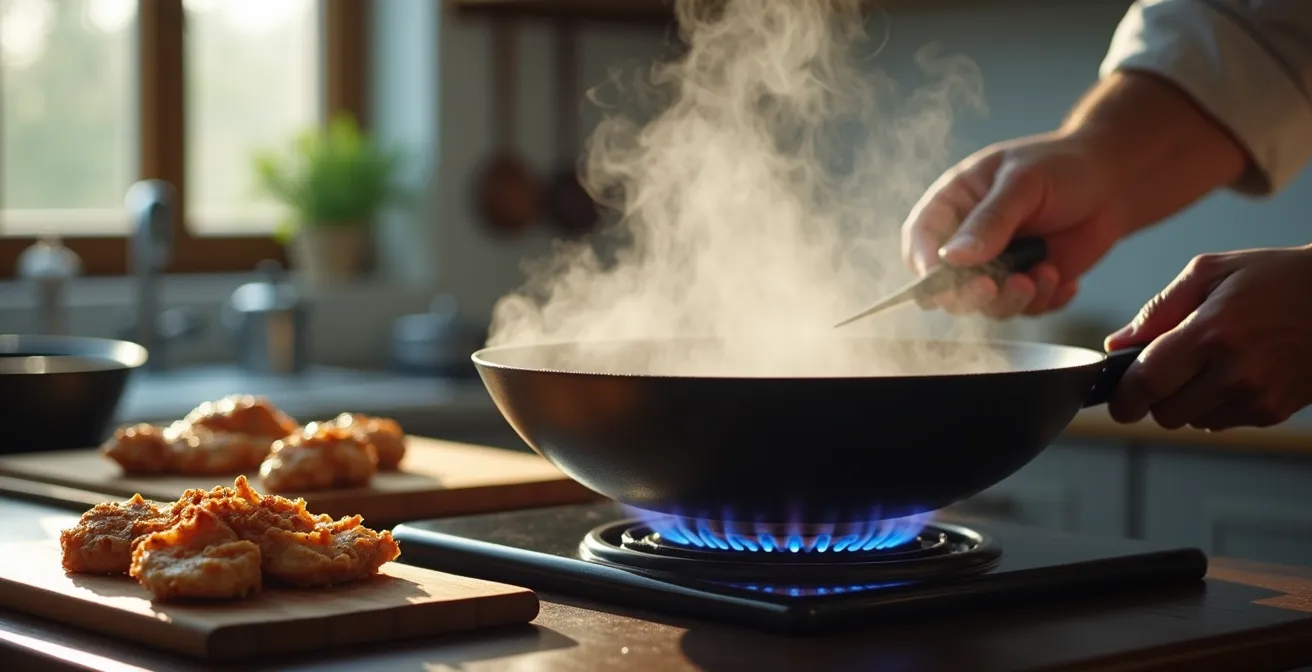
The number one mistake every home cook makes is overcrowding the wok. You have all your beautifully prepped ingredients, and in they go. You hear a satisfying sizzle for three seconds, which is immediately replaced by a disappointing hiss. That is the sound of you losing the battle. You’re not stir-frying anymore; you’re steaming. The wok’s temperature has plummeted, and water is leaching from your ingredients, creating a soupy mess that poaches your chicken into rubbery sadness.
This happens because of the stark reality of your equipment. Your home stove burner might put out 12,000, maybe 20,000 BTUs of heat on a good day. In contrast, an article on kitchen equipment notes that professional wok stations typically produce between 100,000 and 150,000 BTUs. That’s a staggering difference in power. A professional chef’s wok recovers its temperature almost instantly, even when food is added. Yours does not. The heat is your most precious resource, and you are squandering it.
To combat this BTU deficit, you must internalize the principle of cooking in small, fast batches. By cooking less food at a time, your wok can maintain a much higher temperature, allowing you to achieve a proper sear. This means your ingredients must be dry—pat your meat and veggies down—because excess water is a heat-thief. This workflow is the foundation of everything that follows; without mastering heat management, no velveting technique in the world can save your dish.
Premixing Sauces: Why You Don’t Have Time to Measure While Cooking?
Watch a professional wok chef, and you’ll notice something striking: the final cooking phase is a blur of motion that lasts less than a minute. They are not fumbling for bottles of soy sauce or measuring spoons of cornstarch. That’s because in a professional kitchen, speed is everything. Once the wok is at temperature, the process is a carefully choreographed sequence where every second counts. There is absolutely no time to build a sauce on the fly.
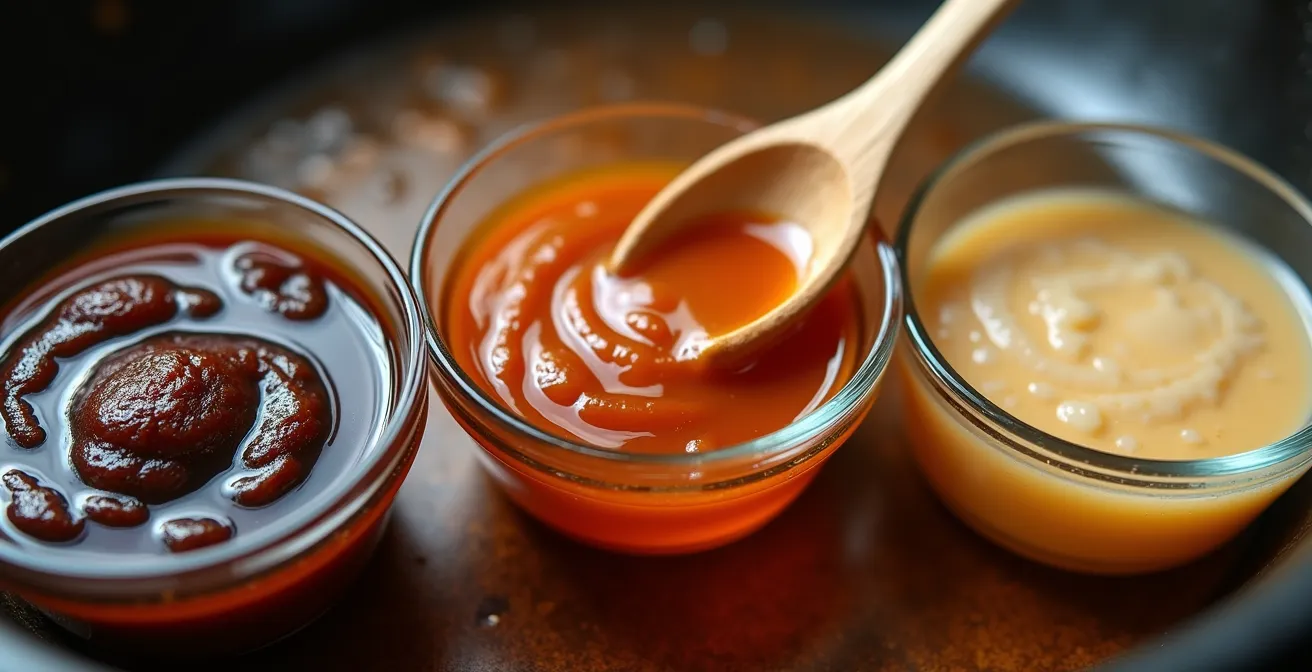
This is where the professional’s `mise en place` goes beyond simple chopping. It involves having a “sauce bowl” ready to go. All the liquid components of your sauce—soy sauce, oyster sauce, Shaoxing wine, sesame oil, chicken stock, and the cornstarch slurry for thickening—are measured and combined in a single bowl beforehand. When the moment comes, the entire mixture is added to the wok in one swift motion. As one analysis of the pro workflow explains, cooking is so fast that chefs often control the burner strength with their knees, freeing their hands for the constant motion of tossing and plating. You don’t have that luxury, which makes premixing even more critical.
For the home cook, this habit is transformative. It removes the panic and chaos of the final cooking stage. Instead of frantically trying to measure and pour while your garlic burns, you can focus entirely on managing the wok. The pre-mixed sauce is added, tossed for 20-30 seconds to combine and thicken, and the dish is done. This is not just a time-saver; it’s a workflow necessity for high-heat cooking.
Diagonal Cutting: Why Surface Area Matters for Fast Cooking Veggies?
The way you cut your vegetables isn’t just for looks; it’s a strategic part of managing the BTU deficit of your home stove. When you’re cooking with intense but limited heat, you need your ingredients to cook as quickly and evenly as possible. The solution is to maximize the surface area that comes into contact with the hot wok. This is why you so often see vegetables like carrots, celery, and bell peppers cut on the diagonal (the “roll cut”).
A simple cross-section of a carrot creates a small, circular surface. A long, thin diagonal cut dramatically increases that surface area. More surface area means more contact with the hottest part of the pan. As Lan Lam of Cook’s Illustrated explains, the physics of a wok are designed for this kind of cooking:
the bottom of a wok is the hottest part … Food that passes through this part of the pan cooks rapidly and acquires flavorful browning.
– Lan Lam, Cooks Illustrated
By giving your vegetables more surface area, you allow them to pass through that intense heat zone and cook through in seconds, not minutes. This rapid cooking is essential for maintaining their crisp texture and vibrant color. If they take too long to cook, they will start to release water, cooling the wok and leading you straight back to the braised stew scenario we’re trying to avoid. The heat difference is immense; a report on cooking technology highlights that even the weakest commercial burner is six times more powerful than a standard home burner. Every technique you employ, including how you hold your knife, must be in service of making the most of the heat you have.
How to Restore a Rusted Carbon Steel Wok in 3 Steps?
You pull out your carbon steel wok, ready to apply these new techniques, only to find a bloom of orange rust. Don’t panic, and don’t throw it away. A rusted wok is not a dead wok; it’s just a wok that has lost its seasoning. Restoring it is straightforward and serves as a powerful lesson in how a wok’s surface works. The goal is to strip it back to bare metal and build a new, non-stick polymer layer from scratch.
The restoration process has three key phases: stripping, seasoning, and maintaining. First, you must aggressively scrub away all rust using steel wool, hot water, and a little dish soap (this is one of the few times soap should touch your wok). Dry it completely. Second, you begin the re-seasoning. Place the clean, dry wok on high heat. Add a teaspoon of a high-smoke-point oil (like canola or grapeseed) and use a paper towel to wipe a micro-thin layer of oil all over the interior. Keep it on the heat until it stops smoking. This process has created the first polymerized layer. Let it cool and repeat two more times to build a solid foundation.
Finally, and most importantly, is maintenance. Proper care prevents rust from ever returning. After each use, wash with only hot water and a soft brush. Then, place the wok back on the stove for a minute to dry it completely with heat. Once dry, wipe another micro-thin layer of oil inside before storing. This discipline is non-negotiable. Whether you choose carbon steel or cast iron, the integrity of this seasoned surface is crucial for high-heat, non-stick cooking.
Your Action Plan: Wok Restoration and Rust Prevention
- Scrub & Strip: Use steel wool and soap to aggressively remove all rust down to the bare metal. Your goal is a clean, uniform grey surface.
- Initial Seasoning: Heat the clean wok until it’s nearly smoking. Apply a paper-thin layer of high-smoke-point oil and continue heating until the oil stops smoking, creating the first polymer layer.
- Post-Cook Protocol: After every use, wash with hot water only (no soap). Place the wok on the stove over low heat to dry it completely.
- Protective Oil Film: Once bone-dry, turn off the heat and wipe a tiny amount of oil on the interior surface with a paper towel. This creates a barrier against humidity.
- Patina Audit: Regularly check your surface. A healthy patina is dark and slick, not sticky or patchy. Stickiness means you’re using too much oil in your maintenance step.
Meat Out, Veg In: Why You Must Cook Components Separately?
Here we arrive at the heart of the professional workflow and the true meaning of “velveting.” You must abandon the idea of a one-pan stir-fry. To achieve perfect results, you must embrace component cooking. This means cooking each major ingredient separately, removing it from the wok, and combining everything only for the final 30 seconds of cooking. This is the only way to ensure each element is cooked perfectly and the wok stays brutally hot.

The “velveting” technique is, in fact, the first step of this process: a par-cooking method. As detailed in a Michelin Guide article, the technique involves coating the protein in a protective cornstarch marinade and then briefly cooking it in hot oil or water. The key is that the meat is only cooked until it’s about 70% done. It is then immediately removed from the wok and set aside in a “landing zone.” According to a chef quoted in the guide, ‘The essence of Chinese cooking is heat control.’ By par-cooking the chicken, you ensure it’s tender and juicy without it ever having to sit in a cooling, overcrowded wok with watery vegetables.
Once the chicken is out, you cook your vegetables, also in batches. Start with the hardiest ones (like carrots and broccoli), stir-fry them until crisp-tender, then remove them to another landing zone. Finish with the more delicate greens (like bok choy or scallions). Only when all components are individually cooked to perfection do you reassemble. The wok is reheated, the garlic and ginger are added, followed by all the cooked components and the pre-mixed sauce. A furious 30 seconds of tossing, and it’s done. This is the system. This is the secret.
Pasta Risks: How to Cook Noodles in Sauce Without Getting a Starchy Gloop?
The principles of heat management and component cooking are never more critical than when dealing with starchy ingredients like noodles. Adding a block of pre-cooked noodles to a stir-fry is a surefire way to create a gummy, starchy tragedy. The noodles act like a giant sponge, soaking up both sauce and, more importantly, heat. This causes the wok’s temperature to plummet, and the starch on the noodles’ surface begins to leach out, turning your vibrant sauce into a thick, pasty gloop.
To avoid this, you must treat noodles as just another component to be cooked separately. The noodles should be blanched or boiled according to package directions, then immediately rinsed under cold water to wash off excess surface starch and stop the cooking process. Drain them thoroughly—remember, water is the enemy of a hot wok. Tossing them with a little sesame oil will prevent them from sticking together while they wait in their landing zone.
When you’re ready for the final assembly, the noodles go in at the very last moment, along with the other cooked components and the sauce. The goal is not to “cook” the noodles in the wok, but simply to reheat them and coat them in the sauce. The heat requirements for this process are significant, and it underscores the gap between home and professional setups; as one guide notes, residential wok cooking requires a heat output of 12,000 to 20,000 BTU, while commercial cooking uses far more, which allows it to handle the heat-sinking properties of noodles more easily. For you, this means small batches and a very, very hot wok are non-negotiable.
How to Master the Wrist Flick to Toss Vegetables Safely?
The iconic image of a wok chef is the “toss”—that effortless flick of the wrist that sends ingredients flying through the air and back into the pan. This isn’t just for show; it’s a highly efficient technique for mixing and aerating ingredients while maintaining constant, even heat. It ensures every piece of food briefly contacts the hottest part of the wok base and gets coated in the developing flavors. As chef Tak Cheung notes, “the secret to a good stir fry is the application of constant levels of heat, and which is evenly distributed.” The toss is the physical manifestation of that principle.
For the home cook, attempting a full-blown professional toss on a flat stovetop can be a recipe for disaster. The key is to adapt the motion. Use a flat-bottomed carbon steel wok, which provides more stability on a home burner. A resource for home cooks advises that a flat-bottomed carbon steel wok is best for a gas stove of average power, and recommends a smaller diameter of 12 or 14 inches to ensure heat is transferred efficiently. Instead of a huge lift, practice a short, sharp push-pull motion combined with a slight wrist flick. Push the wok forward quickly, then pull it back just as fast, tilting the front edge up slightly on the return. This will encourage the food at the front to slide up the side and “fold” back over the top.
Start with a cold wok and some dry beans to get the feel of the motion without sending your dinner all over the kitchen floor. The goal is controlled movement, not chaos. This technique, combined with a ‘wok chan’ (a shovel-like spatula), gives you full control, allowing you to move and mix your food with the speed necessary for high-heat cooking.
Key takeaways
- Heat is your most valuable and limited resource; protect it by never overcrowding the wok and always cooking in small, separate batches.
- Velveting is a par-cooking technique, not just a marinade. Cook the meat 70% of the way through, then remove it from the wok.
- Your entire workflow must be built for speed: premix your sauces, set up “landing zones” for cooked components, and assemble everything in the final 30-60 seconds.
Wok Hei at Home: How to Achieve Smoky Flavor Without a Commercial Burner?
We’ve assembled the entire workflow: heat management, `mise en place`, component cooking, and the physical toss. All of these techniques serve a single, ultimate goal: achieving `wok hei`. Often translated as the “breath of the wok,” it’s that complex, smoky, slightly charred flavor that distinguishes a great stir-fry from a mediocre one. It is the signature of a master wok chef.
‘Wok hei’ has a literal translation, which is ‘breath of a wok’ and refers to the bouquet which arises from a just-cooked stir-fried dish, and which can only happen when food is cooked at very high heat.
– Michelin Guide, Michelin Guide
Scientifically, `wok hei` is the result of several things happening at once in a scorching hot wok. It involves the Maillard reaction and caramelization, but also the vaporization and pyrolysis of oil. As you toss the food, tiny droplets of oil are thrown into the air above the wok, where they combust in the flame from the burner, creating a plume of flavorful smoke that is then infused back into the food. This is what you see when a chef’s wok erupts in a brief ball of fire.
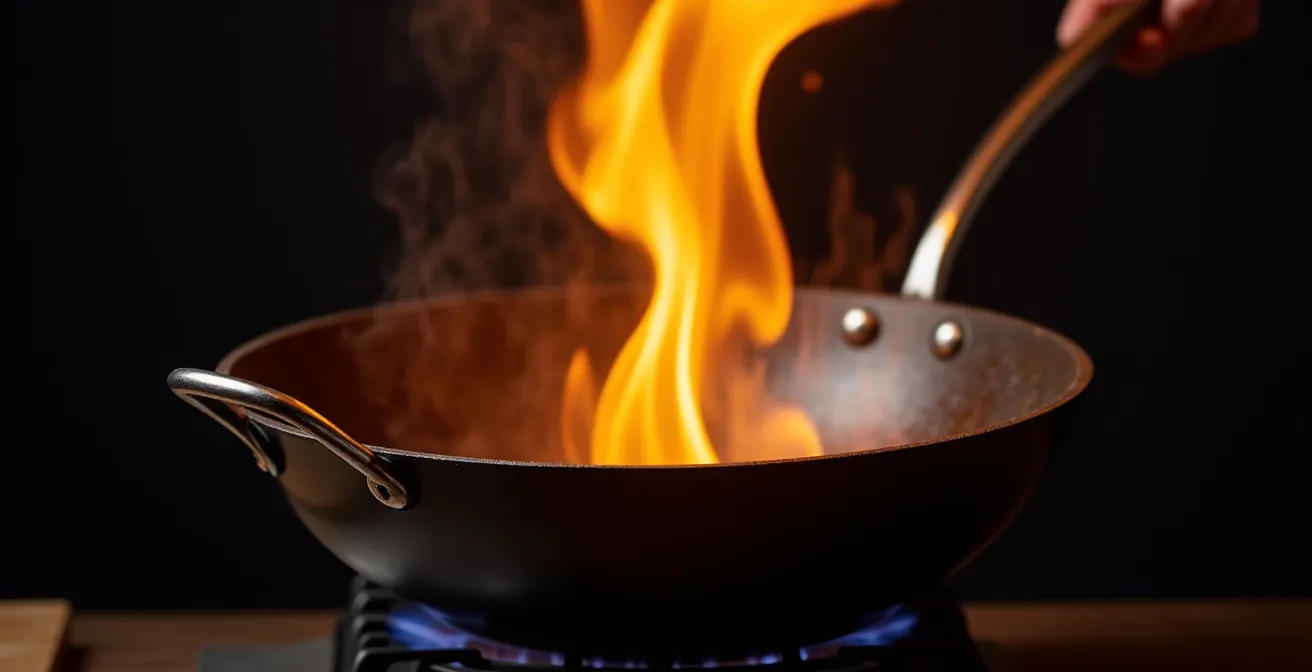
Can you achieve this at home without a 150,000 BTU burner? Yes, but you must be disciplined. You need a well-seasoned carbon steel wok, as it heats up fast and can withstand extreme temperatures. Get the wok hotter than you think is reasonable—it should be shimmering and letting off wisps of smoke *before* you add your cooking oil. Cook in very small batches to keep the temperature high. And when you do the final toss, the combination of the hot wok, the atomized oil, and the sugars in your sauce can create a mini version of that flavor infusion. The entire system we’ve discussed—the workflow—is designed to create the perfect conditions for this magical moment to happen.
Mastering this workflow takes practice, but it will fundamentally change the way you cook. By shifting your focus from a simple recipe to a holistic process of heat management and staged cooking, you are adopting the mindset of a professional. This is how you finally achieve that perfectly tender, restaurant-quality chicken at home.