The cardinal sin of sautéing is overcrowding the pan, which traps moisture and steams your food instead of searing it.
- True sautéing requires managing a “heat bank” to keep the pan’s surface temperature above the 300°F (150°C) threshold for the Maillard reaction.
- Using a high-smoke-point oil for the initial sear and finishing with butter for flavor is the professional technique for achieving a perfect crust without burning.
Recommendation: Always use a pan large enough for a single, uncrowded layer of ingredients, and cook in batches if necessary. This is not a suggestion; it is the law of the sauté.
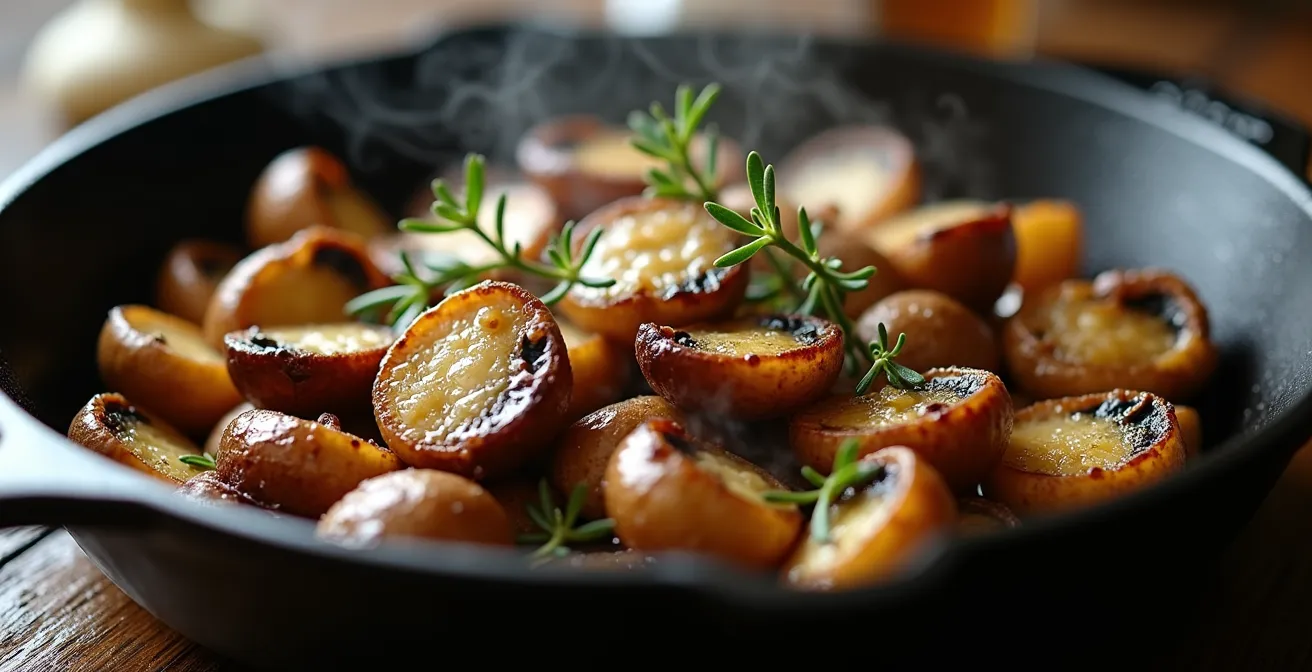
There is a deep, primal satisfaction in the sizzle of ingredients hitting a hot pan. It is the sound of flavor being born. Yet, for many avid home cooks, this symphony too often descends into a disappointing gurgle. You dream of deeply browned, crisp-edged mushrooms, a perfect sear on a steak, or vibrant, tender-crisp stir-fried vegetables. Instead, you are left with a pan of grey, soggy, and sadly steamed ingredients. You have followed the recipes, but the result is failure. Why?
The common advice—”don’t crowd the pan”—is correct, but it is incomplete. It is a symptom, not the diagnosis. The true mastery of the sauté lies not in following steps, but in understanding and controlling the fundamental physics at play: the violent, constant battle between high heat and escaping moisture. It is a technique governed by principles of thermal mass, evaporation rates, and the glorious chemistry of the Maillard reaction.
Forget what you think you know. We are not here to follow a recipe; we are here to master a technique. This guide deconstructs the science of the sauté, from managing pan temperature to choosing the correct fat and executing the perfect pan toss. We will turn your stovetop into a laboratory and transform you from a cook who hopes into a chef who knows. The difference between a steamy stew and a perfect sauté is precision, and today, you will learn to be precise.
This article dissects the critical principles of sautéing, providing a clear roadmap from fundamental theory to practical application. The following sections will guide you through each essential element to ensure you never steam what should be seared again.
Summary: The Mistake That Ruins Sautéed Mushrooms and How to Avoid It Every Time
- Why Using a Small Pan for Sautéing Creates a Steaming Effect?
- Butter or Oil: Which Fat Creates the Best Crust on Sautéed Fish?
- How to Master the Wrist Flick to Toss Vegetables Safely?
- What Liquid to Use to Deglaze Your Pan and Create Instant Sauce?
- When to Lower the Heat to Finish Cooking Without Burning?
- How to Control Pan Temperature to Avoid Steaming Your Steak?
- Why Cooking Too Much at Once Turns Stir-Fry into Braised Stew?
- Which Oil Should You Choose for High-Heat Frying to Avoid Smoke Points and Burnt Flavors?
Why Using a Small Pan for Sautéing Creates a Steaming Effect?
The primary mistake that leads to steamed, grey food is a failure to respect the laws of physics. Sautéing is a dry-heat cooking method. Its goal is to achieve the Maillard reaction, a chemical process that creates hundreds of new flavor compounds and the desirable golden-brown color. This reaction only begins when the food’s surface temperature is high enough. As one culinary analysis confirms, the surface temperature must stay above 300°F/150°C for browning to occur. When you overcrowd the pan, you introduce a massive amount of cold, moisture-releasing ingredients at once. This causes two catastrophic failures.
First, the pan’s temperature plummets. Second, the ingredients release their water content, but because they are packed together, the resulting steam has no room to escape. It becomes trapped, creating a humid environment directly on the pan’s surface. This layer of steam acts as a barrier, preventing the food from making direct contact with the hot metal and capping the temperature at the boiling point of water (212°F/100°C)—far below the threshold for browning. You are no longer sautéing; you are boiling. As Dan Souza of America’s Test Kitchen explains it:
A crowded pan traps a layer of steam that can’t escape fast enough, lowering the surface temperature below the Maillard reaction threshold.
– Dan Souza, America’s Test Kitchen – What’s Eating Dan?
To avoid this, you must give your ingredients space. This is not about aesthetics; it is about facilitating a high rate of evaporation. A single, uncrowded layer ensures that as moisture is released, it can immediately evaporate into the air, keeping the pan surface dry and hot. If your pan is not large enough, the only correct solution is to cook in batches. It is far better to do two perfect batches than one soggy one.
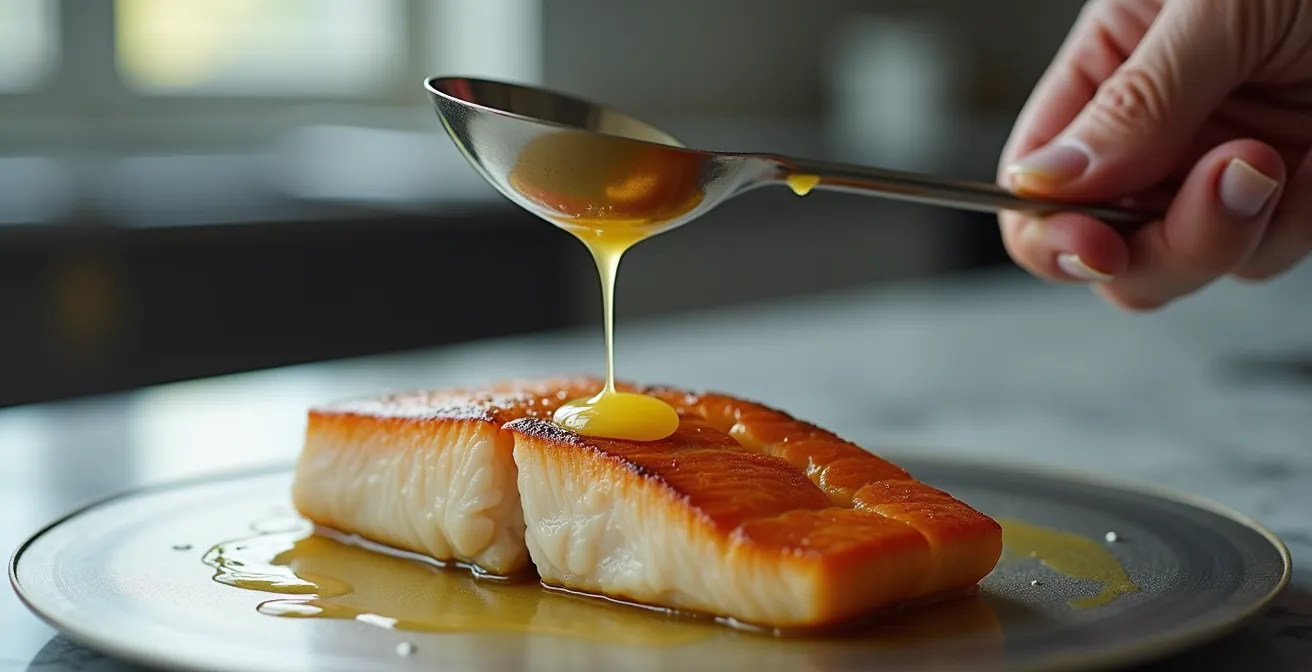
Butter or Oil: Which Fat Creates the Best Crust on Sautéed Fish?
The choice of fat is not a matter of preference but of strategy, dictated by temperature. While the flavor of butter is unparalleled, its properties make it a poor choice for the initial high-heat sear required for a perfect crust on fish, steak, or mushrooms. Standard butter is an emulsion of fat, water, and milk solids. It is these milk solids that are the problem; they begin to burn at a relatively low temperature (around 300-350°F or 150-175°C), creating acrid, bitter flavors long before a proper sear can form.
As a Rouxbe culinary instructor, Ken, notes, the solution is to think in stages. This is a non-negotiable principle for professionals.
Butter burns at a lower temperature than most oils, so if you want to saute over high heat, use oil first (and finish with butter) or use clarified butter (which has a higher smoke point).
– Ken (Rouxbe Culinary School Instructor), Rouxbe Online Culinary School Community
The professional two-stage technique is the only way to achieve both a hard sear and the rich flavor of browned butter. First, you sear the food in a high-smoke-point oil like grapeseed, avocado, or light olive oil. These fats can withstand the intense heat needed for the initial Maillard reaction. Only after the crust is established and you have reduced the heat do you add whole butter. This allows you to baste the food with the foaming, nutty brown butter (beurre noisette) for the final minutes of cooking, adding immense flavor and a beautiful glaze without any risk of burning.
This method ensures the best of both worlds: the high-heat performance of oil and the superior flavor of butter. Clarified butter, or ghee, is an alternative, as the milk solids have been removed, raising its smoke point significantly. However, the two-stage method with whole butter provides a more dynamic flavor as the remaining milk solids toast in the pan.
How to Master the Wrist Flick to Toss Vegetables Safely?
The chef’s wrist flick—that effortless toss that sends vegetables flying in a perfect arc back into the pan—is not for show. It is the most efficient method for turning and mixing ingredients to ensure even cooking without resorting to a spoon, which can damage delicate items like fish or soft mushrooms. However, fear of splattering hot oil prevents many home cooks from attempting it. The key to mastery is practice, but smart practice. As confirmed in a method from former James Beard nominee Chef Jean-Pierre, the secret is to build muscle memory without risk, as his culinary school teaches by starting with dried beans or rice in a cold pan. This removes the danger, allowing you to focus purely on the mechanics.
The motion itself is a sequence based on simple physics: momentum and trajectory. It can be broken down into three distinct phases. Mastering these phases in a cold pan will make the movement second nature when you are working with hot oil. The goal is a fluid, controlled motion, not a violent jerk. Your arm should move forward and back, with a final, sharp lift from the wrist.
Your Action Plan: Mastering the Pan Toss
- Push Phase: Move the pan sharply forward on the stovetop. This pushes the ingredients to the far, sloped edge of the pan.
- Stop Phase: Abruptly halt the forward motion. The ingredients’ momentum will carry them up and forward, climbing the pan’s front lip.
- Lift & Pull Phase: As the ingredients leave the surface, give a slight upward flick of the wrist while simultaneously pulling the pan back. This “catches” the ingredients as they fall.
- Practice Drill: Use uncooked rice or dried beans in a cold skillet. Practice the push-stop-lift sequence for 10 minutes a day. The motion will become fluid and automatic.
The right pan is also crucial. A sauté pan with sloped sides is essential; a straight-sided saucepan will not work. This technique is more than a party trick; it is a fundamental skill that aerates the ingredients, helps control temperature, and ensures every piece is perfectly and evenly cooked.
What Liquid to Use to Deglaze Your Pan and Create Instant Sauce?
After a successful sauté, the bottom of your pan should be coated with dark, caramelized bits of food. This is not a mess to be scrubbed away; it is a treasure called the fond, a French term for “foundation.” These browned bits are concentrated flavor, and the technique to unlock them is called deglazing. By adding a small amount of liquid to the hot pan, you can dissolve the fond and instantly create a flavorful base for a sauce.
The choice of liquid is a critical decision that will define the character of your final sauce. Each type of liquid serves a different purpose, from adding acidic complexity to building savory body. Water can be used in a pinch, but it adds no flavor, only hydration. To elevate your cooking, you must select your deglazing liquid with intention. The best approach is to match the liquid’s flavor profile to the protein or vegetables you have just cooked. A robust red wine is perfect for a beef dish, while a crisp white wine complements chicken or fish.
This comparative guide, based on data compiled from numerous professional sources, breaks down the function of common deglazing liquids. An analysis of deglazing techniques shows clear functional differences between liquid types.
| Liquid Type | Primary Function | Best Use Case | Flavor Profile |
|---|---|---|---|
| Wine (Red/White) | Lifts fond, adds acidity | Rich meat sauces | Complex, fruity |
| Vinegar/Citrus | Cuts richness | Fatty proteins | Sharp, bright |
| Stock/Broth | Adds body | Building gravies | Savory, meaty |
| Fruit Juice | Adds caramelization | Pork, poultry | Sweet-tangy |
| Water | Pure hydration | Delicate flavors | Neutral |
The process is simple: remove your cooked food from the pan, return the pan to medium-high heat, and pour in the liquid. As it bubbles, use a wooden spoon or spatula to scrape up all the browned bits from the bottom. Let the liquid reduce by about half to concentrate the flavor, then finish the sauce by whisking in a pat of cold butter for richness and a glossy texture. This simple act transforms cleanup into creation.
When to Lower the Heat to Finish Cooking Without Burning?
Sautéing is a dance of heat management. Starting with high heat is essential for the initial sear, but maintaining that intensity for the entire duration will lead to burning on the outside before the inside is cooked. The moment to lower the heat is a critical decision that separates the novice from the expert. While timing provides a rough guide—many professional chefs recommend a total cooking time of 20-25 minutes for something like mushrooms—relying on a clock is a mistake. True control comes from using your senses.
You must learn to listen, smell, and see the signs the food is giving you. The initial, aggressive sizzle of food hitting the hot pan is the sound of surface moisture rapidly evaporating. As this phase completes and the browning begins, the sound will mellow to a gentler, steadier bubbling. This is your first cue to consider reducing the heat. The aroma is equally important. The nutty, roasted smell of the Maillard reaction is your goal. If that aroma shifts to a sharp, acrid, or bitter scent, you are seconds away from burning and must reduce the heat immediately.
Visually, the cues are the most obvious. Once you see well-defined, golden-brown edges forming on your ingredients, the primary searing phase is complete. This is the precise moment to transition from high heat to medium or medium-low. This allows the interior of the food to cook through gently, using the residual heat of the pan and a lower flame, without carbonizing the beautiful crust you have just created. This entire process often happens within the first 3-5 minutes of cooking. Pay attention. The pan is talking to you; you must learn its language.
- Listen: An aggressive crackle should soften into a steady sizzle.
- Smell: The aroma should be toasty and nutty, never sharp or burnt.
- Look: Once a deep golden-brown crust has formed, it is time to lower the heat.
How to Control Pan Temperature to Avoid Steaming Your Steak?
The difference between a beautifully seared steak and a grey, boiled piece of meat is decided before the steak ever touches the pan. The secret is achieving and maintaining a stable, high surface temperature. The most common failure is adding the food to an insufficiently preheated pan. To avoid this, you must build a “heat bank.” This means using a heavy-bottomed pan (like cast iron or thick-gauge carbon steel) that can absorb and hold a large amount of thermal energy. A thin, cheap pan will lose its heat the moment cold food is added, leading directly to steaming.
Preheating this heavy pan for 3-5 minutes on medium-high is non-negotiable. But how do you know when it is truly ready? Smoke is an unreliable indicator, as different oils smoke at different temperatures. The most precise method is the water drop test, a technique which relies on a scientific principle known as the Leidenfrost effect. As a study from America’s Test Kitchen scientifically validated, this method is superior to all others. When a drop of water is flicked into the pan, its behavior tells you the exact temperature range. If it sizzles and evaporates, the pan is not yet hot enough. If it splits into many tiny, frantic droplets, it is too hot. What you seek is the moment the water droplet forms a single, mercury-like bead that glides across the pan’s surface. This indicates the surface is well above 212°F (100°C), creating a cushion of steam that the droplet skates on. This is your signal that the pan is primed for a perfect sear.
Only at this point should you add your oil. It should shimmer almost instantly upon contact. Once you add the steak or other ingredients, do not move them. Allow them to form a deep crust for 2-3 minutes. This initial contact is when the “heat bank” you built is making its withdrawal. After the initial sear is established on both sides, you can then reduce the heat to medium to finish cooking the interior without burning the exterior. Control the heat before you cook, not during.
Why Cooking Too Much at Once Turns Stir-Fry into Braised Stew?
The principle of not overcrowding a pan becomes even more critical—and more violated—in the high-velocity world of stir-frying. A stir-fry is the epitome of high-heat, rapid cooking. Its success depends on maintaining an extremely hot wok or skillet to create a “wok hei” effect—a complex, smoky flavor that can only be achieved with intense heat. When you overload the wok, you commit the same sin as in a regular sauté, but with more dramatic consequences.
The wok’s sloped shape is designed to create distinct heat zones and facilitate rapid evaporation. By filling it more than one-third full, you eliminate these zones and create a dense mass of ingredients that immediately traps steam. The temperature plummets, and your stir-fry instantly becomes a stir-braise. The vegetables lose their crispness, the proteins become tough, and the entire dish turns into a watery, homogenous stew. There is no recovery from this. The only solution is prevention, which requires a disciplined batch cooking protocol.
This means cooking your ingredients in stages and combining them only at the very end. This ensures the wok maintains its ferocious heat for every component.
- Cook proteins (chicken, beef, shrimp) first in small batches until just browned, then remove and set aside.
- Next, cook the hard vegetables (broccoli, carrots) until crisp-tender, then remove.
- Finally, cook the soft vegetables (bok choy, mushrooms) and aromatics (garlic, ginger).
- Return all cooked ingredients to the wok for the final 30-60 seconds, add the sauce, and toss to combine and heat through.
Another crucial but often-ignored step is ensuring your ingredients are at room temperature. Adding ice-cold meat or vegetables from the refrigerator will steal even more heat from the pan. Let everything sit out for 15-20 minutes before you begin. It is a small detail that makes a significant difference.
Key Takeaways
- Heat Over Volume: A hot, uncrowded pan is the only environment where the Maillard reaction can defeat moisture and create flavor. Batch cooking is not optional; it is mandatory for success.
- Right Fat, Right Time: Use high-smoke-point oil for the initial high-heat sear. Introduce butter only at the end, over lower heat, for its unparalleled flavor.
- Master the Fundamentals: Learn to read the pan’s temperature using the Leidenfrost effect and use your senses to know when to lower the heat. These skills are more important than any recipe.
Which Oil Should You Choose for High-Heat Frying to Avoid Smoke Points and Burnt Flavors?
Your choice of cooking oil is a technical decision, not an arbitrary one. The single most important factor for high-heat sautéing is the oil’s smoke point: the temperature at which it stops shimmering and starts breaking down, producing smoke and acrid, burnt flavors. Using an oil below its smoke point is essential not only for flavor but also for health, as burning oil can release harmful compounds.
For high-heat searing, you need an oil with a smoke point of at least 400°F (205°C). This immediately disqualifies some popular choices. Unrefined extra virgin olive oil, for example, has a relatively low smoke point (around 375°F) and a strong, fruity flavor. It is a finishing oil, perfect for drizzling, but a poor choice for searing a steak. The same is true for unrefined coconut oil or whole butter. You must choose a neutral, refined oil that can withstand the heat without imparting unwanted flavor or burning.
The best choices for high-heat applications are:
- Refined Avocado Oil: The champion, with a smoke point over 500°F and a completely neutral flavor.
- Grapeseed Oil: An excellent and versatile choice with a clean flavor and a smoke point around 420°F.
- Light Olive Oil: Not “light” in calories, but refined, giving it a much higher smoke point (around 465°F) and milder flavor than its extra-virgin counterpart.
- Peanut Oil: A classic for stir-frying, with a high smoke point (450°F) and a faint nutty flavor that complements Asian dishes.
A fascinating technique championed by America’s Test Kitchen involves starting mushrooms in water. Once the water evaporates and the mushroom cells have collapsed, only a tiny amount of oil is needed for the final browning. This method drastically reduces oil absorption, proving that technique can often trump an abundance of ingredients. By understanding the properties of your tools, including your cooking fat, you gain complete control over the final product.
By internalizing these principles—managing moisture, controlling the heat bank, and choosing the right fats—you elevate sautéing from a mere cooking step to a controlled, repeatable craft. This is the foundation of countless dishes and the key to unlocking deep, complex flavor from the simplest ingredients. Now, go to your kitchen and practice. Perfection awaits.