
In summary:
- The key to great sugar-free desserts isn’t just replacing sugar, but recreating its structural role in controlling texture and ice formation.
- Mastering freezing point depression with natural ingredients like fiber, alcohol, or small amounts of unrefined syrup is crucial for scoopable sorbets.
- The protein and fat content in your base (like Greek yogurt) directly impacts creaminess and how slowly the dessert melts.
- Proper storage and serving temperature (tempering) are non-negotiable steps to prevent iciness and unlock the full flavor of your creations.
The quest for a refreshing summer treat that aligns with a clean, health-conscious diet often leads to disappointment. We’ve all been there: the “healthy” ice cream that freezes into a rock-solid block, the sorbet that’s more icy than smooth, or the frozen yogurt that lacks any satisfying creaminess. The common advice is to simply use very ripe fruit or switch to artificial sweeteners, but this rarely solves the core problem. These approaches ignore a fundamental truth: in desserts, sugar is far more than just a sweetener; it’s a critical structural component.
The real issue isn’t a lack of sweetness, but a failure to manage the food science of freezing. Refined sugar lowers the freezing point of water, which is the secret to soft, scoopable textures. Without it, water forms large, crunchy ice crystals that ruin the mouthfeel. But what if the solution wasn’t about finding a perfect sugar substitute, but about understanding and recreating sugar’s function using whole-food ingredients and smart techniques? This is where a wellness chef’s approach changes everything.
This guide moves beyond basic recipes to reveal the science behind crafting delicious chilled desserts. We will explore how to manage ice crystals, manipulate melting points, and build a rich texture without a grain of refined sugar. By focusing on the “why” behind the techniques, you’ll gain the skills to create consistently creamy, flavorful, and truly refreshing desserts that you can feel good about eating.
This article breaks down the essential science and techniques you need to master. Follow along as we explore everything from choosing the right base to the final, crucial step of tempering before you serve.
Summary: Crafting Superior Sugar-Free Chilled Desserts
- Alcohol or Corn Syrup: How to Prevent Sorbet From Freezing Rock Hard?
- Greek Yogurt vs Regular: Which Base Melts Slower at Room Temp?
- Agar-Agar vs Gelatin: Which Creates the Best Texture for Panna Cotta?
- How to Stop Ice Crystals Forming on Your Ice Cream in the Freezer?
- Why You Should Temper Frozen Desserts 10 Minutes Before Eating?
- Cucumber and Watermelon: How to “Eat” Your Water for Better Hydration?
- Why You Should Stop Buying Strawberries in December?
- The 5 “Hidden” Additives in Your Pantry That Sabotage Clean Cooking
Alcohol or Corn Syrup: How to Prevent Sorbet From Freezing Rock Hard?
The number one complaint about homemade, sugar-free sorbet is that it freezes into an unscoopable, icy brick. This happens because sugar performs a crucial function known as freezing point depression. It essentially gets in the way of water molecules trying to form large, organized ice crystals, keeping the final product softer at freezer temperatures. When you remove sugar, you need to replace this function, not just the sweetness. While corn syrup is a classic commercial solution, it’s a refined sugar we want to avoid. The clean-cooking alternatives are alcohol and certain types of fiber.
A small amount of neutral alcohol (like vodka) or a flavorful liqueur works wonders because it has a much lower freezing point than water. Just one or two tablespoons per quart is enough to interfere with ice crystal formation without adding any noticeable booziness. Alternatively, soluble fibers like inulin, derived from chicory root, are a game-changer. They add “body” and bind with water, creating a smoother mouthfeel. Modern food science confirms this; a recent study found that the molar amount of a sugar substitute has a high correlation with freezing point depression, while functional ingredients like inulin improve texture by refining ice crystals.
The goal is to increase the Total Soluble Solids (TSS)—all the stuff dissolved in the water—to around 30-35%. In traditional recipes, sugar does this. In ours, we use a combination of fruit purée, natural unrefined sweeteners like a touch of maple syrup, and these functional ingredients. By focusing on rebuilding the structural integrity of the sorbet, you solve the texture problem at its source.
Greek Yogurt vs Regular: Which Base Melts Slower at Room Temp?
When creating a frozen yogurt, the type of yogurt you choose as your base has a profound impact on the final texture and melt rate. The clear winner for a slow, creamy melt is full-fat Greek yogurt. The difference lies in its composition. Greek yogurt is strained, which removes much of the whey (the watery part of milk). This process concentrates the protein and fat, creating a much denser, richer product from the start.
This concentration is key. The higher protein and fat content act as natural stabilizers. Fat molecules physically obstruct the formation of large ice crystals, resulting in a creamier texture. Protein, meanwhile, adds body and helps trap air and water, leading to a more stable structure that melts more slowly and evenly. In fact, nutritional comparisons show that Greek yogurt has 184% more protein than standard vanilla ice cream. This protein provides the structural scaffolding that holds the dessert together as it warms up, preventing it from turning into a soupy mess the moment it hits the bowl.
This close-up view highlights the textural differences between a frozen dessert made with a dense Greek yogurt base versus a lighter, regular yogurt base.
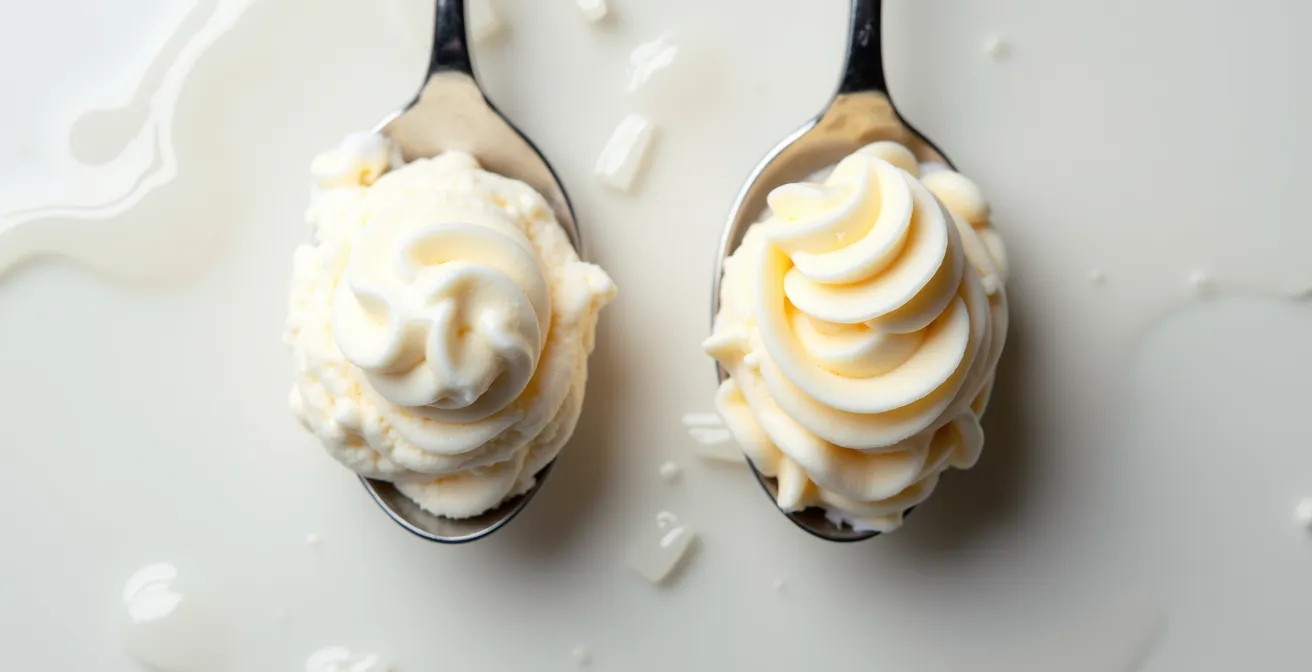
As you can see, the denser structure of the Greek yogurt dessert on the left appears far creamier and less crystalline. Regular yogurt, with its higher water content and lower fat/protein, is more prone to forming larger ice crystals, resulting in a thinner, icier texture that melts much more quickly. For a luxurious, slow-melting frozen treat, choosing a high-protein, high-fat Greek yogurt is a non-negotiable starting point.
Agar-Agar vs Gelatin: Which Creates the Best Texture for Panna Cotta?
For chilled desserts that don’t rely on churning, like a classic panna cotta, the gelling agent is the star of the show. It’s what provides the signature wobble and silky mouthfeel. When working without refined sugar, the choice between gelatin and a plant-based alternative like agar-agar becomes even more critical, as each interacts differently with other ingredients and provides a distinct texture. Gelatin, an animal-derived protein, creates a very creamy, tender set that famously melts at body temperature. This is what gives traditional panna cotta its luxurious, melt-in-your-mouth quality.
Agar-agar, derived from seaweed, is a powerful vegan alternative, but it behaves very differently. It creates a much firmer, cleaner “snap” and only melts at a high temperature (around 85°C or 185°F). This means an agar-based panna cotta won’t melt in your mouth in the same way. It will feel cooler and have a more brittle, less creamy texture. This isn’t necessarily a bad thing; for certain fruit jellies or modern desserts, this clean bite is desirable. However, for a classic panna cotta experience, gelatin is texturally superior. If you require a vegan option, using a slightly lower concentration of agar (around 0.8%) can help achieve a softer, less rigid set.
This comparative table clearly outlines the properties of different gelling agents, helping you choose the right one for your desired outcome.
| Gelling Agent | Setting Temp | Melting Point | Texture | Best For |
|---|---|---|---|---|
| Gelatin | 15°C | 27°C (body temp) | Creamy, melts in mouth | Classic panna cotta |
| Agar | 35°C | 85°C | Firm, clean bite | Vegan desserts |
| Ground Chia | Room temp | N/A | Pudding-like | Raw desserts |
| Carrageenan | 40-70°C | 45-80°C | Elastic gel | Dairy alternatives |
Ultimately, the “best” texture is subjective. If you crave the classic, rich creaminess, gelatin is the way to go. If you need a vegan dessert or prefer a firmer, jelly-like texture, agar-agar is an excellent choice, provided you handle it correctly to avoid a grainy result.
How to Stop Ice Crystals Forming on Your Ice Cream in the Freezer?
You’ve churned the perfect, creamy base, but a few days later, you open the container to find a crunchy layer of ice crystals on top. This is the result of moisture migration and recrystallization. Small temperature fluctuations in your freezer (every time you open the door) cause tiny ice crystals to melt and then refreeze into larger, crunchier ones. The key to preventing this is twofold: minimizing temperature swings and creating a physical barrier against air and moisture.
First, always store your homemade ice cream in the coldest, most stable part of your freezer—the very back, never the door. The door is subject to the most drastic temperature changes. Second, use the right container. A shallow, flat container promotes faster freezing, and faster freezing creates smaller ice crystals from the start. A smaller initial crystal size gives you a much creamier final product. A container with a tight-fitting lid is essential.
The most effective technique, however, is creating a direct barrier. Before putting the lid on, press a piece of parchment paper or plastic wrap directly onto the entire surface of the ice cream. This simple step prevents moisture in the air inside the container from settling on the surface and forming frost. It also minimizes exposure to air, which can cause freezer burn.

This hands-on approach of carefully sealing the surface is your best defense against textural degradation over time. By combining this barrier method with smart storage placement and the right container, you can significantly extend the life of your creamy, homemade dessert and ensure every scoop is as good as the first.
Why You Should Temper Frozen Desserts 10 Minutes Before Eating?
Serving a frozen dessert straight from the deep freeze is a common mistake that sabotages both texture and flavor. The process of “tempering”—letting it sit at room temperature for 5 to 10 minutes before scooping—is not just about making it easier to serve. It’s a crucial step rooted in the science of sensory perception. Extreme cold literally numbs your taste buds, especially the receptors responsible for detecting sweetness and complex, nuanced flavors. A dessert served at -18°C (0°F) will taste bland and one-dimensional compared to the same dessert served at -12°C (10°F).
Tempering allows the dessert to warm up just enough for its aromatic compounds to become volatile, meaning they can travel up to your olfactory receptors, which are responsible for the vast majority of what we perceive as “flavor.” Studies on sensory perception confirm that temperature should be between -10°C and -18°C to optimize the taste and texture of ice cream. By tempering, you bring the product into this ideal window, allowing its full flavor profile to blossom. It also softens the texture, transforming it from a hard block into the creamy, luscious consistency the creator intended.
Different types of frozen desserts have slightly different ideal serving temperatures due to their varying compositions of fat, air, and solids.
| Dessert Type | Storage Temp | Ideal Serving Temp | Tempering Time | Texture at Service |
|---|---|---|---|---|
| Sorbet | -18°C | -14°C (7°F) | 5-7 minutes | Smooth, scoopable |
| Ice Cream | -18°C | -12°C (10°F) | 8-10 minutes | Creamy, soft |
| Granita | -18°C | -10°C (14°F) | 10-12 minutes | Crystalline, fluffy |
| Frozen Yogurt | -18°C | -11°C (12°F) | 7-9 minutes | Smooth, tangy |
Think of tempering as the final, respectful step in the dessert-making process. It’s a small investment of patience that pays huge dividends in flavor and enjoyment, ensuring you experience the dessert exactly as it was meant to be.
Cucumber and Watermelon: How to “Eat” Your Water for Better Hydration?
Staying hydrated, especially in warmer months or after a workout, isn’t just about drinking water. You can also “eat” your water by consuming foods with high water content, which often come naturally packaged with beneficial electrolytes and nutrients. Fruits and vegetables are hydration powerhouses, and two summer favorites—watermelon and cucumber—are at the top of the list. It’s well known that fruits like watermelon (around 92% water) and strawberries (91%) are incredibly hydrating. These foods provide hydration in a slow-release form, as the water is bound within a fibrous structure.
This makes them perfect candidates for a hydrating, refreshing chilled dessert that does more than just satisfy a sweet craving. A sorbet made from watermelon and cucumber isn’t just a treat; it’s a functional recovery food. Watermelon is a fantastic source of L-citrulline, an amino acid that can help reduce muscle soreness, while cucumber provides cooling minerals and silica, which is beneficial for connective tissue. Adding a squeeze of lime for Vitamin C and a pinch of pink Himalayan salt for trace minerals turns your dessert into a delicious, all-natural electrolyte drink you can eat with a spoon.
Creating a post-workout electrolyte sorbet is incredibly simple:
- Blend 2 cups cubed watermelon (for L-citrulline and hydration)
- Add 1 cup peeled cucumber chunks (for cooling minerals)
- Squeeze in the juice of 1 lime (for a vitamin C boost)
- Add a pinch of pink Himalayan salt (for trace minerals and electrolytes)
- Blend until smooth, then churn in an ice cream maker or use a shallow pan for a granita-style freeze.
This approach reframes dessert from an indulgence to a delicious part of your wellness and hydration strategy. Instead of empty calories, you’re consuming a functional food that actively replenishes your body.
Why You Should Stop Buying Strawberries in December?
The allure of having any fruit we want, any time of year, comes at a hidden cost to both flavor and nutrition. A strawberry bought in the dead of winter is a pale imitation of one picked locally in June. This isn’t just a matter of taste; it’s a matter of science. Fruits develop their peak flavor and nutrient profile when allowed to ripen fully on the vine and are consumed shortly after being picked. Out-of-season produce is typically harvested under-ripe to withstand long-distance shipping and then artificially ripened with gas, a process that never allows the full spectrum of sugars and aromatic compounds to develop.
The nutritional deficit is significant. Vitamins, particularly fragile ones like Vitamin C, begin to degrade the moment a fruit is picked. The long journey from a farm across the globe to your winter fruit bowl takes a toll. In fact, nutritional studies confirm that December strawberries can have up to 50% less Vitamin C than their locally picked, in-season counterparts. When you’re relying on fruit as the primary source of sweetness and flavor in your clean desserts, using out-of-season, nutrient-depleted produce sets you up for a bland result.
The smart strategy is to embrace seasonality and the freezer. This allows you to enjoy peak flavor year-round:
- Spring (Mar-May): Enjoy fresh strawberries and rhubarb in your desserts.
- Summer (Jun-Aug): This is the peak for berries, stone fruits, and melons. Buy them in bulk at their peak ripeness and freeze them yourself.
- Fall (Sep-Nov): Apples, pears, and grapes make for wonderful sorbets and compotes.
- Winter (Dec-Feb): Rely on fresh citrus fruits and use your stash of high-quality, peak-season berries from the freezer. A flash-frozen berry picked in July is far superior to a “fresh” one shipped in January.
By working with nature’s calendar, you guarantee your desserts are not only more delicious and aromatic but also more nutritionally potent.
Key Takeaways
- To avoid rock-hard desserts, you must replicate sugar’s function of freezing point depression using fibers, alcohol, or a touch of unrefined syrup.
- A base high in protein and fat, like Greek yogurt, is essential for a creamy texture and slow, even melt.
- Ice crystal management is a proactive process involving fast freezing, stable temperatures, and creating a physical barrier on the dessert’s surface.
The 5 “Hidden” Additives in Your Pantry That Sabotage Clean Cooking
In the pursuit of a “clean” diet, we often focus on obvious culprits like refined sugar, but neglect the hidden additives lurking in seemingly healthy pantry staples. Gums, fillers, stabilizers, and mystery “natural flavors” can disrupt gut health and undermine your efforts, even when making homemade desserts. These ingredients are often used by manufacturers to create texture and shelf stability in products that would otherwise be simple, like plant milks or canned coconut cream.
For instance, many store-bought almond milks contain guar gum or xanthan gum, which can cause digestive issues for sensitive individuals. Canned coconut cream might contain Polysorbate 80, an emulsifier linked to gut inflammation. Even something as innocent as fruit-flavored yogurt often contains “natural flavors,” a catch-all term for proprietary chemical mixtures that are anything but natural. Being a truly clean cook means becoming a vigilant label-reader and learning to make simple, pure alternatives at home.
The good news is that swapping these additive-laden products for clean, homemade versions is often quick, easy, and results in a far superior product. Making your own nut milk takes just a few minutes, and flavoring plain yogurt with your own fresh fruit purée gives you complete control over the ingredients. This commitment to purity ensures that your healthy dessert is truly beneficial from the inside out.
Your Action Plan: DIY Clean Swaps for Common Additives
- Audit Your Pantry: Check labels on plant milks, yogurts, canned coconut products, and dried fruits for gums (guar, xanthan), stabilizers (polysorbate 80), sulfites, and “natural flavors.”
- Collect Clean Alternatives: Stock up on plain, full-fat Greek yogurt, canned coconut cream containing only coconut and water, and organic, unsulfured dried or freeze-dried fruits.
- Master the 2-Minute Nut Milk: Instead of buying almond milk, blend 1 cup of raw almonds with 4 cups of filtered water on high speed for 2 minutes. Strain through a nut milk bag or fine-mesh sieve.
- Embrace Natural Thickeners: When a recipe needs stabilization or thickening, replace commercial additives with whole-food options like a tablespoon of ground chia seeds or psyllium husk powder.
- Prioritize Whole Fruit Flavor: Instead of buying flavored yogurts or extracts with “natural flavors,” create your own intense flavor by making a simple purée of fresh or frozen berries to mix into your plain base.
By embracing these principles of food science and clean cooking, you can move beyond disappointing results and start creating chilled desserts that are not only delicious and refreshing but also truly nourishing for your body.