Perfectly juicy chicken breast isn’t about luck; it’s about controlling heat transfer and moisture at a cellular level.
- Techniques like brining and velveting chemically alter protein fibers to retain more water during cooking.
- Gentle cooking methods (cold-start, sous-vide) and proper resting prevent moisture from being squeezed out of the muscle.
Recommendation: Master one core method, like the high-heat sear plus steam-finish, for a reliable, macro-friendly solution you can execute in under 20 minutes.
For any fitness enthusiast dedicated to meal prepping, there’s a familiar, sinking feeling: opening the fridge on Wednesday to find that the perfectly cooked chicken from Sunday has become a stack of dry, rubbery pucks. You’ve followed the standard advice—you bought a meat thermometer, you didn’t “overcook” it—yet the result is consistently disappointing. This frustration leads many to believe that lean chicken breast is doomed to be bland and tough, a protein source to be endured, not enjoyed.
The common solutions often feel like a compromise. Drenching it in fatty sauces defeats the purpose of a lean, high-protein meal. The endless cycle of trying different bake times and temperatures feels like guesswork. But what if the secret wasn’t just about avoiding mistakes, but about proactively engineering a better result from the start? What if the key to unlocking consistent juiciness wasn’t about complex recipes, but about mastering a few core principles of food science that chefs use daily?
This is where we shift from a home cook’s hope to a nutrition chef’s strategy. The real solution lies in controlling heat and moisture with purpose. It’s about understanding how to use salt to lock in water at a cellular level, how to manage the velocity of heat transfer to prevent protein seizure, and why the minutes after cooking are just as important as the minutes during. This guide will walk you through eight professional, macro-focused techniques that transform chicken breast from a chore into a highlight of your meal prep.
For those who prefer a quick visual summary, the video below demonstrates some key principles for achieving juicy results in record time.
In this article, we’ll explore each of these advanced methods in detail. From the science of brining to the precision of sous-vide, you’ll gain an arsenal of techniques to guarantee tender, flavorful chicken that fits your fitness goals and your busy schedule.
Summary: A Chef’s Guide to Juicy, Macro-Friendly Chicken
- Wet Brine vs Dry Brine: Which is Faster for Weeknight Pork Chops?
- Cold Start Poaching: How to Cook Salmon so It Doesn’t Seize Up?
- How Long to Marinate Tofu to Penetrate the Center?
- Why Slicing Lean Steak Immediately Ruins the Texture?
- Precision Cooking: Is a Sous-Vide Stick Worth It for Turkey Breast?
- When to Apply BBQ Sauce to Prevent Burning the Sugars?
- Flash Frozen at Sea: Why It Is Often Better Than “Fresh” Counter Fish?
- How to Cook Nutritious Foods Quickly When You Only Have 20 Minutes?
Wet Brine vs Dry Brine: Which is Faster for Weeknight Pork Chops?
While this question specifies pork chops, the principle of brining is a universal law for lean proteins, especially chicken breast. Brining is the single most effective way to insure against dryness. It’s not just “adding salt”; it’s a process of cellular osmosis. Salt denatures the protein strands within the meat, causing them to unwind and trap water molecules. This creates a buffer of moisture that remains even after cooking.
A wet brine (soaking the chicken in salt water) is fast-acting and effective. Scientific analysis shows it works; research by Dr. Greg Blonder shows chicken can absorb enough solution to increase its weight by up to 10%, retaining a significant portion of that as added moisture after cooking. The downside is a potentially softer, slightly waterlogged texture and less crispy skin. For a meal prepper, it also requires a large container and fridge space.
A dry brine (salting the surface and letting it rest) is simpler and yields a more concentrated chicken flavor and superior browning. The salt draws moisture out, creates a brine on the surface, and then that brine is reabsorbed, seasoning the meat more deeply. For crispy skin or a perfect sear, dry brining is unequivocally better. The following table breaks down the trade-offs for a busy athlete.
| Method | Active Time | Total Time | Texture Result | Best For |
|---|---|---|---|---|
| Wet Brine | 15-20 min | 4-24 hours | Plump, very juicy | Grilling, lean cuts |
| Dry Brine | 2-3 min | 8-24 hours | Dense, concentrated flavor | Crispy skin, roasting |
For weeknight speed, a quick wet brine of 30-60 minutes is better than nothing. But for optimal meal prep results, a dry brine started the night before offers the best flavor and texture with minimal active effort.
Cold Start Poaching: How to Cook Salmon so It Doesn’t Seize Up?
The terror of watching a beautiful piece of salmon seize and turn chalky the moment it hits a hot pan is real. This happens because high, direct heat causes the exterior proteins to contract violently, squeezing out moisture. The same principle applies to chicken breast. The solution is to manage the heat transfer velocity—in other words, cook it gently. While the title mentions poaching, a far more versatile and macro-friendly technique for chicken is “cold pan searing.”
This method turns conventional wisdom on its head. Instead of preheating a pan to screaming hot, you place the seasoned chicken breast in a cold, heavy-bottomed pan with a minimal amount of oil. Then, you turn the heat to medium. This gradual temperature increase allows the chicken to cook evenly from edge to center without the shock that leads to toughness. The proteins warm up and set gently, retaining their internal moisture.
As Linda Spiker of The Organic Kitchen notes, the right equipment is simple but essential: “The only thing you need to achieve tender chicken breasts on the cooktop is a sturdy pan with a lid.” The lid is critical for the final step, where a splash of water is added to create steam, finishing the cooking process with gentle, moist heat. This sear-plus-steam combination is a game-changer for meal prep, delivering a beautifully browned exterior and a perfectly tender interior with almost no added fat.
How Long to Marinate Tofu to Penetrate the Center?
The challenge of marinating dense proteins like tofu or thick chicken breasts is that flavor often remains on the surface. For a marinade to be effective, it needs two things: time and surface area. While you can marinate tofu for 24 hours, you can achieve a similar flavor penetration on chicken much faster by mechanically increasing its surface area. This is a far more efficient strategy for a meal prepper than simply waiting longer.
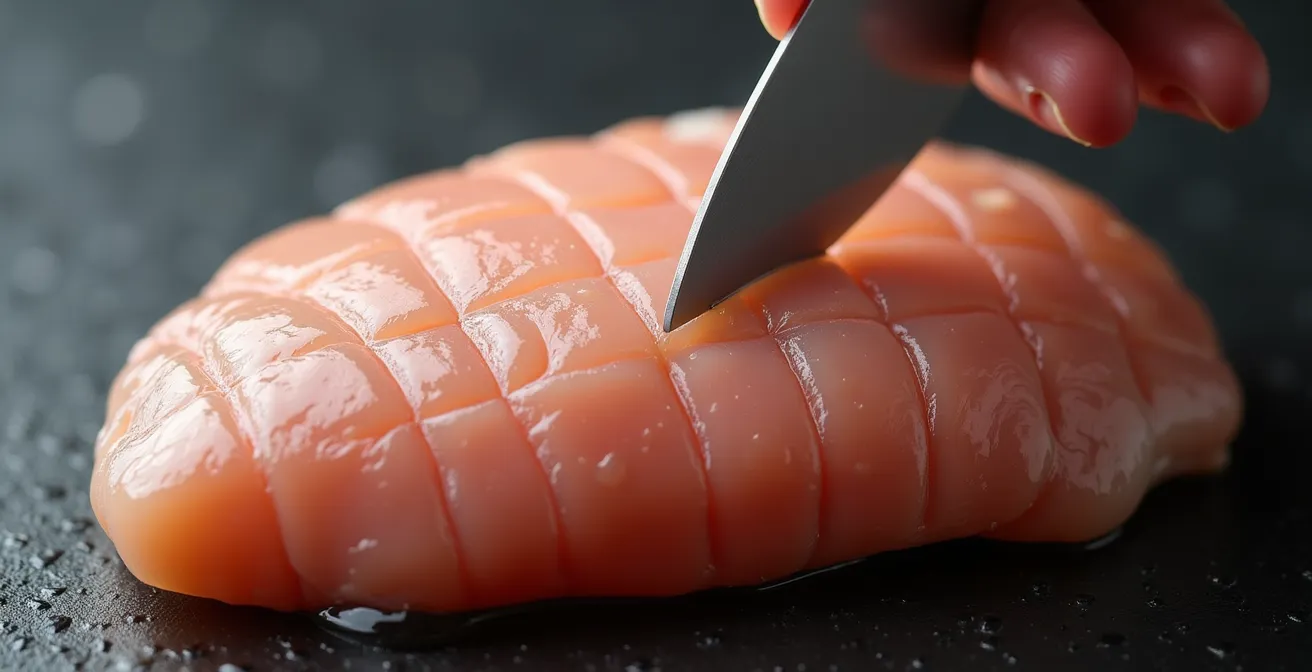
The most effective method is crosshatch scoring. By making a series of shallow (about 1/8-inch deep) cuts in a diamond pattern across the surface of the chicken breast, you dramatically increase the area exposed to seasoning and heat. Marinade and spices get trapped in these grooves, and the thinner sections cook more quickly and evenly. This simple, 30-second step ensures every bite is flavorful, not just the outside edge.
For the ultimate moisture lock, however, chefs turn to a Chinese technique called velveting. This involves coating the chicken in a thin slurry, typically of egg white and cornstarch, for at least 30 minutes before cooking. This coating forms a protective barrier that seals the surface of the meat, preventing moisture from escaping during the high heat of searing or stir-frying. It’s an incredibly effective, low-fat way to guarantee a silky, tender texture that feels like it came from a high-end restaurant.
Why Slicing Lean Steak Immediately Ruins the Texture?
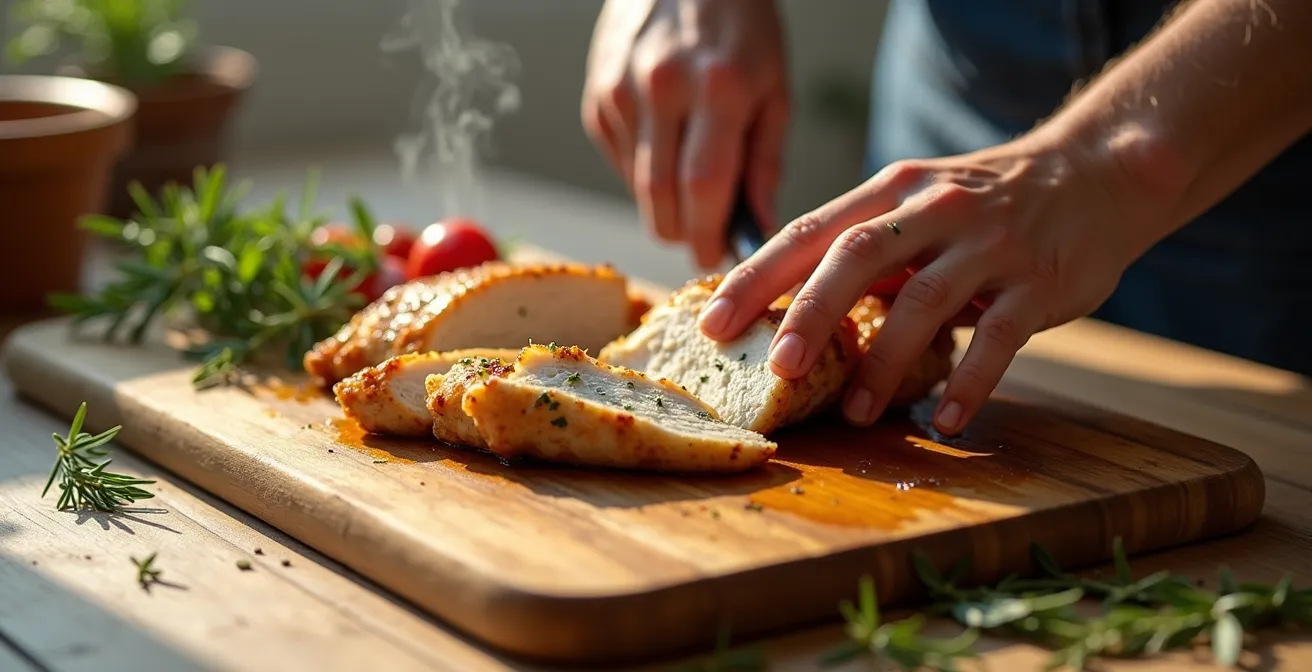
Whether it’s a lean sirloin or a chicken breast, the rule is absolute: slicing into meat directly off the heat is a cardinal sin of cooking. During cooking, the muscle fibers tighten and push all their internal juices toward the center. If you slice it immediately, this pool of unbound liquid pours out onto your cutting board, resulting in a dry, disappointing meal. It’s not an opinion; it’s physics. In fact, tests show that chicken can lose 10-15% of its moisture if sliced without proper resting.
Resting allows the muscle fibers to relax and reabsorb that precious juice, distributing it evenly throughout the meat. This process, known as carryover cooking, also lets the internal temperature stabilize. A chicken breast pulled from the pan at 160°F can easily rise to the food-safe 165°F while it rests. For a meal prepper, this is a non-negotiable step. The 5-10 minutes you spend letting the chicken rest is the most important part of the entire cooking process.
The ideal resting time depends on the thickness of the cut and the cooking method. A thin, pan-seared cutlet needs less time than a thick, roasted breast. Using a guide ensures you’re not guessing and are maximizing the moisture retention you worked so hard to achieve during the cook.
| Chicken Thickness | Cooking Method | Resting Time |
|---|---|---|
| Thin cutlet (1/2 inch) | Pan-seared | 3-5 minutes |
| Medium (3/4 inch) | Pan-seared | 5-7 minutes |
| Thick breast (1+ inch) | Roasted | 10-12 minutes |
Think of resting as the final, crucial phase of cooking. Skipping it undoes all your previous efforts to build flavor and moisture.
Precision Cooking: Is a Sous-Vide Stick Worth It for Turkey Breast?
For the data-driven athlete obsessed with precision, sous-vide is the holy grail. The technique involves vacuum-sealing food and cooking it in a precisely controlled water bath. While the question mentions turkey, it’s even more transformative for chicken breast. Its primary benefit is eliminating all guesswork. You set the temperature to your exact desired doneness—say, 145°F for an ultra-juicy chicken breast—and it’s physically impossible to overcook it. The chicken reaches that exact temperature edge-to-edge, no dry exterior, no undercooked center.

This method redefines food safety. Conventionally, we cook chicken to 165°F to kill bacteria instantly. But pasteurization is a function of both temperature and time. With sous-vide, you can achieve the same level of safety at much lower temperatures by holding it for a specific duration. For instance, according to Anova Culinary’s pasteurization data, holding chicken at 145°F for about an hour yields a fully pasteurized, incredibly tender, and perfectly safe result that is far juicier than its 165°F counterpart. This is the protein coagulation point in action; by avoiding higher temperatures, more of the proteins remain in their tender, moisture-rich state.
Is an immersion circulator (the “stick”) worth it? For a meal prepper cooking large batches of protein, the answer is a resounding yes. It offers unparalleled consistency and frees you up to do other things, as it requires no monitoring. You can cook a week’s worth of chicken breasts to perfection, then give them a quick 60-second sear in a hot pan before serving or storing. It’s the ultimate tool for texture and macro precision.
When to Apply BBQ Sauce to Prevent Burning the Sugars?
Grilling chicken breast can feel like a race against time, especially when using a sweet sauce or glaze. Most commercial BBQ sauces are high in sugar, and sugar burns at a much lower temperature (around 265°F) than the temperatures needed for the Maillard reaction that creates those beautiful grill marks and savory flavor (300-500°F). Applying a sugary sauce too early is a guaranteed recipe for a blackened, acrid crust on top of undercooked chicken.
The professional solution is to use a two-zone grilling setup. This means arranging your charcoal or turning on your gas burners to create one side of the grill with high, direct heat and another side with lower, indirect heat. The chicken is cooked almost entirely through on the cooler, indirect side. This allows the internal temperature to rise gently without burning the exterior.
The sauce is applied only during the final 5 minutes of cooking, once the chicken is nearly at its target temperature. After saucing, the chicken can be moved to the hot side for just 30-60 seconds per side. This is just enough time to caramelize the sugars in the sauce, creating a sticky, delicious glaze without any char or bitterness. This technique gives you total control, ensuring the chicken is cooked perfectly and the sauce is a flavorful addition, not a burnt mess.
Action Plan: Two-Zone Grilling for Glazed Chicken
- Set up grill: Establish a clear hot zone (direct heat) and a cool zone (indirect heat).
- Initial Sear: Start the chicken on the hot zone to get a quick sear, about 2-3 minutes per side.
- Cook Through: Move the chicken to the cool zone, close the lid, and cook until it’s almost at your target temperature (around 15-20 minutes).
- Apply Sauce: Brush the chicken with your BBQ sauce or glaze only during the last 5 minutes of cooking on the cool side.
- Final Caramelization: Move the sauced chicken back to the hot zone for a final 30-60 seconds per side to set the glaze.
Flash Frozen at Sea: Why It Is Often Better Than “Fresh” Counter Fish?
There’s a pervasive myth in the grocery store that “fresh” is always better than “frozen.” For a meal prepper valuing quality and convenience, this is often untrue, especially for lean proteins. The “fresh” fish or chicken at the counter may have been sitting for days, slowly degrading in quality. The principle of “Flash Frozen at Sea” for fish applies directly to high-quality chicken: Individually Quick Frozen (IQF) chicken is often a superior product.
IQF is an industrial freezing method that blasts individual pieces of chicken with cryogenic air, freezing them solid in minutes. Standard home or conventional freezing takes hours. This speed is critical because slow freezing allows large, jagged ice crystals to form within the meat’s cells. These crystals puncture the cell walls, and when the meat thaws, a significant amount of moisture and flavor leaks out. IQF creates tiny, smooth micro-crystals that leave the cell structure intact, preserving the texture and juiciness of the chicken almost perfectly.
The difference is stark. A conventionally frozen chicken breast often thaws into a pale, watery state, while an IQF breast retains its color, firmness, and moisture. For a meal prepper, the benefits are huge. You can pull out the exact number of chicken breasts you need without having to thaw a giant block. Furthermore, industry data shows that IQF freezes chicken in minutes vs 3-4 hours for conventional freezing, a process that fundamentally protects the protein’s integrity. Don’t fear the freezer aisle; for consistent quality, IQF is your ally.
Key Takeaways
- Juiciness is engineered, not accidental. It relies on scientific principles of moisture retention and heat control.
- Pre-cooking preparation like brining or velveting chemically alters protein fibers to lock in moisture before heat is ever applied.
- Controlling cooking speed (cold-pan sear, two-zone grilling) and allowing for a proper post-cook rest are just as crucial as hitting the right internal temperature.
How to Cook Nutritious Foods Quickly When You Only Have 20 Minutes?
Bringing it all together, the ultimate goal for a meal prepper is a method that is reliable, fast, and delivers a fantastic, macro-friendly result. You don’t always have hours for a brine or a sous-vide bath. For a 20-minute solution, the high-heat sear combined with a steam finish is the most effective technique in your arsenal. It combines the flavor benefits of the Maillard reaction with the gentle, moisture-preserving power of steam.
As food blogger Nicole Modic of Kalejunkie puts it, the challenge with chicken is inherent to its lean nature.
Friends, when it comes to simple and easy weeknight dinners, there is nothing better than a juicy chicken breast. But as delicious as chicken is, it can be very easy to make one simple mistake and end up with a dry chicken breast that doesn’t satisfy. And that’s because chicken tends to be lower in fat, so it doesn’t have the same juiciness that other meats (like steak, for example) naturally have. Because of this, it needs to be prepared carefully, so that we keep all of that moisture locked inside.
– Nicole Modic, Kalejunkie
This high-heat method does exactly that. First, pound the chicken to an even 1/2-inch thickness—this is non-negotiable for quick, even cooking. Season it generously. Get a heavy pan (cast iron is ideal) very hot, add a minimal amount of high-smoke point oil, and sear the chicken for 2-3 minutes without moving it. Flip it, sear for another 2 minutes, then add a splash of liquid (broth, water, even wine), and immediately cover the pan. The trapped steam finishes the cooking in about a minute, creating a moisture lock that keeps the chicken incredibly tender. Pull it from the pan, let it rest for five minutes, and you have a perfect chicken breast ready in under 15 minutes from start to finish.
By mastering even one of these core techniques, you can elevate your meal prep from a bland necessity to a delicious and satisfying part of your fitness journey. Start by perfecting the sear-and-steam method, and you’ll never have to endure a dry chicken breast again.