In summary:
- The key to fluffy grains is not just water ratios, but removing natural coatings like saponins and controlling moisture through techniques like toasting.
- In baking, texture depends on understanding binders; xanthan gum provides structure but can turn slimy, while psyllium husk offers a softer crumb.
- Grittiness in flours like almond is a hydration problem, solved by resting batters and adding sufficient fat and moisture.
- True safety in a shared kitchen for those with Celiac disease means understanding hidden cross-contamination vectors like wooden utensils and airborne flour.
There’s nothing more disappointing for someone navigating a gluten-free diet than the promise of a hearty grain salad or a warm slice of bread falling flat—literally. You follow the package directions to the letter, yet you’re left with a pot of gummy quinoa, a gritty cake, or a side dish that’s more mush than meal. It’s a common frustration that can make even the most dedicated home cook feel defeated. The internet is full of basic advice like “rinse your grains” or “use a binder,” but this often fails to address the root of the problem.
As a chef specializing in gluten-free cuisine, I can tell you the solution isn’t about finding a magic recipe. It’s about understanding the science behind your ingredients. The difference between a fluffy, distinct grain and a sticky mess lies in chemistry—the interaction of starches, proteins, and moisture. For those with Celiac disease or a serious sensitivity, this knowledge extends to the very real science of cross-contamination, where gluten can hide in the most unexpected places.
This guide moves beyond the basics. We’re going to pull back the curtain on the ‘why’ behind the techniques. We won’t just tell you to do something; we’ll explain the molecular changes that occur when you toast buckwheat, the reason corn needs a special treatment to unlock its nutrients, and how to become the master of your own all-purpose flour blend. By understanding the properties of each ingredient, you’ll gain the intuition and control to finally achieve the textures you’ve been missing. This is where you stop following instructions and start truly cooking.
To navigate this deep dive into gluten-free texture, here is a breakdown of the key areas we will explore. Each section is designed to build your expertise from the ground up, turning frustration into mastery.
Summary: From Gummy to Glorious: A Gluten-Free Grain Texture Guide
- The Saponin Layer: Why Unwashed Quinoa Tastes like Soap?
- Xanthan Gum vs Psyllium Husk: Which Binder Creates Better Bread Structure?
- How to Balance the Earthy Taste of Buckwheat in Pancakes?
- Colanders and Toasters: Where Does Gluten Hide in a Shared Kitchen?
- Rice Flour vs Sorghum: How to Mix Your Own All-Purpose Blend?
- Why Corn Must Be Treated with Lime to Be Nutritious?
- Almond Flour Grittiness: How to Sift for a Finer Cake Crumb?
- Cauliflower Rice That Doesn’t Suck: How to Achieve a Fluffy Grain-Like Texture?
The Saponin Layer: Why Unwashed Quinoa Tastes like Soap?
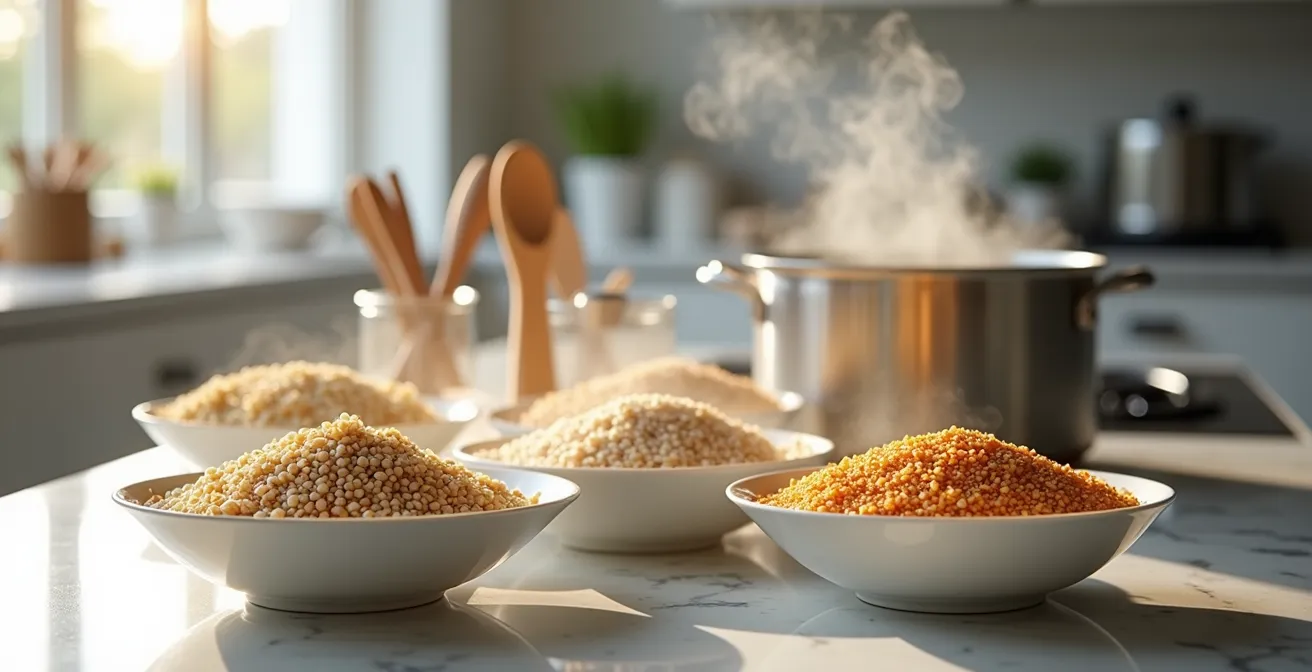
The most common complaint about quinoa isn’t its texture, but its occasional bitter or soapy taste. This isn’t a flaw in the grain itself, but a feature: a natural, protective coating called saponin. This compound exists to deter pests in the field, but for us, it can ruin a dish. While most commercially sold quinoa is pre-rinsed, variations in processing mean you can’t always rely on it. A thorough rinse under cold, running water for at least 30 seconds is non-negotiable insurance for a clean, nutty flavor.
Once the saponin is gone, achieving a fluffy texture is all about precise moisture control. The standard 2:1 water-to-grain ratio is often too much, leading to a mushy result. A better starting point is 1 ¾ cups of liquid to 1 cup of quinoa. Bring it to a boil, then immediately cover and reduce the heat to a bare simmer for exactly 15 minutes. The most critical step follows: remove it from the heat and let it stand, covered, for 10 minutes. This allows the grains to steam and absorb the remaining moisture without overcooking. Finally, fluff with a fork. A spoon will crush the delicate grains and create a pasty texture.
For an even deeper, nuttier flavor and superior grain separation, try toasting the quinoa before cooking. After rinsing and draining thoroughly, add the quinoa to a dry pan or a pot with a small amount of oil or butter over medium heat. Stir constantly for about 3 minutes until the grains are golden and aromatic. This not only enhances the taste but also helps create a firmer outer shell on each grain, making it even more resistant to becoming gummy.
Xanthan Gum vs Psyllium Husk: Which Binder Creates Better Bread Structure?
When you remove gluten, you remove the protein network responsible for trapping air and providing structure and chew. This is why gluten-free baked goods can be dense or crumbly. Binders are essential to replicate this effect, and the two most common are xanthan gum and psyllium husk. Xanthan gum, a polysaccharide created through fermentation, is incredibly powerful. It excels at creating the elasticity needed for breads and pizza dough, preventing cookies from spreading into thin crisps. It’s the go-to for creating a strong, reliable structure.
However, xanthan gum has a downside. Overuse can lead to what I call the “slimy mouthfeel,” a slightly gummy or slick texture that can be off-putting. It’s a common issue in commercial gluten-free products. Psyllium husk, a fiber derived from the seeds of the Plantago ovata plant, offers a different experience. It absorbs a tremendous amount of water, creating a gel that provides excellent moisture and a softer, more tender crumb. It’s often preferred for cakes, muffins, and more delicate bakes where a chewy, bread-like structure isn’t the primary goal.
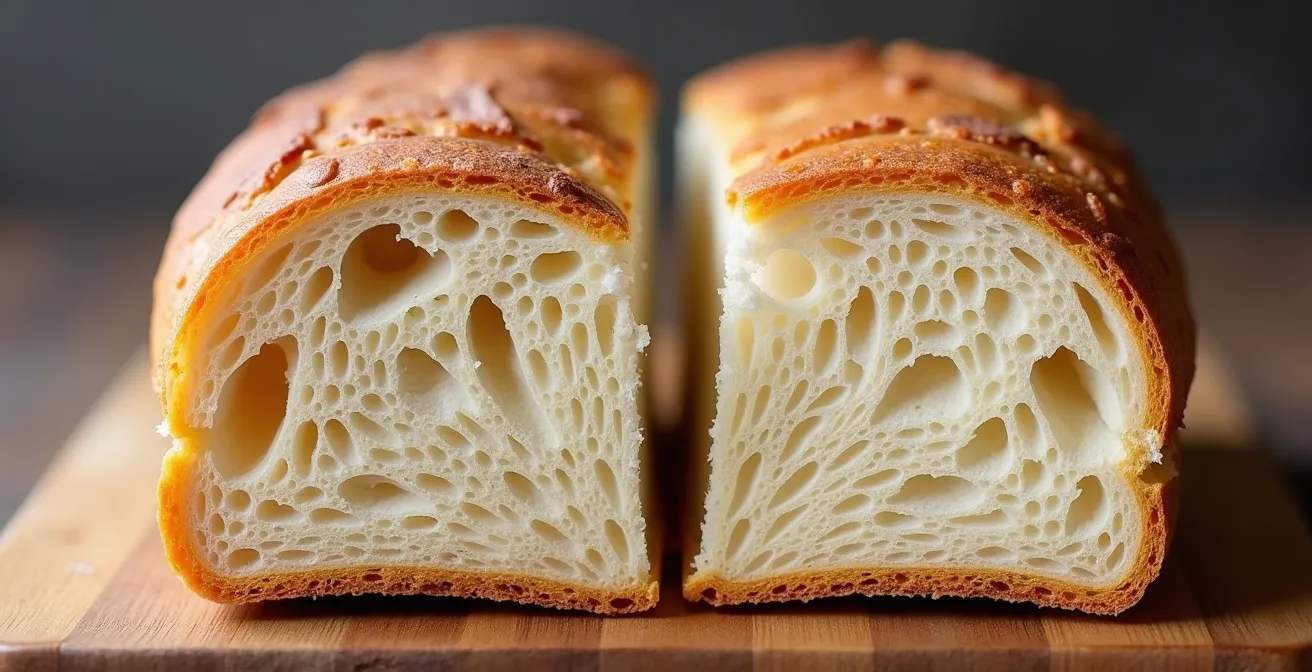
The choice isn’t about one being “better,” but about purpose. For a crusty loaf of bread, xanthan gum provides the necessary framework. For a moist chocolate cake, psyllium husk might give you a superior, softer result. Many professional recipes now use a combination of both to get the best of both worlds: structure from a small amount of xanthan gum and moisture from psyllium husk. Experimenting is key, as different flour blends interact with binders in unique ways. A good rule of thumb is that if a recipe feels too wet or results in a gummy texture, try reducing the xanthan gum first.
How to Balance the Earthy Taste of Buckwheat in Pancakes?
Buckwheat, despite its name, is not a type of wheat but a seed related to rhubarb. It’s naturally gluten-free and packed with nutrients, but it possesses a very distinct, strong, earthy flavor that can be polarizing, especially in delicate items like pancakes. For many, this robust taste can overwhelm a dish. The secret to taming this flavor profile lies in a simple, transformative technique: toasting the flour.
Before you incorporate it into your batter, spread the buckwheat flour in a dry skillet over medium heat. Stir it constantly for 3-5 minutes. You’ll know it’s ready when a deep, nutty aroma is released. This process mellows the raw, earthy notes and brings out a richer, more toasted and complex flavor that is far more complementary to pancakes or other baked goods. It turns buckwheat from a dominant flavor into a supportive, interesting one.
Another strategy is blending. You don’t have to go 100% buckwheat. Start by substituting 25-30% of your favorite all-purpose gluten-free flour blend with toasted buckwheat flour. This will introduce its nutritional benefits and complex flavor without overpowering the dish. For pancakes, pairing it with complementary flavors is also key. The sweetness of maple syrup, the tang of buttermilk, or the brightness of fresh berries all work beautifully to cut through and balance buckwheat’s inherent earthiness. Don’t fight its strong character; learn to work with it.
Colanders and Toasters: Where Does Gluten Hide in a Shared Kitchen?
For a person with Celiac disease, the kitchen can be a minefield. Gluten isn’t just in obvious places; it’s a microscopic and persistent contaminant. Understanding the most dangerous cross-contamination vectors is not just about cleanliness, it’s about safety. A shared kitchen requires a level of vigilance that goes far beyond simply wiping down counters.
Some of the most high-risk items are porous materials. Wooden cutting boards, spoons, and rolling pins are particularly notorious. Gluten proteins can get trapped in the microscopic pores of the wood and can leach out into your gluten-free food, even after the utensil has been washed. It’s always safest to maintain a dedicated set of non-porous (plastic, glass, or metal) tools for gluten-free prep.
Case Study: The Hidden Oil Residue Risk
An often-overlooked danger is cooking oil. Research from Celiac.org highlights that frying oil can retain gluten proteins. A pan used to fry breaded chicken, for example, will contaminate the oil. Subsequently cooking vegetables in that same pan, even after washing it, can transfer enough gluten to cause a reaction. The only truly safe method is to maintain dedicated “gluten-free only” frying pans and use fresh, separate oil that has never been in contact with gluten-containing foods.
Appliances are another major hazard. The slots of a shared toaster are permanently contaminated with gluten crumbs. Using toaster bags is an option, but a dedicated gluten-free toaster is the safest bet. Colanders are also problematic; a quick rinse is not enough to remove tiny pasta particles or flour residue stuck in the mesh. The same goes for flour sifters. Finally, be aware of airborne flour. If someone is baking with wheat flour in the same room, invisible particles can travel and settle on your “safe” surfaces and ingredients. Always ensure surfaces are wiped down immediately before you begin your gluten-free cooking.
Rice Flour vs Sorghum: How to Mix Your Own All-Purpose Blend?
Relying on store-bought gluten-free flour blends can be convenient, but they are often expensive and may not provide the perfect texture for every type of baked good. Learning to mix your own all-purpose blend is the ultimate step in taking control of your gluten-free baking. The key is to understand that you’re not just replacing one flour, but three components of wheat flour: its protein, its fine starch, and its gluten. A good blend typically combines a higher-protein flour, a lighter flour, and a starchy flour.

White rice flour is a common base because it’s neutral in flavor and provides structure, thanks to its high amylose starch content. However, on its own, it can lead to a dry, gritty texture. This is where a flour like sorghum comes in. Sorghum flour has a higher protein content, which aids in structure and browning, and a smoother, more wheat-like texture. It helps create tenderness and a finer crumb, balancing the potential grittiness of rice flour.
To these, you must add a starch. Starches like tapioca starch, potato starch, or cornstarch are crucial for lightness and binding. They help create a softer texture and prevent the final product from being too dense. A fantastic starting point for a versatile all-purpose blend is a ratio of 40% higher-protein flour (like sorghum or millet), 30% lighter flour (like white rice flour), and 30% starch (like tapioca starch). By understanding the role each flour plays, you can adjust these ratios based on your desired outcome: more rice flour for a sturdy bread, or more sorghum and starch for a tender cake.
To illustrate the different properties, consider this comparison:
| Property | White Rice Flour | Sorghum Flour |
|---|---|---|
| Protein Content | Low (5-6%) | Higher (10-11%) |
| Starch Type | High amylose (structure, can be gritty) | Balanced amylose/amylopectin |
| Browning Ability | Poor | Good (due to protein) |
| Best For | Structure in breads | Tenderness in cakes |
| Texture Result | Can be dry/gritty alone | Smoother, more wheat-like |
Why Corn Must Be Treated with Lime to Be Nutritious?
Corn is a naturally gluten-free grain that forms the backbone of many diets. However, not all corn is created equal from a nutritional standpoint. You may have noticed that corn used for authentic tortillas or grits (like masa harina) has a very distinct, savory flavor compared to simple cornmeal. This is the result of an ancient and brilliant food science process called nixtamalization.
In its natural state, the essential vitamin B3 (niacin) in corn is chemically bound and unavailable for human absorption. A diet heavily reliant on untreated corn can lead to a serious deficiency disease called pellagra. Mesoamerican cultures discovered thousands of years ago that soaking and cooking the corn kernels in an alkaline solution—typically water with dissolved cal (calcium hydroxide), or food-grade lime—transforms the grain. This process dissolves the tough outer hull of the corn, making it easier to grind. But more importantly, the alkaline solution chemically unlocks the niacin and also increases the availability of calcium, making the corn vastly more nutritious.
This process also profoundly affects the texture. It gelatinizes the starches in the corn, allowing it to form a pliable dough (masa) when mixed with water. This is something that untreated cornmeal simply cannot do; it will just create a gritty slurry. So, when you’re making tamales or fresh corn tortillas, reaching for masa harina isn’t just about authentic flavor—it’s about using a product that has been scientifically engineered to be both more nutritious and functionally capable of forming a dough. This ancient wisdom is a powerful reminder that preparing grains is often about more than just heat and water. It highlights the importance of the gluten-free diet for the about 6% of the U.S. population that is gluten intolerant, a group for whom every ingredient choice matters.
Almond Flour Grittiness: How to Sift for a Finer Cake Crumb?
Almond flour is a fantastic, low-carb, high-protein alternative in gluten-free baking. However, it presents a unique textural challenge: grittiness. That sandy, coarse mouthfeel in an otherwise delicious cake or cookie can be a major letdown. This isn’t a flaw in the flour, but a result of improper starch and fiber hydration. Unlike grain flours, almond flour is just finely ground nuts, and its particles need more help to soften.
The first line of defense is moisture and fat. As an insightful article from King Arthur Baking explains, fat helps smooth out the mouthfeel by coating the flour particles. This is why many successful almond flour recipes are rich in eggs, butter, or oil. Adding an extra egg yolk, a spoonful of sour cream, or yogurt can introduce both the fat and moisture needed to soften the flour. The second, and perhaps most important, technique is resting the batter. Allowing your cake batter or cookie dough to rest for at least 20-30 minutes (or even overnight for cookies) before baking gives the almond flour particles time to fully absorb the liquid, swell, and soften. This simple, patient step dramatically reduces the final perception of grittiness.
For an even finer texture, especially in delicate cakes, you can take an extra step. Pulsing the almond flour together with the sugar from the recipe in a food processor for a minute can break down the particles even further, essentially creating a finer-milled flour. Always opt for blanched almond flour (made from almonds with their skins removed) over natural almond meal for the smoothest possible result. Sifting is often recommended, but it’s more for removing clumps than for reducing inherent grittiness; true texture improvement comes from hydration and fat.
Your Action Plan: Eliminating Almond Flour Grittiness
- Increase Moisture: Check if your recipe has enough liquid and fat. Consider adding an extra egg yolk, a tablespoon of yogurt, or sour cream to help soften the flour particles.
- Rest the Batter: Always let your batter or dough rest for a minimum of 20-30 minutes before baking. This is the most crucial step for proper hydration.
- Use a Food Processor: For ultra-fine results, pulse the almond flour and sugar together for 30-60 seconds to break down the particles before mixing with wet ingredients.
- Choose the Right Flour: Opt for “blanched” almond flour, which is made from skinless almonds and has a finer, less coarse texture than almond meal.
- Audit Your Fat Content: Since you’re using blanched flour, which has a slightly lower oil content, ensure your recipe has enough fat (butter, oil) to create a smooth, non-gritty mouthfeel.
Key Takeaways
- Texture is science: Master gluten-free cooking by understanding the ‘why’—how starches hydrate, proteins build structure, and binders work.
- Control your ingredients: Techniques like toasting grains, blending flours, and resting batters give you direct control over flavor and texture, moving you beyond simply following recipes.
- Safety is paramount: For those with Celiac disease, true kitchen safety means a forensic understanding of hidden cross-contamination risks in porous materials and shared appliances.
Cauliflower Rice That Doesn’t Suck: How to Achieve a Fluffy Grain-Like Texture?
Let’s be honest: much of the “cauliflower rice” served is a watery, mushy disappointment. The goal is to create something that mimics the light, fluffy, and separate grains of actual rice, not a pile of steamed vegetable bits. The number one enemy of good cauliflower rice is moisture. Cauliflower is over 90% water, and if you don’t manage it correctly, you will be steaming it in its own liquid, leading directly to a soggy mess.
The process starts with how you “rice” it. Using the grater attachment on a food processor is the best method for uniform, grain-like pieces. Don’t over-process it into a paste. Once riced, the most critical step is to remove excess water. Spread the riced cauliflower on a clean kitchen towel or several layers of paper towels, and press firmly to squeeze out as much liquid as possible. You’ll be surprised how much comes out. This step alone will drastically improve your final texture.
When it comes to cooking, forget boiling or steaming. The best method is a quick sauté in a hot, wide pan or wok. Use a bit of high-heat oil (like avocado or coconut oil) and get the pan very hot before adding the cauliflower. Spread it in a thin layer—don’t crowd the pan, cook in batches if necessary. The goal is to toast the cauliflower quickly, not to steam it. Stir infrequently for 5-7 minutes, allowing it to get some light browning. This high-heat, dry-cooking method evaporates remaining surface moisture and develops a nutty, roasted flavor, transforming it from a bland vegetable into a genuinely satisfying, grain-like side dish. Season it only at the very end to prevent drawing out more water during cooking.
Now that you’re armed with the science behind texture, you have the power to move from following recipes to creating your own solutions. Start by picking one grain or one baking challenge and apply these principles. Notice the difference, learn from it, and build the intuitive skills that define a great cook.
Frequently Asked Questions about Gluten-Free Cooking and Contamination
Why are wooden utensils particularly problematic for gluten contamination?
Wooden cutting boards, spoons, and rolling pins are porous materials that can absorb and leach gluten particles even after washing, making them high-risk vectors for cross-contamination.
How can airborne flour dust contaminate a gluten-free space?
When wheat flour is used in a kitchen, invisible airborne particles can settle on all surfaces including upper cabinets and backsplashes. Never bake gluten-free immediately after using wheat flour without thoroughly wiping down ALL surfaces.
Can a dishwasher really spread gluten contamination?
Yes, shared dishwashers can redeposit gluten particles onto ‘clean’ dishes. For safety, hand-wash critical gluten-free items or place them on the top rack and run a high-temperature sanitizing cycle.