
Cooking fast isn’t about shortcuts; it’s about eliminating the hidden time-sinks in your technique.
- Your pan’s temperature and your choice of protein can save you over 10 minutes alone, without any extra effort.
- Systematizing your choices with a “Decision-Free Matrix” and prepping components—not whole meals—is the key to consistent, fast weeknight dinners.
Recommendation: Master one technique from this guide, like the mushroom dry sauté, to prove to yourself that speed and incredible flavor go hand-in-hand.
It’s 7 PM. You’re exhausted, you’re hungry, and the thought of cooking feels like starting a marathon. The takeout app icon glows invitingly on your phone. You know you *should* cook—it’s healthier, cheaper—but it just takes too long. This is the daily friction point for millions. The common advice you hear is always the same: “meal prep on Sundays,” or “make one-pan meals.” While well-intentioned, this advice often fails because it doesn’t address the real reason cooking feels slow: a series of small, misunderstood technique errors that compound into wasted minutes and frustration.
The truth is, cooking a delicious, nutritious meal doesn’t have to take an hour. It doesn’t even have to take 30 minutes. The difference between a 15-minute meal and a 45-minute ordeal isn’t the recipe; it’s the physics of your kitchen and the efficiency of your movements. It’s about understanding heat, managing moisture, and eliminating decision fatigue before you even open the fridge.
But what if the real key wasn’t finding “quick recipes,” but mastering “quick techniques”? What if you could cook *anything* faster, just by fixing a few common mistakes? This guide is built on that premise. We’re not just giving you recipes; we’re giving you the speed-cooking operating system. We will dismantle the myths that make cooking feel like a chore and rebuild your approach from the ground up, focusing on the high-impact hacks that professional chefs use to get food on the plate, fast. Prepare to identify the hidden time-wasters you never knew you had and reclaim your weeknight dinners for good.
This article breaks down the essential strategies to transform your kitchen from a place of stress to a hub of speed and efficiency. We’ll cover everything from mental frameworks to specific cooking techniques that deliver maximum flavor in minimum time.
Summary: How to Cook a Real Meal in Under 20 Minutes, Every Time
- Why You Think Cooking Takes an Hour When It Can Take 15 Minutes?
- How to Reduce Stew Cooking Time by 70% Using an Instant Pot?
- Chicken Breast vs Thighs: Which Cooks Faster Without Drying Out?
- The Temperature Error That Adds 10 Minutes to Your Cooking Time
- Pasta Risks: How to Cook Noodles in Sauce Without Getting a Starchy Gloop?
- How to Prep 3 Days of Dinners in 90 Minutes on Sunday?
- Meat Out, Veg In: Why You Must Cook Components Separately?
- The Mistake That Ruins Sautéed Mushrooms and How to Avoid It Every Time
Why You Think Cooking Takes an Hour When It Can Take 15 Minutes?
The single biggest time-suck in the kitchen isn’t chopping or cooking; it’s decision fatigue. Staring into the fridge and wondering “What’s for dinner?” is a black hole for mental energy and time. This paralysis is why you default to takeout—it’s not because you can’t cook, but because you can’t decide. The solution is to remove the decision-making process from your tired, post-work brain entirely. You need a system, not willpower.
This is where a “Decision-Free” framework comes in. Instead of thinking about a specific recipe, you think in terms of interchangeable components. By pre-defining your options and ensuring they are stocked, you reduce the nightly choice to a simple, “pick one from each column” game. This simple shift in mindset is the difference between a 5-minute decision and a 30-minute delay that ends with ordering pizza.
The visual below represents this matrix approach. It’s not about complex planning; it’s about smart simplification. By creating a visual menu of possibilities, you build a flexible system that adapts to your cravings without overwhelming you with infinite choices. It’s the ultimate hack for your brain.
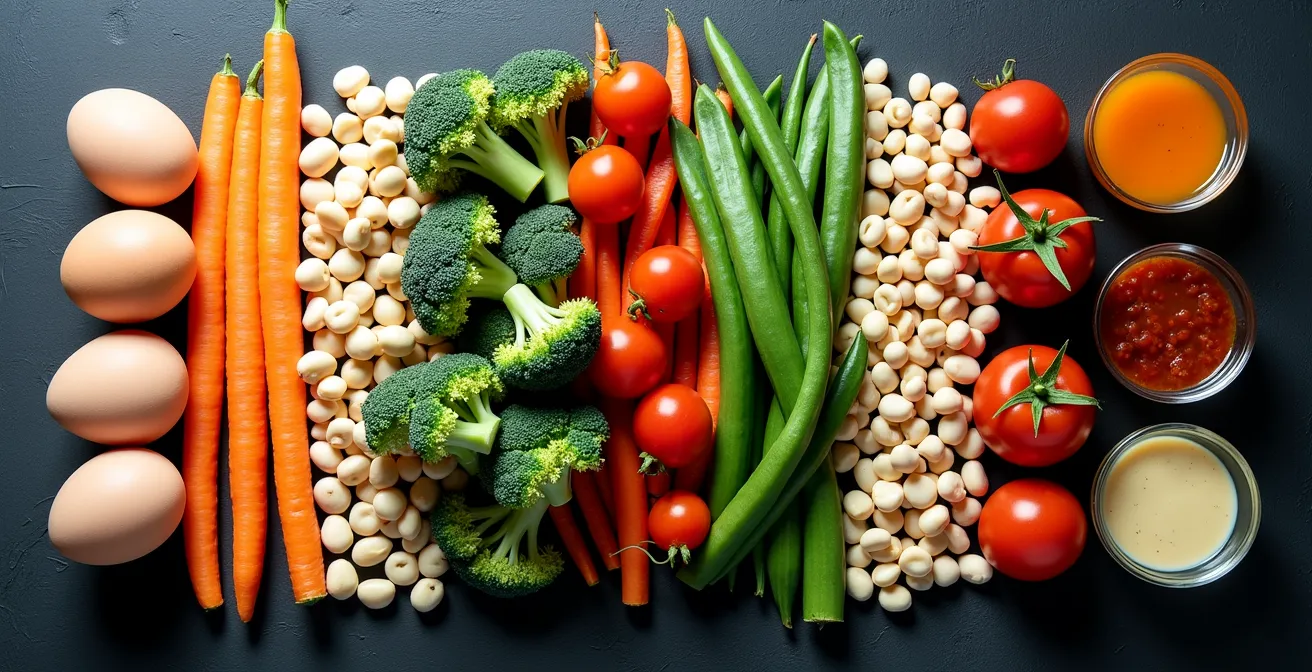
To put this into practice, you can build your own matrix right now. The goal is to make dinner assembly as mindless and automatic as brushing your teeth. The following plan walks you through creating this powerful system.
Your Action Plan: The Decision-Free Dinner Matrix
- Step 1: Create three columns on a sheet – Proteins, Vegetables, Sauces
- Step 2: List 5 quick-cooking options in each column (pre-cooked rotisserie chicken, frozen shrimp, canned beans for proteins)
- Step 3: Each evening, pick one from each column – no decision paralysis
- Step 4: Keep ingredients for all combinations stocked at home
- Step 5: Use a timer for 15 minutes total prep and cooking time
How to Reduce Stew Cooking Time by 70% Using an Instant Pot?
Slow-cooked flavor is the holy grail of comfort food, but who has three hours on a Tuesday? The perception that deep, rich flavor requires a long, slow simmer is a major reason people avoid dishes like stews or braises. This is a problem of thermal efficiency. Traditional cooking on a stovetop is incredibly inefficient; a huge amount of energy and time is spent just bringing liquids to a simmer and then slowly breaking down tough tissues.
An Instant Pot or any electric pressure cooker is a time-slashing machine because it hacks the laws of physics. By trapping steam, it increases the pressure inside the pot, which in turn raises the boiling point of water from 212°F (100°C) to around 240°F (115°C). This superheated environment forces liquid into food much faster and breaks down tough collagens in a fraction of the time. It’s not a shortcut; it’s a hyper-efficient application of science.
The results are not just marginal gains; they are revolutionary. A beef stew that would normally bubble away for nearly three hours to become tender can achieve the same result in just 35 minutes under pressure. This isn’t just a time-saver; it fundamentally changes what’s possible for a weeknight meal.
| Stew Type | Traditional Time | Instant Pot Time | Time Saved |
|---|---|---|---|
| Beef Stew | 2.5-3 hours | 35 minutes | 76% |
| Chicken Stew | 1.5 hours | 20 minutes | 78% |
| Lentil Stew | 45 minutes | 12 minutes | 73% |
| Vegetable Stew | 40 minutes | 8 minutes | 80% |
Chicken Breast vs Thighs: Which Cooks Faster Without Drying Out?
The eternal chicken debate: breast or thigh? When it comes to speed, the answer seems obvious: thin chicken breasts cook faster. But the real question is, which one cooks faster *without turning into a dry, chalky tragedy*? The answer lies in understanding fat content and mastering temperature control. Chicken breasts are extremely lean, making them cook quickly but also incredibly unforgiving. They go from perfectly cooked to overcooked in less than a minute.
The first hack is to change the geometry. A thick chicken breast cooks unevenly. By butterflying the breast (cutting it horizontally) or pounding it to an even 1/2-inch thickness, you dramatically increase the surface area and ensure it cooks in 90 seconds per side on a hot pan. This is pure physics.
The second, and more crucial, hack is to ignore outdated advice. Many sources say to cook chicken to 165°F. For chicken thighs, which are rich in fat and connective tissue, this is fine. But for lean breast meat, it’s a death sentence. The secret is carryover cooking. You should pull chicken breast from the heat when a thermometer reads 155-160°F. As it rests for 5 minutes, its internal temperature will continue to rise to a perfectly safe and, more importantly, incredibly juicy 165°F. According to some food safety guidelines, 155-160°F for breast meat, not 165°F is the target for pulling it off the heat, a detail often overlooked that makes all the difference. Chicken thighs are more forgiving due to their higher fat content; you can cook them skin-side down in a cast-iron skillet for 4-5 minutes for crispy skin and juicy meat.
The Temperature Error That Adds 10 Minutes to Your Cooking Time
You’re trying to make a quick sauté, so you add oil to a pan, turn on the heat, and immediately throw in your food. The pan sizzles weakly, and your ingredients just kind of… steam. Ten minutes later, they’re pale and soggy, and you’re wondering what went wrong. This is the single most common and time-wasting mistake in home cooking: starting with a cold or underheated pan. Cooking is chemistry, and the delicious browning you want—the Maillard reaction—only happens at high temperatures (typically above 300°F). When you add cold food to a cool pan, the pan’s temperature plummets, and you enter the “steam zone.” The food releases its water, which then has to boil off before any browning can even begin. This process easily adds 10-15 minutes of wasted time and ruins the final texture.
The solution is aggressive preheating. Your pan should be hot—shimmering hot—before anything touches it. A heavy-bottomed pan, like cast iron or tri-ply stainless steel, is your best friend here because it has high thermal mass, meaning it holds onto its heat even when you add food.
Professional Chefs’ Time-Saving Pan Techniques
As a case study, Chef John from Food Wishes and J. Kenji López-Alt have demonstrated that using properly preheated, heavy-bottomed pans can slash cooking times. In testing, thin aluminum pans dropped from 425°F to an abysmal 250°F when cold food was added, causing 10-15 minutes of steaming before proper browning began. In contrast, a study of pan materials found that cast iron pans maintained 380°F+ throughout, achieving an immediate Maillard reaction and cutting total cook time nearly in half. Their recommendation is clear: invest in one quality pan that holds heat well.
Pasta Risks: How to Cook Noodles in Sauce Without Getting a Starchy Gloop?
One of the most alluring speed-cooking promises is “one-pot pasta,” where dry noodles cook directly in the sauce. The reality for most home cooks is a sticky, starchy mess. The opposite mistake is just as bad: fully cooking pasta, draining it completely, and then dumping it into a pan of sauce. This results in slippery noodles that never truly marry with the sauce. The professional solution is a technique that gives you a perfectly emulsified, restaurant-quality dish in minutes.
The secret is to treat the starchy pasta water not as waste, but as a key ingredient. It’s the glue that holds everything together. As a noted expert on cooking technique, Chef Brian Lagerstrom explains, it’s about creating a beautiful emulsion.
The Italian ‘mantecare’ technique is about creating an emulsion, not fighting starch. We finish pasta 2-3 minutes before al dente, then let it absorb the sauce while constantly tossing with pasta water and fat.
– Chef Brian Lagerstrom, YouTube Cooking Channel Analysis
This technique is a game-changer. By undercooking the pasta slightly and finishing it in a wide sauté pan with the sauce and pasta water, you allow the noodles to absorb flavor while the starch from the water emulsifies with the fat in the sauce, creating a creamy coating without any cream. Here is the foolproof method:
- Cook pasta for 2-3 minutes LESS than the package directions.
- Before draining, reserve at least 1 cup of the starchy pasta water.
- Transfer the undercooked pasta directly into a WIDE sauté pan (not a pot) containing your heated sauce.
- Add a splash of the reserved pasta water and toss vigorously over medium-high heat for 1-2 minutes. The sauce will begin to cling to the noodles.
- Turn off the heat and add your finishing fat (a knob of cold butter or a drizzle of olive oil), tossing constantly until a glossy, unified sauce forms.
How to Prep 3 Days of Dinners in 90 Minutes on Sunday?
The phrase “meal prep” often conjures images of sad, identical containers of chicken, broccoli, and rice for five days straight. This is a recipe for boredom and failure. The modern, sustainable approach is not to prep meals, but to prep components. This “Component Cooking” philosophy gives you the efficiency of prepping without sacrificing variety and flexibility. Instead of five identical meals, you create a toolkit of ingredients that can be assembled into dozens of different combinations throughout the week.
The goal is to use a 90-minute “Power Hour” on Sunday to cook your most time-consuming ingredients. Think roasted vegetables, a batch of grains like quinoa or farro, a versatile protein like shredded chicken or baked tofu, and a couple of flavorful sauces or dressings. During the week, “cooking” is reduced to a 5-minute assembly job: grab a grain, a protein, some veggies, and a sauce. This approach, popularized by creators like Alyssia Sheikh of Mind Over Munch, prevents flavor fatigue and makes healthy eating feel effortless.
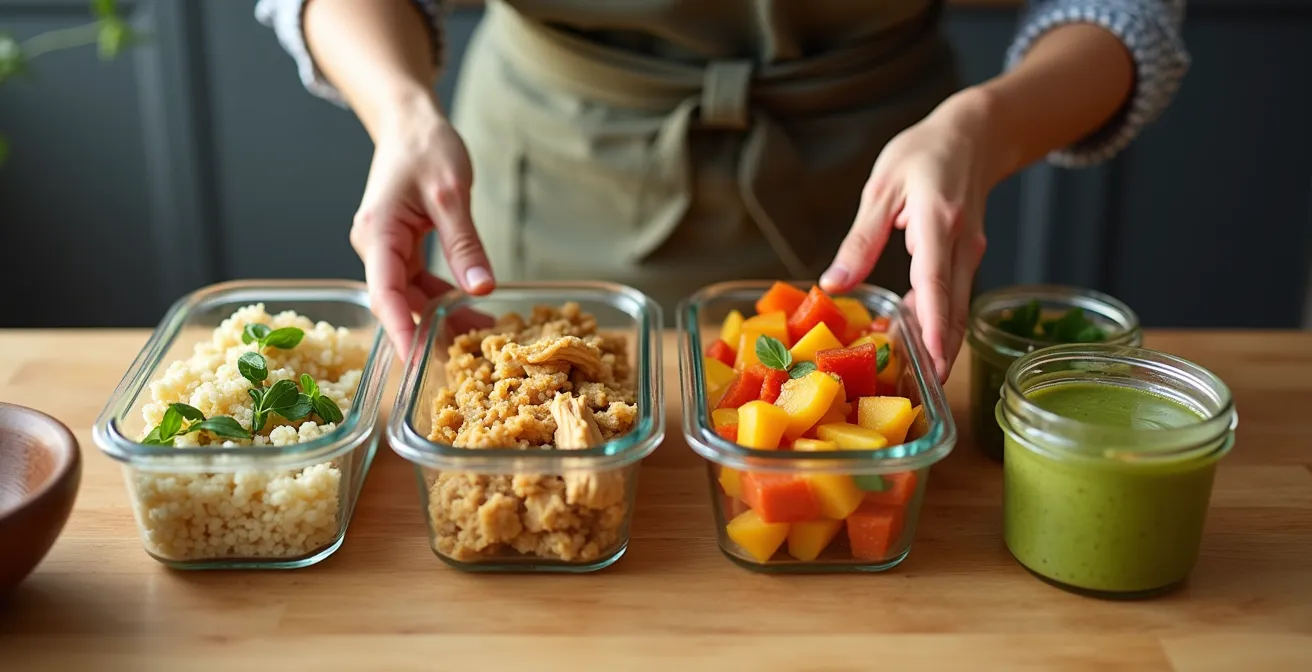
This organized, component-based system is your secret weapon against weeknight chaos. A well-executed 90-minute session can set you up for stress-free, delicious dinners for days, as detailed in this efficient timeline. This proven power-hour timeline shows how to overlap tasks for maximum efficiency.
| Time Block | Task | Equipment Used |
|---|---|---|
| 0-15 min | Preheat oven, wash & chop all vegetables | Oven, cutting board, knife |
| 15-45 min | Vegetables roasting, grain cooking on stove | Sheet pan, pot |
| 45-75 min | Cook protein, prepare vinaigrette | Skillet, mixing bowl |
| 75-90 min | Cool, portion into containers, label | Glass containers |
Meat Out, Veg In: Why You Must Cook Components Separately?
The allure of the “one-pan meal” is strong: toss everything on a sheet pan, bake, and you’re done. Minimal cleanup, maximum convenience. But this often leads to disappointing results: mushy broccoli, tough chicken, and undercooked carrots. The mistake is treating all ingredients as if they have the same needs. They don’t. Each vegetable and protein has its own ideal cooking time and temperature. Ignoring this is a surefire way to get unevenly cooked food.
The “Meat Out, Veg In” principle is about respecting these differences to achieve perfect results every time. It means you start with the ingredients that take the longest to cook, and add the quicker-cooking items in stages. For a sheet pan meal, this might mean roasting root vegetables like carrots and potatoes for 15-20 minutes *before* adding more delicate items like broccoli florets or a piece of fish for the final 10 minutes.
This isn’t about creating more work; it’s about smart timing. The differences in cooking times are significant. For example, research on vegetable cooking times shows that dense root vegetables can require double the time of watery ones. A dense carrot might need 20 minutes to become tender in a 400°F oven, while zucchini or bell peppers are perfectly cooked in 10 minutes, and delicate asparagus might only need 7. Dumping them all in at once guarantees that something will be either raw or overcooked. By staggering their entry, you ensure every single component of your meal is cooked to perfection.
Key takeaways
- Master Heat, Not Recipes: Properly preheating your pan and using the right tool (like a pressure cooker) will save you more time than any “quick recipe.”
- Cook Components, Not Meals: Prep versatile ingredients on the weekend to enable 5-minute meal assemblies during the week, killing decision fatigue and boredom.
- Respect a Food’s Properties: Cook vegetables in stages based on density and pull lean proteins like chicken breast off the heat early to let carryover cooking do the work.
The Mistake That Ruins Sautéed Mushrooms and How to Avoid It Every Time
Let’s end with a single technique that perfectly encapsulates the entire philosophy of this guide: sautéing mushrooms. The typical method is to heat oil in a pan, add the mushrooms, and sauté. The result is often slippery, grey, and underwhelming. The mushrooms release their water, which mixes with the oil, and they end up steaming in their own liquid. You get a passable result, but you miss out on the deep, savory, umami-rich flavor that makes mushrooms truly spectacular.
The professional hack, popularized by chefs like Adam Ragusea, is the “dry sauté.” It’s counter-intuitive but revolutionary. You start by adding your sliced mushrooms to a *dry, hot pan*. No oil, no butter. Crowd them in. As they heat up, they will begin to release an enormous amount of water. Your job is to let that water completely cook off. The pan will go from silent, to sizzling, to silent again. Only when the pan is quiet and the mushrooms look shrunken and start to stick should you add your fat (butter or oil) and seasonings. The fat will now be instantly absorbed, and the mushrooms will brown and caramelize in seconds, developing a flavor that is 3x more concentrated and a texture that is meaty and satisfying, not soggy.
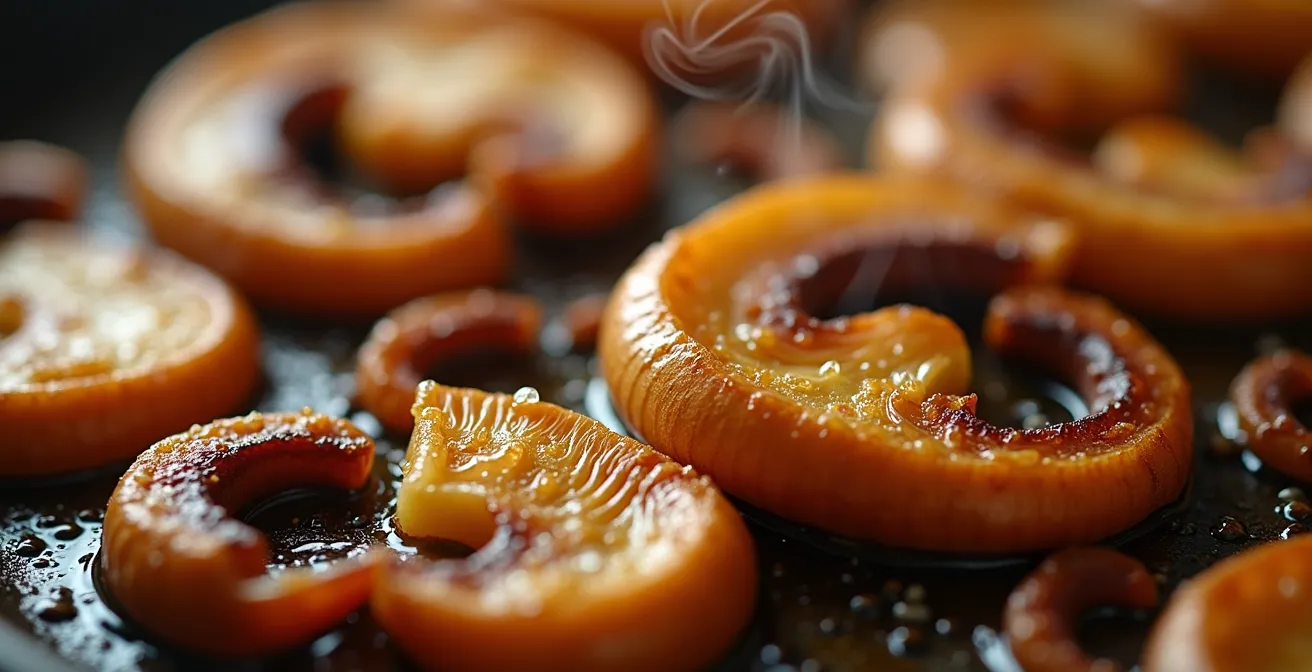
This single technique proves the point: understanding and controlling moisture is everything. It takes the same 8-10 minutes as the wrong way, but the result is dramatically superior. It’s not a shortcut; it’s just the *correct* way, and it’s faster at delivering flavor.
Start today by mastering one of these techniques. Don’t try to change everything at once. Pick one—the dry sauté, the chicken temperature pull, the pasta finish—and nail it. When you taste the difference, you’ll be motivated to master the next. This is how you build the skill and confidence to make cooking a fast, joyful, and permanent part of your life.