
The secret to a flawless Thanksgiving meal is to stop thinking like a home cook and start orchestrating like a banquet manager, focusing on thermal management and workflow over just recipes.
- Effective heat retention relies on science: using pre-warmed ceramic platters and understanding the “holding power” of each side dish.
- A professional presentation is achieved through strategic carving, thoughtful garnishing (platter architecture), and a reverse-engineered timeline.
Recommendation: Adopt the 90/10 principle—complete 90% of your prep work in the days prior, so you only have 10% of the finishing touches to execute on Thanksgiving Day.
The moment of truth arrives. After hours, or even days, of planning and cooking, you bring the magnificent Thanksgiving platter to the table. But as your 12 guests begin to serve themselves, a quiet dread sets in: the turkey is lukewarm, the sides are cooling rapidly, and the beautiful presentation is quickly becoming a chaotic heap. This is the common anxiety for any designated host. You’ve followed the recipes, but no one taught you the most critical part: the logistics of serving a large-scale, multi-component meal while maintaining both temperature and visual appeal.
Most advice revolves around familiar tips like using a slow cooker for mashed potatoes or making a simple timeline. While helpful, these are fragmented tactics, not a cohesive strategy. They don’t address the core challenge of orchestrating a dozen different elements, each with its own cooking and cooling rate. The real problem isn’t your cooking; it’s your operational system. What if the key wasn’t a new recipe, but a new mindset borrowed from the world of professional catering?
This guide will not give you more recipes. Instead, it provides a banquet chef’s system for success. We will shift the focus from mere cooking to strategic execution, exploring the principles of thermal management, workflow choreography, and platter architecture. You will learn how to choose the right equipment based on science, when to transfer each dish for optimal heat, and how to coordinate a complex meal so you can actually enjoy the celebration yourself. Forget the last-minute panic; it’s time to run your Thanksgiving dinner like a professional event.
For a detailed visual on one of the most crucial steps, the following video provides an expert guide to carving the turkey—a key moment in your platter’s presentation.
To master this professional approach, we’ve broken down the essential strategies into a clear, sequential guide. Each section addresses a critical logistical challenge, providing you with the calm, organized system needed to deliver a hot and beautiful Thanksgiving platter every time.
Summary: A Banquet Chef’s System for a Perfect Thanksgiving Platter
- How to Carve a Turkey for the Platter Without It Looking Like Scraps?
- Ceramic vs Metal Platters: Which Keeps Meat Warm Longer?
- Fresh Herbs and Citrus: How to Garnish Brown Foods to Look Appetizing?
- Stuffed Squash or Nut Roast: Which Centerpiece Pairs Best with Traditional Sides?
- When to Transfer Sides to Serving Dishes to Prevent Drying Out?
- Plated vs Family Style: Which Service Method keeps Food Hotter?
- Potatoes vs Carrots: When to Add Veggies to the Roasting Pan?
- How to Coordinate a 3-Course Celebration Dinner for 10 People Without Spending All Day in the Kitchen?
How to Carve a Turkey for the Platter Without It Looking Like Scraps?
A beautifully carved turkey is the heart of your platter’s architecture, but the process can quickly turn a majestic bird into a pile of shreds. The secret is a combination of patience and technique. First and foremost, you must let the turkey rest for at least 30 minutes after it comes out of the oven. This non-negotiable step allows the juices to redistribute throughout the meat. Carving too soon causes those juices to flood the cutting board, leaving you with dry meat and a messy station.
Once rested, the carving process should be systematic. According to detailed professional carving guides, you should dismantle the bird before slicing. Start by removing the entire leg and thigh section on each side, cutting through the skin and popping the joint. Separate the drumstick from the thigh. Next, locate the breastbone and run your knife along one side, removing the entire breast in one large piece. Place this piece on your cutting board and slice it against the grain into even, 1/4-inch thick slices. This method ensures clean, uniform pieces instead of small, ragged bits.
For platter arrangement, create a visually appealing structure. Fan the breast slices elegantly in the center of the platter, then arrange the dark meat (thighs and drumsticks) around the sides. This creates a sense of abundance and makes it easy for guests to choose their preferred cut. A professional catering trick for large crowds involves a “show” turkey and a “go” turkey. One whole bird is presented for visual impact, while a second turkey, carved in advance and reheated gently in broth, provides the readily available meat. This completely removes the pressure of carving during service.
Ceramic vs Metal Platters: Which Keeps Meat Warm Longer?
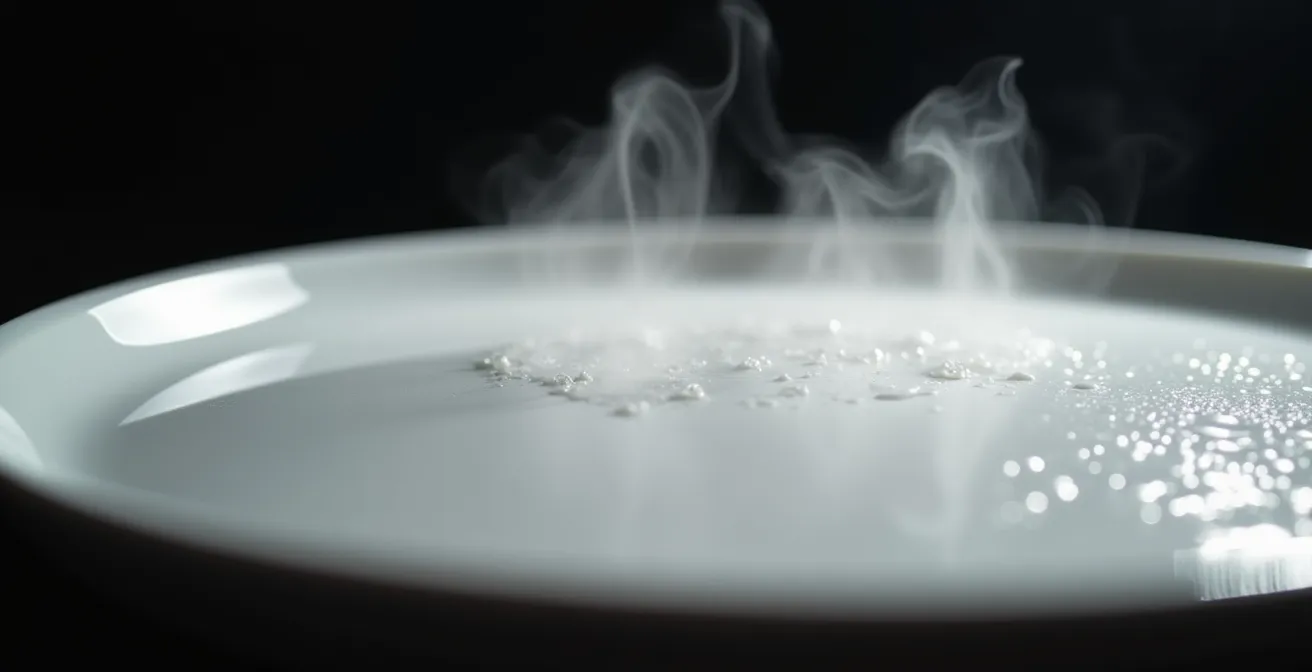
The platter you choose is not just a serving vessel; it’s a critical tool in your thermal management strategy. The material of your platter has a dramatic impact on how long your food stays hot. While a gleaming silver platter might look elegant, metal is a poor choice for heat retention unless it’s on an active warming tray. Metal has high thermal conductivity, meaning it transfers heat *away* from your food and into the cold air very quickly.
The superior choice for holding temperature is ceramic or porcelain. These materials have low thermal conductivity, so once they are heated, they release that heat slowly, helping to keep the food warm. The key is to pre-warm your ceramic platters significantly before plating. You can do this by running them under hot water for a few minutes and drying them thoroughly, or by placing them in a low-temperature oven (around 150-200°F or 65-95°C) for 10-15 minutes. A pre-warmed ceramic platter acts like a gentle warming plate, extending the life of your hot food at the table.
The difference is not trivial. In fact, recent thermal conductivity research shows that pre-warmed ceramic can hold heat significantly longer than its metal or glass counterparts. Glass, while visually appealing, often has thin walls and also loses heat quickly, making it best suited for cold dishes. For your main event, a heavy, pre-heated ceramic platter is your most reliable ally in the fight against cold food.
This comparative analysis highlights the scientific basis for choosing your serving dishes as part of a professional thermal strategy.
| Material | Thermal Conductivity | Heat Retention | Best Use Case |
|---|---|---|---|
| Ceramic/Porcelain | Low (1-1.5 W/mK) | Excellent when preheated | Traditional serving, holds temperature |
| Metal (Stainless Steel) | High (16 W/mK) | Poor without active heating | Use with warming tray or hot water bath |
| Glass | Medium (1.0 W/mK) | Poor due to thin walls | Visual presentation only |
Fresh Herbs and Citrus: How to Garnish Brown Foods to Look Appetizing?
Thanksgiving food is delicious, but it’s often a monotonous landscape of brown and beige. A strategic approach to garnishing—what we call platter architecture—is essential to make the meal as appealing to the eyes as it is to the palate. The goal is to add color, texture, and height without cluttering the platter or introducing flavors that clash. Move beyond a simple sprig of parsley and think like a food stylist.
A professional framework for garnishing focuses on a few key principles. First, apply color theory. Use the vibrant red of pomegranate arils or cranberries, the bright warmth of orange or lemon zest, and the fresh green of various herbs. Second, create height and texture. Instead of laying herbs flat, stand a few rosemary sprigs upright among the turkey slices. Scatter toasted nuts, crispy fried shallots, or seeds to add a textural contrast that also catches the light. This multi-sensory approach makes the dish more dynamic and inviting.
Finally, consider the visual flow of the platter. Use lines of cranberries or trails of finely chopped herbs to guide the eye across the dish. Place larger bundles of herbs like thyme and sage in the natural gaps between pieces of meat. When arranging sliced turkey, lean the slices against each other rather than stacking them flat; this creates an effortless, abundant look. Timing is also critical: add structural garnishes like citrus halves early, but save delicate herbs for the absolute last minute before serving to prevent wilting.
Action Plan: Platter Garnishing Framework
- Apply Color Theory: Use pomegranate arils for red accents, orange zest for warmth, and fresh herbs for green contrast to break up brown tones.
- Create Height Variation: Elevate the visual interest by standing robust garnishes like rosemary sprigs upright instead of laying them flat.
- Add Textural Contrast: Incorporate elements like toasted nuts, crispy fried shallots, or crunchy pomegranate seeds for a more complex mouthfeel and look.
- Design Visual Flow: Strategically place lines of cranberries or herb trails to guide the viewer’s eye across the platter in an appealing way.
- Time Garnish Application: Add sturdy garnishes (e.g., citrus halves) during plating, but reserve delicate herbs until the final moment to ensure freshness.
Stuffed Squash or Nut Roast: Which Centerpiece Pairs Best with Traditional Sides?
When catering to vegetarian guests, the centerpiece must be more than an afterthought; it needs to integrate seamlessly into the platter’s thermal and flavor profile. The two most common options, stuffed squash and nut roast, offer different advantages and challenges. A stuffed squash provides a rustic, “horn of plenty” aesthetic but can be messy to serve and tends to lose its structural integrity as it cools.
A nut roast, by contrast, offers a savory, umami-rich flavor profile that pairs beautifully with all traditional Thanksgiving sides, from mashed potatoes to cranberry sauce. Its firm texture allows it to be sliced cleanly, holding its shape well on the platter and making portion control effortless. From a logistical standpoint, the nut roast is often the superior choice for a large gathering due to its stability and broad flavor compatibility.

However, a top-tier professional strategy often bypasses the “single large centerpiece” problem altogether. As one professional caterer advises in a guide on catering best practices:
Instead of a single large centerpiece, create several smaller, complementary vegetarian ‘sidekicks’ that are easier to integrate onto a platter and manage thermally.
– Professional Event Caterer, Thanksgiving Catering Best Practices Guide
This approach might involve individual stuffed mushrooms, mini-quiches, or small portions of different roasted vegetables. It simplifies serving, enhances visual variety, and makes thermal management far easier than trying to keep one large, disparate item hot alongside a turkey.
The choice of a vegetarian centerpiece has significant logistical implications, as shown in this comparison.
| Option | Flavor Profile | Visual Impact | Serving Ease | Side Pairing |
|---|---|---|---|---|
| Stuffed Squash | Sweet, earthy | Rustic, horn of plenty aesthetic | Can be messy, loses structure when cooling | Complements savory sides, may clash with sweet ones |
| Nut Roast | Savory, umami-rich | Clean, modern lines when sliced | Slices cleanly, holds shape well | Pairs seamlessly with all traditional sides |
| Multiple Mini Options | Varied | Elegant individual portions | Easy portion control | Flexible pairing options |
When to Transfer Sides to Serving Dishes to Prevent Drying Out?
The moment a side dish is transferred from its cooking vessel to a serving platter, the clock starts ticking. To manage this, banquet chefs use a “holding power” classification system. Not all sides are created equal; some can be plated well in advance, while others must wait until the last possible second. Understanding this is fundamental to your workflow choreography.
Dishes can be divided into three categories based on their ability to retain heat and moisture:
- High-Hold Dishes: These are your best friends. Items with high fat and moisture content like creamed spinach, gravy, and buttery mashed potatoes can be transferred to their serving dishes 15-20 minutes before serving. Keeping them in a slow cooker on the “warm” setting is an excellent holding strategy.
- Medium-Hold Dishes: Casseroles with moderate moisture, such as green bean or sweet potato casserole, fall into this group. They should be transferred 5-10 minutes before the meal begins.
- Low-Hold Dishes: These are the most vulnerable. Roasted vegetables, bread-based stuffing, and anything with a crispy surface will dry out or go soggy quickly. They must be transferred at the absolute last minute. A professional trick is to keep a small spray bottle of warm broth or water handy to gently mist the surface of these dishes to revitalize them just before serving.
This entire system is enabled by a core principle of professional kitchens: the 90/10 rule. According to professional catering guidelines, a 90% prep with 10% finishing approach allows most dishes to be cooked almost to completion and held safely. This means on Thanksgiving Day, you are only reheating and performing the final 10% of the cooking, which dramatically reduces stress and improves timing.
Plated vs Family Style: Which Service Method keeps Food Hotter?
The way you serve the meal has a direct impact on temperature control. For a smaller, more formal gathering of up to 10 people, plated service offers maximum temperature control. Each plate is assembled in the kitchen—a “production line” setup—and served immediately. The food goes directly from a hot pan to a hot plate to the guest, minimizing heat loss. However, this requires significant coordination and effort from the host during the meal.
For a larger, more casual group of 12, family-style service (using platters on the table) is more social and requires less active effort from the host. However, it presents the greatest thermal challenge. Food sits on the table for an extended period as guests serve themselves, leading to rapid cooling. This method absolutely requires the use of pre-warmed ceramic platters and a strategic understanding of each dish’s holding power.
A brilliant compromise used by professional caterers is the hybrid model. In this setup, the main protein—the star of the show—is pre-plated in the kitchen to ensure it’s served hot and perfectly portioned. The side dishes, which generally have better holding power, are then served family-style on the table. This gives you the best of both worlds: guaranteed hot turkey for every guest and the warm, communal atmosphere of shared sides. This approach elevates the dining experience and provides a practical solution to the heat-loss problem.
Choosing a service style is a strategic decision that balances temperature, effort, and guest experience.
| Service Style | Temperature Control | Host Effort | Guest Experience | Best For |
|---|---|---|---|---|
| Plated Service | Maximum – direct from kitchen | High – requires production line setup | Formal, controlled portions | 4-10 guests, multi-course |
| Family Style | Moderate – requires active management | Lower – self-service | Communal, social, flexible | 10+ guests, casual atmosphere |
| Hybrid (Plated protein + family sides) | High for main dish | Balanced | Best of both worlds | Any size, professional result |
Potatoes vs Carrots: When to Add Veggies to the Roasting Pan?
Perfectly roasted vegetables, where every piece is tender and caramelized without being mushy or burnt, are a matter of precise timing. Simply tossing all your vegetables together on a pan is a recipe for uneven cooking. The key is to add them to the roasting pan in stages, based on their density and water content.
A universal roasting timeline begins with the hardest, most dense vegetables. Items like potatoes, carrots, parsnips, and winter squash need the longest cooking time and should go into the hot oven first. About 15-20 minutes later, add your medium-density vegetables, such as Brussels sprouts, cauliflower, and beets. Finally, with about 10-15 minutes of roasting time left, add the soft, high-water-content vegetables like zucchini, bell peppers, and mushrooms, which cook very quickly.
Another professional trick is the “size equalizer.” If you must cook different vegetables together, cut the dense ones (like potatoes) into smaller, 1-inch pieces and the softer ones (like zucchini) into larger, 2-inch chunks. This helps their cooking times sync up more effectively. However, for truly flawless results, the best practice is clear. As the Chef’s Institute’s roasting manual states:
For true professional quality, roast dense and soft vegetables on two separate sheet pans to guarantee perfect caramelization and texture for all components.
– Chef’s Institute, Professional Roasting Techniques Manual
This two-pan method gives you complete control over each vegetable, ensuring every single one is cooked to perfection. It’s an extra dish to wash, but the payoff in quality is immense and is standard practice in any high-end kitchen.
Key Takeaways
- Embrace Thermal Management: Your choice of platter and when you pre-warm it is as important as any recipe. Use heavy, pre-heated ceramic to act as a warming source.
- Master Workflow Choreography: Adopt a reverse timeline and the 90/10 prep rule. Your goal is to be a manager finishing tasks, not a cook starting them, on Thanksgiving Day.
- Design with Platter Architecture: Garnish with purpose. Use color, height, and texture to transform a simple platter into a stunning centerpiece, and carve the turkey systematically for clean, professional-looking slices.
How to Coordinate a 3-Course Celebration Dinner for 10 People Without Spending All Day in the Kitchen?
Coordinating a large, multi-course dinner is the ultimate logistical test. Success is determined not on the day of the event, but in the days leading up to it. The master tool for this is the Reverse Timeline Planning System. You start with your desired serving time (e.g., 6:00 PM on Thanksgiving) and work backward, hour by hour, day by day, scheduling every single task.
A professional workflow looks something like this:
- 2 Days Before: Complete all grocery shopping. Make any stocks, brines, or dessert bases that can be prepared in advance.
- 1 Day Before: This is your main prep day. Chop all vegetables (and store them in airtight containers). Assemble desserts. Prepare any side dishes that reheat well. Set the table.
- Morning Of: The kitchen should be calm. Your focus is solely on items that require day-of assembly or cooking, like roasting the turkey and finishing the most delicate sides.
Another crucial element of this workflow is creating an “appliance map.” Well before the day, assign each dish to a specific piece of equipment: this dish goes in the main oven, this one in the second oven, this on a specific stovetop burner, and these two will be held in slow cookers. This prevents the all-too-common scenario of discovering you need to bake two things at different temperatures simultaneously. One of the best time-saving tips is to prepare your serving dishes ahead of time. A week before, look over your menu and assign a specific bowl or platter to each dish. This helps you identify what you might need to borrow and gives you time to polish silver or wash special dishes, freeing up precious hours on the day itself.
By shifting your mindset from a cook to a banquet manager, you transform a day of potential chaos into a smooth, controlled, and successful event. This strategic approach, built on thermal management and meticulous workflow choreography, not only guarantees a hot, beautiful meal for your guests but also gives you the greatest gift of all: the time and peace of mind to enjoy the celebration yourself. The next logical step is to put this system into practice. Start planning your next large dinner by drafting your own reverse timeline and appliance map today.