In summary:
- Achieving a professional glossy finish and “snap” is not magic; it’s the science of controlled cocoa butter crystallization, known as tempering.
- The choice of material is critical: high-cocoa-butter couverture chocolate and rigid polycarbonate molds are non-negotiable for artisan results.
- Mastery lies in precision—from exact temperatures during tempering to the technique of filling and the controlled environment for storage.
- Presentation elevates the craft, using techniques like piping, quenelles, and textural garnishes to turn a simple treat into a work of art.
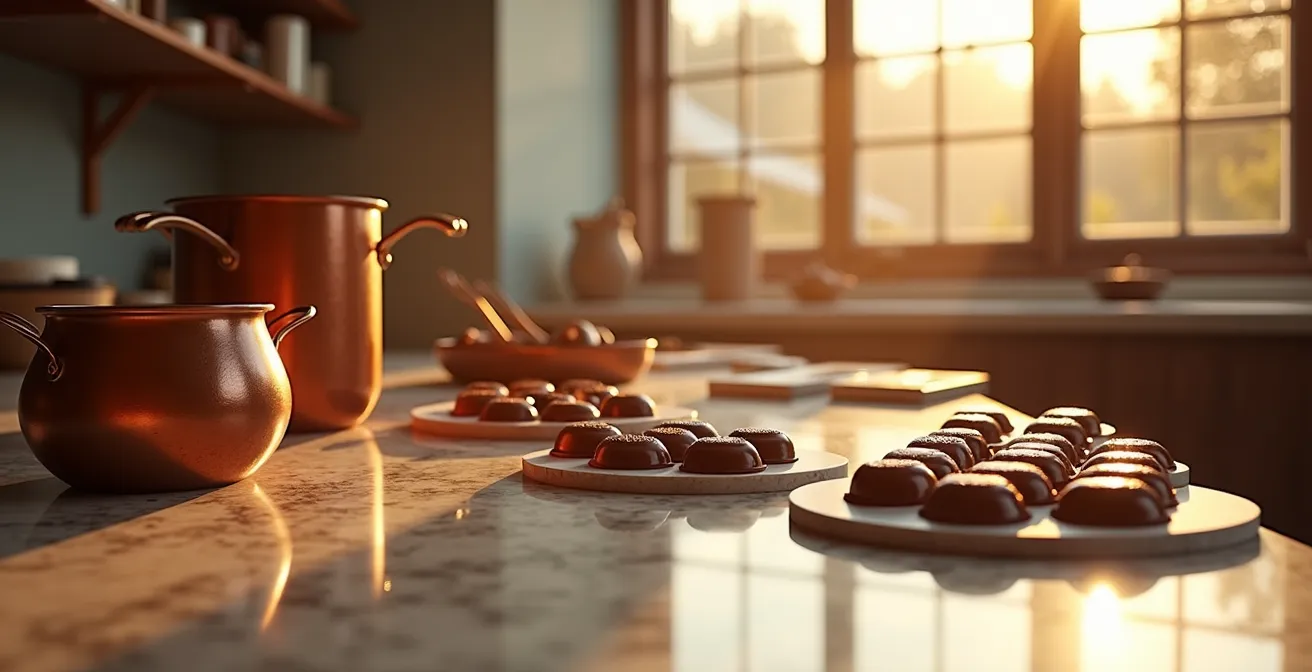
There is a unique disappointment in crafting a batch of chocolate truffles with care, only to have them emerge dull, streaky, and soft enough to melt at a touch. You followed the recipe, used good ingredients, yet the result lacks the sharp, resonant snap and brilliant sheen of a creation from a high-end chocolate boutique. Many home bakers believe this gap is bridged by secret ingredients or impossibly complex equipment. They scour the internet for tips on ganache or search for the perfect sprinkles, missing the fundamental truth.
The difference between an amateur treat and an artisan confection is not in the recipe, but in the respect for the medium itself. Chocolate is a crystalline substance, a canvas sculpted by temperature and motion. The secret isn’t about adding more, but about controlling the very structure of the cocoa butter within. It’s a dance between heating and cooling, a precise choreography that aligns crystals into a stable, beautiful form. Forget the generic advice you’ve read; the path to professional results lies in understanding the physics of chocolate.
This guide will demystify that process. We will move beyond simple melting and dipping to explore the science of crystallization, the importance of professional-grade materials, and the subtle techniques that create a flawless finish. By mastering these principles, you will learn to sculpt chocolate with the confidence and precision of a true chocolatier, transforming your homemade gifts into stunning, memorable works of edible art.
For those who learn best by watching, the following video provides a visual masterclass on the single most crucial step in this journey: tempering. It perfectly complements the detailed principles we are about to explore.
This article is structured to build your expertise progressively, from the foundational science of chocolate to advanced finishing and presentation techniques. Each section addresses a critical question, providing the knowledge you need to elevate your craft step by step.
Summary: The Art and Science of Artisan Chocolate Making
- Why Untempered Chocolate Melts in Your Hand and Looks Dull?
- How to Unmold Chocolate Bonbons Without Cracking the Shell?
- Dark Chocolate and Sea Salt: Why This Contrast Excite the Palate?
- Supermarket Chips vs Couverture: Is the Price Difference Worth It?
- When to Box Your Chocolates to Prevent Blooming During Storage?
- The “Double Dip” vs “Single Swipe”: Which yields a Smooth Top?
- Silpat or Parchment: Which is Better for Macaron Feet?
- The 4-Ingredient Chocolate Mousse That French Chefs Swear By for Dinner Parties
Why Untempered Chocolate Melts in Your Hand and Looks Dull?
The tragic state of a dull, soft, and streaky chocolate creation that melts instantly upon touch stems from a single source: unstable crystallization. When you simply melt and cool chocolate, the cocoa butter inside forms a chaotic jumble of different crystal types. These are weak, have low melting points, and reflect light poorly, resulting in that dreaded matte finish and a texture that is mushy, not crisp. The goal of a chocolatier is to coax all of the cocoa butter into one specific, stable form—the Beta V crystal. This is the secret to a professional sheen, a hard surface, and a sharp, satisfying “snap” when broken.
This process of controlled crystallization is known as tempering. It involves a precise sequence of heating, cooling, and agitation to eliminate unstable crystals and encourage the exclusive growth of the desirable Beta V form. It is not an optional step for high-quality results; it is the absolute foundation. Without it, you are merely melting chocolate. With it, you are sculpting its very structure. The seeding method is one of the most reliable techniques for home chocolatiers, as it introduces already-stable Beta V crystals into the melted chocolate to kickstart the correct crystallization process.
Your Action Plan: The 6-Step Seeding Method for Perfect Tempering
- Melt your chocolate to 40-45°C (104-113°F) in a microwave (in short bursts) or a bain-marie, ensuring no water comes into contact with it.
- Let the chocolate cool at room temperature, stirring occasionally, until it reaches 34°C for dark or 33°C for milk/white chocolate.
- Add 1% of its weight in Mycryo (powdered, crystallized cocoa butter). For 1kg of chocolate, this is just 10g. This is your “seed” of stable crystals.
- Mix thoroughly to distribute the Mycryo evenly, ensuring the stable crystals can encourage the rest of the chocolate to follow suit.
- Maintain the working temperature. The chocolate is now tempered and ready to use. Keep it at 31°C for dark or 29°C for milk/white chocolate for extended work.
- Test your temper. Spread a thin layer on parchment paper. A properly tempered chocolate will set within minutes at room temperature, exhibiting a hard, glossy finish and a clean snap.
How to Unmold Chocolate Bonbons Without Cracking the Shell?
Achieving that flawless, jewel-like bonbon requires more than just perfectly tempered chocolate; it demands an understanding of physics and the right equipment. A cracked shell or a bonbon that refuses to release is often caused by two culprits: improper cooling or the wrong type of mold. When tempered chocolate cools, it contracts slightly. This contraction is what allows it to pull away from the sides of a rigid mold, enabling a clean release. If cooling happens too quickly (e.g., in a freezer), the chocolate experiences thermal shock, causing it to contract unevenly and crack under its own tension.
This is where mold selection becomes paramount. While flexible silicone molds are popular for their ease of use in other applications, they are the enemy of a glossy, perfectly formed bonbon. They lack the rigidity to hold a precise shape and their flexibility works against the chocolate’s natural contraction, preventing a clean release. Professional chocolatiers exclusively use rigid polycarbonate molds. These molds are completely inflexible, providing a perfect canvas for a mirror-like finish and allowing the contracting chocolate to pop out with a satisfying tap. In fact, professional molds that maintain a 0.2mm thickness consistency tolerance ensure that every bonbon shell is uniform and strong.

The visual difference is stark. A bonbon from a polycarbonate mold possesses a brilliant, uniform sheen that is simply unattainable with silicone. The key to a successful unmolding is to allow the filled molds to set completely at a cool room temperature (around 18-20°C or 65-68°F) until you see a small air gap forming between the chocolate and the mold. This is the sign that contraction is complete. At this point, a simple flip and a firm tap on the counter is all that’s needed to release your perfect creations.
As this table illustrates, the initial investment in professional-grade molds pays dividends in the quality and consistency of your final product.
| Feature | Polycarbonate Molds | Silicone Molds |
|---|---|---|
| Surface Finish | Mirror-like shine, professional grade | Matte to semi-gloss finish |
| Release Quality | Clean snap release when properly tempered | Flexible but may stick if undertempered |
| Durability | 15+ years with daily use | 2-5 years depending on quality |
| Price Range | $35-75 per mold | $10-25 per mold |
| Shell Thickness Control | Precise 2mm optimal thickness | Variable thickness, less control |
Dark Chocolate and Sea Salt: Why This Contrast Excite the Palate?
The combination of rich dark chocolate and crystalline sea salt is more than a passing trend; it is a masterclass in sensory science. The magic of this pairing lies in how salt interacts with our taste receptors. The human palate perceives five basic tastes: sweet, sour, salty, bitter, and umami. Dark chocolate is beloved for its complexity, which includes both bitter notes from the cocoa solids and sweetness from the sugar. For some, the bitterness can be overpowering, but this is where salt performs its alchemy.
Salt is a natural bitterness suppressant. When a flake of sea salt dissolves on the tongue alongside chocolate, it chemically interferes with our ability to perceive the bitter compounds. This doesn’t remove the bitterness, but rather pushes it into the background, allowing the more subtle and fruity notes of the cocoa to come forward. Simultaneously, salt acts as a flavor enhancer, making the existing sweetness in the chocolate seem more pronounced and vibrant. The result is a more balanced, dynamic, and layered flavor experience. The textural contrast between the smooth, melting chocolate and the sharp, crystalline crunch of flake salt adds another layer of sensory delight.
This move towards sophisticated flavor profiles is not just an artistic choice; it reflects a broader consumer desire for more functional and exciting food experiences. As the Taste Tomorrow research team highlights in their industry forecast, this is a clear market trend. They note that consumers seeking benefits like focus or a mood boost are increasingly drawn to chocolates with unique and engaging flavor contrasts. The simple addition of sea salt transforms a piece of chocolate from a simple sweet into a complex, palate-awakening event.
Supermarket Chips vs Couverture: Is the Price Difference Worth It?
In the aisles of a supermarket, bags of chocolate chips sit next to bars of baking chocolate, all seeming to serve the same purpose. Yet, for the aspiring chocolatier, the difference between these products and true couverture chocolate is as vast as the difference between a sketch and a finished oil painting. The distinction, and the justification for the price difference, comes down to one critical ingredient: cocoa butter. The key difference professional chocolatiers know is that couverture contains 31-39% cocoa butter, while standard chocolate chips or baking bars often contain as little as 10-12%.
This higher percentage of cocoa butter gives couverture its signature quality: a high degree of fluidity or “viscosity” when melted. This fluidity is essential for the delicate work of creating thin, even shells for bonbons, enrobing truffles with a sleek coating, or crafting intricate decorations. Supermarket chocolate chips, by contrast, are formulated with less cocoa butter and often contain stabilizers like soy lecithin precisely so they hold their shape during baking. Attempting to use them for fine chocolate work results in a thick, sludgy consistency that is difficult to temper and yields clunky, unprofessional results.
Furthermore, the cost of using cheaper chocolate is not just in the final aesthetic. Professional chocolatiers report that the inconsistent performance and poor tempering qualities of lower-grade chocolate lead to a higher rate of failure, resulting in wasted ingredients and time. When you invest in high-quality couverture, you are paying for consistency, workability, and a superior mouthfeel—that signature silky melt-in-the-mouth texture that can only come from a high cocoa butter content. For anyone serious about creating artisan-level chocolates, the answer is unequivocal: the price difference is not just worth it; it is essential.
When to Box Your Chocolates to Prevent Blooming During Storage?
You have successfully tempered, molded, and filled a batch of beautiful, glossy chocolates. The final, and often overlooked, step is preserving that perfection. Boxing your creations at the wrong time or storing them in the wrong conditions can quickly lead to “bloom,” a dreaded whitish or grayish film on the surface. There are two types of bloom: sugar bloom, caused by moisture dissolving sugar on the surface, and fat bloom, caused by unstable cocoa butter crystals migrating to the exterior. Both are the enemy of an artisan finish and are entirely preventable.
The cardinal rule is to ensure your chocolates have fully crystallized before they are handled or packaged. This is not a process to be rushed. While a thin coating might feel firm to the touch in minutes, the crystal structure throughout a thicker shell or a ganache-filled bonbon takes much longer to stabilize. Moving or packaging them prematurely can disrupt this delicate process, leading to fat bloom later on. For ganache-filled chocolates, a full 24 hours of crystallization at a controlled room temperature of 18-20°C (65-68°F) is the professional standard before they should even be considered for boxing.
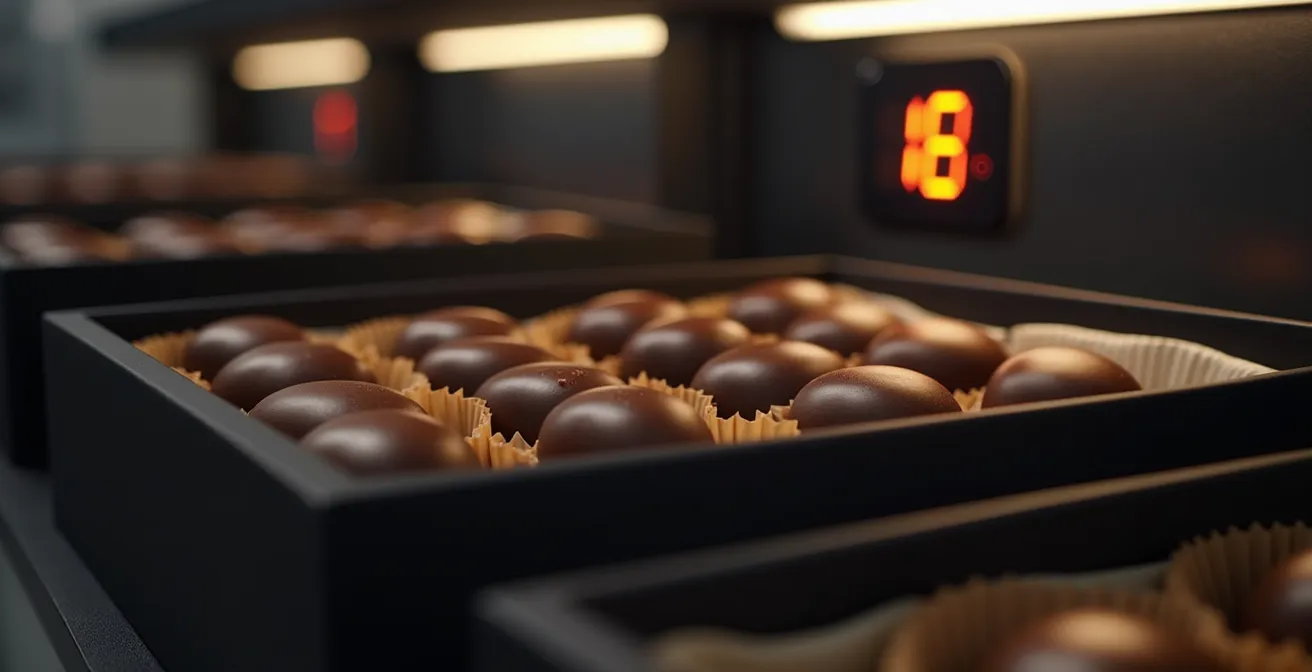
Once crystallized, the storage environment is everything. Humidity is the primary cause of sugar bloom, so chocolates must be kept in a dry place, ideally with less than 50% humidity. Never transfer chocolates directly from a cool refrigerator to a warm room; this temperature shock will cause condensation to form on their surface, instantly triggering sugar bloom. Always place them in an airtight container first to allow for gradual acclimatization. When boxing, use glassine paper dividers to prevent scuffing and fill the box as completely as possible to minimize air circulation, which can carry moisture and odors.
Your Action Plan: Professional Chocolate Storage and Packaging
- Allow tempered chocolates to crystallize fully at a cool, stable room temperature (18-20°C / 65-68°F). This can take up to 24 hours for filled bonbons.
- Never move chocolates directly from a cool environment to a warm one. Use an airtight container to let them acclimate gradually and prevent condensation.
- Store finished chocolates in a dark, dry environment with humidity below 50% to prevent sugar bloom.
- When boxing, use glassine paper or candy cups to separate individual pieces and prevent them from scuffing each other.
- Fill the box completely to minimize air circulation, which can introduce moisture and accelerate the blooming process.
The “Double Dip” vs “Single Swipe”: Which yields a Smooth Top?
When filling a polycarbonate mold with tempered chocolate to create a shell, the final step before the chocolate sets is to scrape the surface clean, leaving only the chocolate that lines the cavities. This seemingly simple action is a moment where artistry and physics converge, and it’s what separates a clean, professional base from a messy, uneven one. Many beginners are tempted to “double dip” or go back and forth with their scraper, trying to perfect the surface. This is a crucial mistake. The secret to a perfectly smooth, flat top is the “single swipe” method.
Using a firm but flexible offset spatula or a bench scraper, you must execute a single, confident, continuous swipe across the entire surface of the mold at a 45-degree angle. This technique works because it leverages the principles of fluid dynamics. As one professional guide explains, the physics behind this is that a single, confident swipe creates a perfectly flat surface by leveraging the surface tension of the liquid chocolate. The continuous motion creates a clean shear, removing the excess chocolate without disturbing the material that has already coated the cavities. A second pass, or a hesitant, stuttering motion, disrupts this tension, dragging chocolate back over cleaned areas and creating ridges, low spots, and an unprofessional finish.
This isn’t just a niche technique for small-scale artisans; it is a recognized standard for efficiency and quality in the professional world. For instance, as the Brazilian chocolate industry modernized, the implementation of proper single-swipe techniques became standard practice in facilities aiming for premium, consistent results. For the home chocolatier, this means investing in a good quality, wide bench scraper and practicing that single, decisive movement. It may feel daunting at first, but mastering the single swipe is a hallmark of an efficient and precise chocolatier.
Silpat or Parchment: Which is Better for Macaron Feet?
While not strictly a chocolate confection, the French macaron shares a critical principle with artisan chocolate making: precision and the interaction between your medium and your surface are everything. A common debate among bakers is whether a Silpat (silicone mat) or parchment paper is superior for achieving the coveted “feet”—the delicate, ruffled base of a perfect macaron shell. While both can yield good results, they function very differently, and understanding the science reveals why parchment paper often has the edge for developing taller, more pronounced feet.
The difference lies in heat transfer and surface grip. A silicone mat is an insulator, meaning it transfers heat to the macaron batter more gently and slowly. Parchment paper is a conductor, transferring heat from the baking sheet more directly and quickly. More importantly, parchment paper has a slight texture that allows the sticky macaron batter to “grip” the surface. This grip is crucial. As the macaron bakes and the leavening agent activates, this surface grip forces the batter to rise directly upwards, creating the classic tall, vertical feet. A Silpat, with its slicker surface, provides less grip. This can cause the batter to spread slightly outwards before it rises, resulting in feet that are wider and shorter.
A professional baker’s comparison study confirms this, noting that after extensive testing, parchment paper produces more consistent and well-defined feet. The key is that the macaron batter must form a skin before the parchment has a chance to warp from the heat. Using a high-quality, heavy-duty parchment paper is therefore essential to prevent the lopsided shells that can result from a warped surface. The choice is a trade-off between the reusability of silicone and the superior results often provided by parchment.
This comparative table breaks down the key differences to help you make an informed choice for your baking needs.
| Factor | Silpat/Silicone Mat | Parchment Paper |
|---|---|---|
| Heat Transfer | Insulator – gentler, even bake | Conductor – direct heat, faster rise |
| Feet Formation | Lower, wider spread | Taller, more pronounced feet |
| Surface Grip | Slick – may cause outward spread | Better grip – forces upward rise |
| Temperature Adjustment | May need 5-10°F higher | Standard recipe temperatures |
| Baking Time | 1-2 minutes longer needed | Standard timing |
| Cost | $15-30 one-time purchase | Recurring cost but consistent results |
Key takeaways
- Tempering is the non-negotiable scientific foundation for all high-quality chocolate work, responsible for shine, snap, and stability.
- The material matters: high-fluidity couverture chocolate and rigid polycarbonate molds are essential investments for achieving an artisan aesthetic.
- Temperature control is paramount at every stage, from the precise working temperatures of chocolate to the cool, stable environment required for crystallization and storage to prevent bloom.
The 4-Ingredient Chocolate Mousse That French Chefs Swear By for Dinner Parties
After mastering the technicalities of tempering and molding, it is a joy to apply these principles to a creation that is pure, decadent simplicity: the classic French chocolate mousse. Stripped of unnecessary additions like gelatin or cornstarch, the authentic mousse relies on just four ingredients: high-quality dark chocolate, eggs, a touch of sugar, and butter or cream. Its magic comes not from a long list of ingredients, but from technique and the quality of the chocolate itself. This is where your knowledge becomes transformative.
Using a finely crafted couverture chocolate with a high cocoa percentage (70% is ideal) will provide a depth of flavor that a standard baking bar simply cannot match. The mousse’s texture is created by air, meticulously folded in. First, egg yolks are beaten with sugar until pale and ribbony, then combined with the melted chocolate and butter mixture. The final, critical step is folding in stiffly beaten egg whites, which act as the sole leavening agent, creating a finished product that is impossibly light yet intensely flavorful. The stability of the mousse relies on the chocolate’s ability to set as it cools—a process that works best with the high cocoa butter content of couverture.
However, what truly elevates this simple dessert from a homey treat to a dinner-party showstopper is the presentation. A French chef would never simply spoon mousse into a bowl. This is your canvas to demonstrate your new-found artistry. Applying professional plating techniques transforms the experience, proving that elegance lies in the details. Your guests will not just taste the quality; they will see it.
Your Action Plan: Professional Mousse Presentation
- Use a piping bag fitted with a large star tip to pipe elegant rosettes into serving glasses, creating defined, restaurant-quality ridges.
- Create sophisticated “quenelles” by shaping the mousse with two spoons dipped in hot water, forming a smooth, three-sided oval to place on a plate.
- Serve in clear glass verrines or cocktail coupes to showcase the silky, airy layers of the mousse.
- Add textural and visual contrast with a shard of your own tempered chocolate, placed at a sharp angle into the mousse.
- Garnish with a light dusting of high-quality cocoa powder applied through a fine-mesh sieve for a soft, professional finish.
Your journey to becoming a home chocolatier begins not with the first recipe, but with the first perfectly tempered batch. Begin practicing these foundational techniques today and transform your creations from homemade treats into edible art.