The perfect mousse texture is not a matter of preference between egg whites and cream, but a direct result of mastering two different physical structures: the protein network and the fat globule matrix.
- Egg white foams create an extremely light, airy texture via a delicate, water-based protein web (albumin) that requires precise folding techniques.
- Heavy cream builds a richer, denser structure through the crystallization and stabilization of fat globules, which offer more stability but less initial volume.
Recommendation: To control the final texture, focus less on the base ingredient and more on the scientific principles of temperature control and mechanical aeration for that specific base.
The debate between a classic French mousse au chocolat, built on the ethereal lightness of egg whites, and its richer American counterpart, often reliant on the decadent body of heavy cream, is more than a culinary preference. It is a lesson in food science. For the dessert lover seeking to master the art of mousse, understanding the “why” behind the texture is paramount. The choice is not simply between two ingredients, but between two fundamentally different methods of creating and stabilizing an aerated structure.
While many recipes focus on the quality of chocolate or the ratio of ingredients, they often gloss over the critical scientific principles at play. The true secret to a sublime mousse lies in the precise manipulation of proteins and fats at a molecular level. It’s about creating a stable emulsion—a delicate balance of fat from the chocolate and water from the egg whites or cream—and trapping air within it. The difference between a light, cloud-like spoonful and a dense, heavy pudding is determined by your understanding of this core concept.
This analysis moves beyond the recipe card and into the culinary lab. We will dissect the physical properties of each base, exploring how one forms a delicate protein network while the other relies on fat globule crystallization. By understanding the science of aeration, the perils of thermal shock, the chemistry of stabilizers, and the physics of chilling, you can learn to control the final texture with scientific precision, regardless of the ingredients you choose.
This guide will deconstruct the essential technical aspects of mousse creation. By examining each stage of the process from a scientific perspective, you will gain the knowledge to not only replicate recipes but to troubleshoot, innovate, and consistently produce mousse with the exact texture you desire.
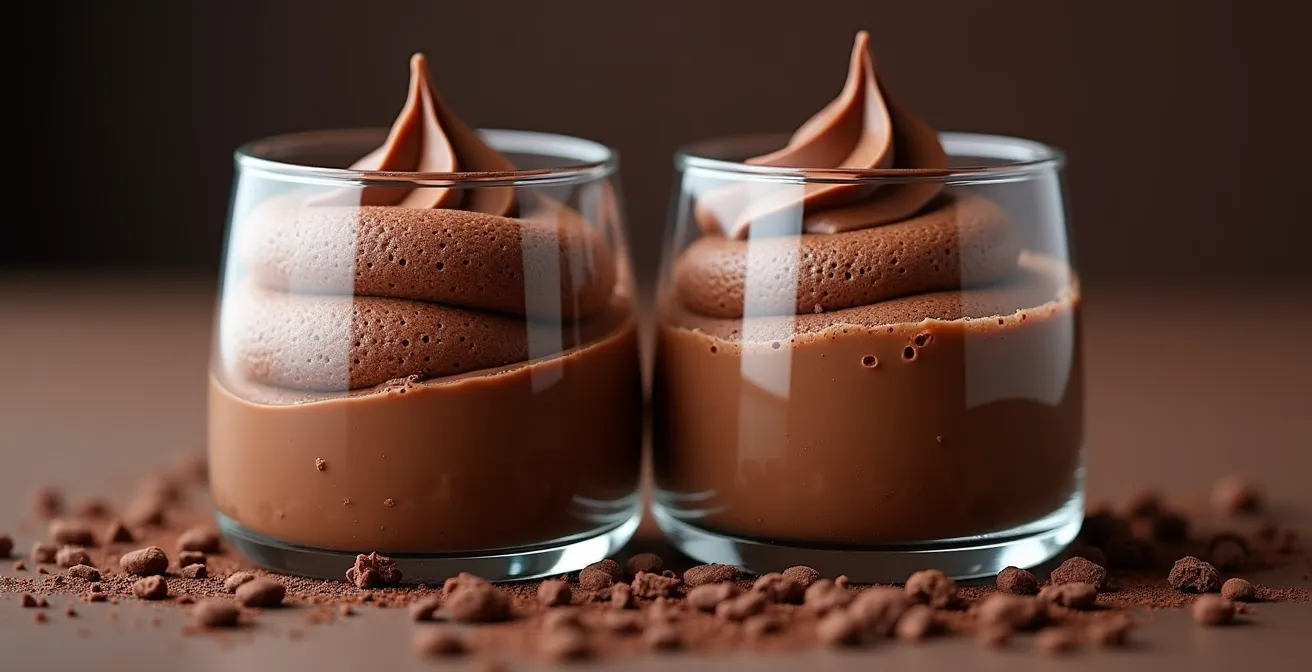
Summary: Egg Whites or Heavy Cream: Which Base Creates the Most Airy Mousse Structure?
- How to Fold Egg Whites into Base Without Deflating the Air?
- Powder vs Leaf Gelatin: How to Bloom Each for Smooth Mousse?
- The Temperature Shock That Causes Lumps in Your Mousse Base
- Why You Must Chill Mousse for 4 Hours Before Serving?
- Glass vs Ceramic: Which Vessel Maintains Mousse Temperature Best?
- Cold Batter or Hot Oil: What Makes Yorkshire Puddings Rise High?
- Almond Flour Grittiness: How to Sift for a Finer Cake Crumb?
- The 4-Ingredient Chocolate Mousse That French Chefs Swear By for Dinner Parties
How to Fold Egg Whites into Base Without Deflating the Air?
The ethereal structure of a French-style mousse is built entirely on the air trapped within a whipped egg white foam. This foam is a delicate network of unfolded albumin proteins linked together around air bubbles. The primary goal of folding is to incorporate the dense chocolate base into this fragile structure with minimal collapse. Vigorous stirring or improper technique will instantly rupture these air pockets, turning your potential mousse into a liquid. The key is a gradual, gentle incorporation that respects the physics of the foam.
The process begins by lightening the base. A small portion of the whipped whites is sacrificially mixed into the chocolate. This makes the base less dense and viscous, preparing it to be more easily accepted by the remaining foam. Then, critically, the lightened base is poured over the whites, not the other way around. This allows the heavier mixture to sink, enabling a “lift and fold” motion from the bottom up that is far gentler than trying to push heavy chocolate through light foam. As Nagi Maehashi of RecipeTin Eats warns, “Don’t beat furiously – that’s the sure fire way to a pot of liquid chocolate!” The illustration below captures this essential, gentle motion.

The choice of tool is also significant. A large balloon whisk or a flexible spatula provides a greater surface area for lifting, accomplishing the task in fewer, more effective movements. The goal is to stop folding as soon as the last white streaks disappear. Over-mixing, even if gentle, will progressively deflate the protein network, leading to a denser final product. It is a balance between homogeneity and aeration.
Action Plan: Preserving Mousse Aeration with a Professional Folding Technique
- Lighten the Base: Take 1/4 of the whipped egg whites and mix them into the chocolate base to reduce its density.
- Pour, Don’t Dump: Pour the now-lighter chocolate mixture into the bowl containing the remaining 3/4 of the egg whites.
- Use the Right Tool: Employ a large balloon whisk or a wide, flexible spatula for broad, lifting motions instead of stirring.
- Fold, Don’t Stir: Perform gentle folding motions from the bottom of the bowl to the top, aiming for a maximum of 12 movements.
- Know When to Stop: Cease folding as soon as no large white streaks remain, even if the mixture is not perfectly uniform.
Powder vs Leaf Gelatin: How to Bloom Each for Smooth Mousse?
While traditional French mousse relies on egg whites and chocolate alone, many modern recipes, especially those using heavy cream or fruit purées, incorporate gelatin for added stability. Gelatin provides a structural safety net, ensuring the mousse sets firmly and doesn’t weep over time. However, improper preparation of gelatin is a primary cause of lumpy, unpleasant textures. The key to a smooth result lies in correctly “blooming” it—the process of hydrating its granules or sheets in cold liquid before melting.
For powder gelatin, it’s crucial to sprinkle the granules evenly over the surface of a cold liquid (typically water), never dumping them in a pile. This ensures each granule is individually exposed to the liquid and can hydrate fully. For sheet gelatin, the sheets must be submerged in a generous amount of cold water for 5-10 minutes until soft and pliable. Using hot water is a critical error for both types; it causes the exterior of the gelatin to swell and “seal” itself instantly, preventing water from reaching the center and leaving you with undissolved, rubbery lumps in your final mousse.
Beyond technique, the type of gelatin matters. Gelatins are graded by “bloom strength,” a measure of their gelling power. This is why simply substituting powder for sheets (or vice-versa) by weight can lead to disastrous results. A high-bloom gelatin (like Gold or Platinum) is much stronger than a low-bloom one, meaning you need less of it to achieve the same setting power. Understanding this conversion is essential for adapting recipes or using different gelatin brands.
This table, based on data regarding gelatin bloom strengths, provides a clear guide for converting between different types. Using it allows a cook to adjust recipes with scientific accuracy, ensuring a consistent texture every time.
| Gelatin Type | Bloom Strength | Weight per Sheet | Conversion Factor |
|---|---|---|---|
| Titanium | 100-125 | 5g | 1.0 |
| Bronze | 125-155 | 3.3g | 0.8 |
| Silver | 160 | 2.5g | 0.62 |
| Gold | 190-220 | 2g | 0.5 |
| Platinum | 235-265 | 1.7g | 0.42 |
The Temperature Shock That Causes Lumps in Your Mousse Base
One of the most common and frustrating failures in mousse making is “seizing,” where smooth, glossy melted chocolate suddenly becomes a thick, grainy, or lumpy mess. This phenomenon is a classic example of a thermal shock breaking an emulsion. Chocolate is a delicate suspension of cocoa solids and sugar in cocoa butter (fat). When a much colder ingredient, like cream or egg yolks straight from the refrigerator, is added to warm melted chocolate, the temperature drop is too rapid. The cocoa butter solidifies instantly and separates from the other components, resulting in a gritty texture.
To prevent this, temperature control is not just a suggestion; it’s a rule of physics. The goal is to combine ingredients that are within a similar temperature range. Professional chocolatiers understand this critical threshold. According to the experts at Valrhona, it is best to work with melted chocolate between 45-50°C (113-120°F). At this temperature, the chocolate is fluid enough to incorporate other ingredients but not so hot that it will cook eggs or melt whipped cream on contact.

The technique of “tempering” an ingredient is the practical solution to this problem. Instead of adding all your cold cream to the warm chocolate at once, you add a small amount of the warm chocolate to your cold cream and whisk it in. This gently raises the cream’s temperature. You can then add this “tempered” mixture back into the main bowl of chocolate without causing a drastic temperature drop. This gradual introduction maintains the stability of the emulsion and is the secret to a silky-smooth mousse base every time.
Why You Must Chill Mousse for 4 Hours Before Serving?
A freshly made mousse, while perfectly aerated, is still in a semi-liquid state. The final, crucial step in its creation is chilling. This is not merely to make it cold; it is a transformative process where the mousse undergoes a structural set. During this time, the fats and proteins that were dispersed in the liquid phase solidify and lock the air bubbles into a stable, sliceable matrix. Skipping or rushing this step is the difference between serving a luxurious foam and a chocolate soup.
The time required for this process to complete depends on the mousse’s composition. For a mousse stabilized by the cocoa butter in chocolate and the proteins in eggs, pastry chefs recommend a minimum chilling time. An analysis of professional recipes shows that you should chill mousse for at least 2 hours, with 6 to 8 hours being optimal for the best texture. During these hours, a clear evolution occurs within the mousse’s structure. It transitions from a delicate foam to a stable solid.
The timeline of this textural evolution can be broken down into distinct phases:
- 0-1 Hour: The mousse is largely liquid. The fat globules (from cream or cocoa butter) and protein networks (from eggs or gelatin) begin to cool and form initial, weak bonds.
- 2 Hours: A soft-set consistency is achieved. The mousse is scoopable but still very delicate. This is the absolute minimum time before serving.
- 4-6 Hours: The ideal texture is reached. The structure is fully formed, providing the perfect balance of aeration and firmness. The flavors have also had time to meld and deepen.
- 8-24 Hours: The mousse reaches maximum stability. This is ideal for mousses that need to be unmolded or used in complex layered desserts.
- 24+ Hours: The structure can begin to degrade. The mousse may become overly firm or rubbery as it slowly loses moisture, especially if not covered properly.
Glass vs Ceramic: Which Vessel Maintains Mousse Temperature Best?
Once your mousse is perfected, the choice of serving vessel becomes the final factor in controlling the diner’s experience. While often seen as a purely aesthetic choice, the material of the vessel—be it glass, ceramic, or metal—has a direct impact on the mousse’s temperature due to a physical property called thermal conductivity. This measures how quickly a material transfers heat. A material with low thermal conductivity is a good insulator, while one with high conductivity will transfer heat (or cold) rapidly.
For serving a delicate, chilled dessert like mousse, you generally want a vessel that insulates well, keeping the mousse cold and stable for as long as possible after it leaves the refrigerator. This is particularly important for buffet service or leisurely dining. Ceramic and porcelain are excellent insulators because of their porous internal structure and low thermal conductivity. They will keep the mousse at its ideal serving temperature for longer. Glass is a moderate insulator, offering a balance between temperature stability and the visual appeal of seeing the mousse’s layers.
Stainless steel, by contrast, has a very high thermal conductivity. A mousse served in a steel cup will warm up very quickly as the metal rapidly absorbs heat from the surrounding air and the diner’s hand. Its best use is for quick-service applications or when the vessels themselves have been pre-chilled in a freezer to help maintain the initial temperature. The following table breaks down these properties clearly, offering a scientific basis for your choice of serving ware.
This data, based on a general analysis of the thermal properties of common materials, highlights the significant performance differences between vessel types.
| Material | Thermal Conductivity (W/mK) | Cooling Rate | Best Use Case |
|---|---|---|---|
| Glass | 1.1 | Medium | Visual presentation, layered desserts |
| Ceramic/Porcelain | 3.8 | Slowest | Buffet service, longer serving times |
| Stainless Steel | 14.3 | Fastest | Quick service, pre-chilled vessels |
Cold Batter or Hot Oil: What Makes Yorkshire Puddings Rise High?
While seemingly unrelated to chocolate mousse, the dramatic rise of a Yorkshire pudding offers a powerful lesson in the physics of aeration. The spectacular puff of a Yorkshire pudding isn’t caused by a chemical leavener like baking powder, but by the rapid expansion of water into steam. The key is the extreme temperature differential: a cold, liquid batter hitting a layer of searingly hot oil. This thermal shock instantly converts the water in the batter into a large volume of steam, which violently pushes the batter upwards and outwards, creating the signature hollow, airy structure.
This principle of heat-driven expansion has a direct parallel in the world of desserts, particularly in baked mousses or soufflés. While a chilled mousse relies on a pre-established air bubble network, a baked soufflé uses the same physics as a Yorkshire pudding. The air bubbles whipped into the egg-white base act as nucleation sites. When placed in the oven, the heat causes the air and water vapor trapped in those bubbles to expand dramatically, forcing the entire structure to rise.
Understanding this connection reveals a universal principle of culinary aeration: whether it’s the cold-set network of a chocolate mousse or the steam-powered lift of a Yorkshire pudding, creating a light texture is about first trapping gas (air or water vapor) and then stabilizing the structure around it. The method changes, but the fundamental physics remains the same. The mastery lies in choosing the right method for the desired outcome.
Almond Flour Grittiness: How to Sift for a Finer Cake Crumb?
The issue of grittiness from almond flour in a cake crumb provides another valuable parallel for the aspiring mousse-maker. The texture of a fine cake depends on a homogenous batter where all particles are evenly sized and distributed. Coarse particles of almond flour create interruptions in the delicate cake structure, resulting in a sandy or gritty mouthfeel. The solution is meticulous sifting, which removes larger particles and aerates the flour, allowing it to incorporate more smoothly into the emulsion of fat, sugar, and eggs.
This exact principle applies directly to achieving a silky-smooth chocolate mousse. The primary dry ingredient, cocoa powder (or powdered sugar in some recipes), can be a major source of grittiness if not handled correctly. Cocoa powder has a tendency to clump due to moisture and static electricity. If these clumps are not broken up, they will fail to dissolve properly in the mousse base, remaining as tiny, gritty pockets of dry powder in the final product. Just like with almond flour, these clumps disrupt the continuous, smooth emulsion.
Therefore, sifting is not an optional step for achieving a premium texture. By sifting your cocoa powder, you are doing two things: you are filtering out any hardened clumps, and you are aerating the powder, increasing its surface area. This allows it to hydrate and dissolve almost instantly when introduced to the liquid components of the mousse base. This simple mechanical step is a form of quality control, ensuring that no textural imperfections from dry ingredients compromise the final, velvety consistency you’ve worked so hard to create.
Key Takeaways
- Folding is Physics: The goal of folding is to preserve the egg white protein network. Lighten the base first, then gently lift from the bottom up.
- Temperature is Everything: To avoid a grainy, seized mousse, ensure all ingredients are at similar temperatures. Add warm to cold, not the other way around, to prevent thermal shock.
- Chilling is Transformation: The mandatory chilling period allows the mousse’s structure (fats and proteins) to solidify, turning a liquid foam into a stable solid. 4-6 hours is optimal.
The 4-Ingredient Chocolate Mousse That French Chefs Swear By for Dinner Parties
After dissecting the complex science of aeration, stabilization, and temperature, it may seem that a perfect mousse requires a laboratory of equipment and ingredients. However, a deep understanding of these principles can lead to the opposite: profound simplicity. The ultimate proof is found in a minimalist approach to mousse, one that relies on technique and physics rather than a long ingredient list. This is where the work of French molecular gastronomist Hervé This becomes so illuminating.
By understanding that chocolate is already a perfect emulsion of fat (cocoa butter) and solids, This demonstrated that a sublime mousse could be created with nothing more than chocolate and water. This method strips away the traditional stabilizers of eggs and cream, relying purely on the scientific principles of emulsion and aeration. It’s a testament to the idea that if you control the variables of temperature and agitation correctly, the ingredients themselves will do the work.
This minimalist philosophy is the secret behind the elegant, seemingly effortless mousses served at French dinner parties. They are not about complexity, but about the mastery of core principles to achieve a pure, intense chocolate flavor with a light, airy texture. This is a powerful lesson for any dessert enthusiast: the path to mastery is not through adding more ingredients, but by deeply understanding the function of each one.
Case Study: Hervé This’s Revolutionary Chocolate-Water Mousse
French molecular gastronomist Hervé This revolutionized chocolate mousse by creating a version with just chocolate and water. By melting high-quality chocolate with a small amount of water and then whipping it vigorously over an ice bath, he forces the mixture to cool and thicken rapidly, trapping air and forming a stable emulsion. This technique, which inspired many 4-ingredient “no-egg” recipes, achieves an elegant, gourmet result with a rich chocolate flavor and a surprisingly light, airy texture. It proves that the structural set can be achieved through pure temperature control and mechanical action, without the need for eggs or cream.
Now that you understand the science behind a perfect mousse, the next logical step is to apply this knowledge. Start by choosing one method—egg white or heavy cream—and focus on executing the technique with attention to temperature and motion to create the ideal texture.