
The key to perfectly smooth custard isn’t just constant whisking; it’s understanding how different starches control structural integrity and mouthfeel.
- Flour provides superior structure for fillings like éclairs due to its protein content, while cornstarch offers a glossier, more delicate set.
- Temperature control is non-negotiable: mastering tempering and cooking to the precise point of starch gelatinization (around 175-180°F) prevents both scrambled eggs and a raw, starchy taste.
Recommendation: For fillings that need to hold their shape, a 70/30 blend of flour to cornstarch offers the best of both worlds: stability and a smooth texture.
The pursuit of the perfect crème pâtissière is a rite of passage for any home cook. We’ve all been there: following a recipe to the letter, only to be met with a bowl of sweet, scrambled eggs or a filling that tastes faintly of raw flour. The common advice is to “whisk constantly” and “add the milk slowly,” but these instructions are merely symptoms of a deeper process. True mastery of custard lies not in a recipe, but in technique, and technique is simply applied science.
The frustration of a lumpy custard is a universal baking tragedy. To overcome it, we must move beyond simply following steps and begin to understand the ‘why’ behind them. This guide demystifies the process, shifting the focus from rote memorization to a genuine comprehension of the ingredients. The real secret to a professional-grade, silky-smooth custard is not a magic ingredient, but a fundamental understanding of how eggs and starches react to heat. It’s about controlling protein coagulation and starch gelatinization with precision.
In this guide, we will break down the essential techniques that separate amateur attempts from professional results. We will explore the science of tempering, the debate over skin prevention, the optimal way to infuse flavor, and the critical role of your thickener in achieving the perfect consistency for everything from a simple tart to a structurally sound éclair. By the end, you will not just have a recipe, but the knowledge to troubleshoot and perfect any custard you make.
For those who prefer a more hands-on, visual approach, the following video showcases how mastering core cooking techniques can lead to wonderfully creative and delicious results, applying the same principles of precision and ingredient understanding we’ll discuss.
This article provides a comprehensive look at the key decisions you’ll face when making custard. From the foundational techniques to the final finishing touches, each section is designed to build your confidence and expertise.
Summary: The Ultimate Guide to Perfectly Smooth Custard Cream
- How to Pour Hot Milk into Eggs Without Scrambling Them?
- Plastic Wrap on Surface: The Only Way to Prevent Custard Skin?
- Vanilla Bean: Steep in Milk or Add Seeds at the End?
- When to Strain Your Custard to Remove Chalaza and Lumps?
- How to Fold Whipped Cream into Cold Custard for Diplomat Cream?
- How Thick Should Pastry Cream Be to Support the Éclair Structure?
- Avocado vs Coconut Cream: Which Low-Carb Fat Emulsifies Best in Soups?
- Essential French Patisserie Tools: What Do You Really Need to Start Baking Like a Parisian?
How to Pour Hot Milk into Eggs Without Scrambling Them?
The most dreaded moment in custard making is turning your silky base into sweet scrambled eggs. This happens due to a phenomenon called thermal shock, where the delicate proteins in the eggs cook too quickly upon contact with hot liquid. The key to preventing this is a technique called tempering, which involves gradually raising the temperature of the eggs so they can accept the hot milk without curdling.
Understanding the science behind this is crucial. According to scientific research on coagulation, egg whites begin to set at 60-65°C (140-149°F), while the richer yolks start to firm up between 62-70°C (144-158°F). Pouring boiling milk (100°C or 212°F) directly into the yolks instantly pushes them past this threshold, causing them to coagulate into lumps. Tempering is the controlled process of bringing the egg mixture’s temperature up slowly and evenly.
The professional method involves a two-stage process. First, you whisk the egg yolks, sugar, and starch together until pale and thick. While whisking vigorously, you slowly stream in about half of the hot milk. This initial, small addition is enough to warm the yolks without cooking them. Once this is incorporated, the egg mixture is now “tempered” and can handle the remaining milk being whisked in more quickly before the entire mixture is returned to the saucepan to finish cooking.
Your Action Plan: The Two-Stage Tempering Method
- While whisking the egg yolk mixture constantly, gradually pour in about half of the hot milk in a slow, steady stream.
- Whisk in the remaining hot milk more quickly and immediately return the entire mixture to the saucepan.
- Cook over medium heat, whisking constantly and scraping the bottom and corners, until the mixture thickens to a firm consistency (5-8 minutes).
- Verify with a digital thermometer that the custard reaches 175-180°F (79-82°C) to ensure the eggs are safely cooked and the starch is activated.
- Once thickened, remove from heat and strain immediately through a fine-mesh sieve if desired for absolute smoothness.
This controlled method ensures a perfectly smooth emulsion and is the foundational technique for all custards.
Plastic Wrap on Surface: The Only Way to Prevent Custard Skin?
Every pastry recipe warns of the dreaded “skin” that forms on cooling custard. This occurs as the water on the surface of the hot cream evaporates, causing the proteins and starches left behind to concentrate and dry into a tough, leathery layer. The universally cited solution is to press a piece of plastic wrap directly onto the surface of the custard. This creates a physical barrier, preventing evaporation and thus stopping the skin from forming.
While effective, this is not the only method, and it comes with its own drawbacks, including plastic waste and potential chemical leaching. Professional kitchens sometimes employ a more classic technique: brushing the surface with a thin layer of melted butter. The fat creates a waterproof seal that locks in moisture just as effectively as plastic wrap. As the custard cools, the butter solidifies into a thin layer that can be easily whisked back into the cream or lifted off before use. This method also has the added benefit of enriching the custard with a subtle, buttery flavor.
This technique is particularly useful for custards that will be re-whipped or folded into other components, as the incorporated butter adds to the overall richness and mouthfeel.
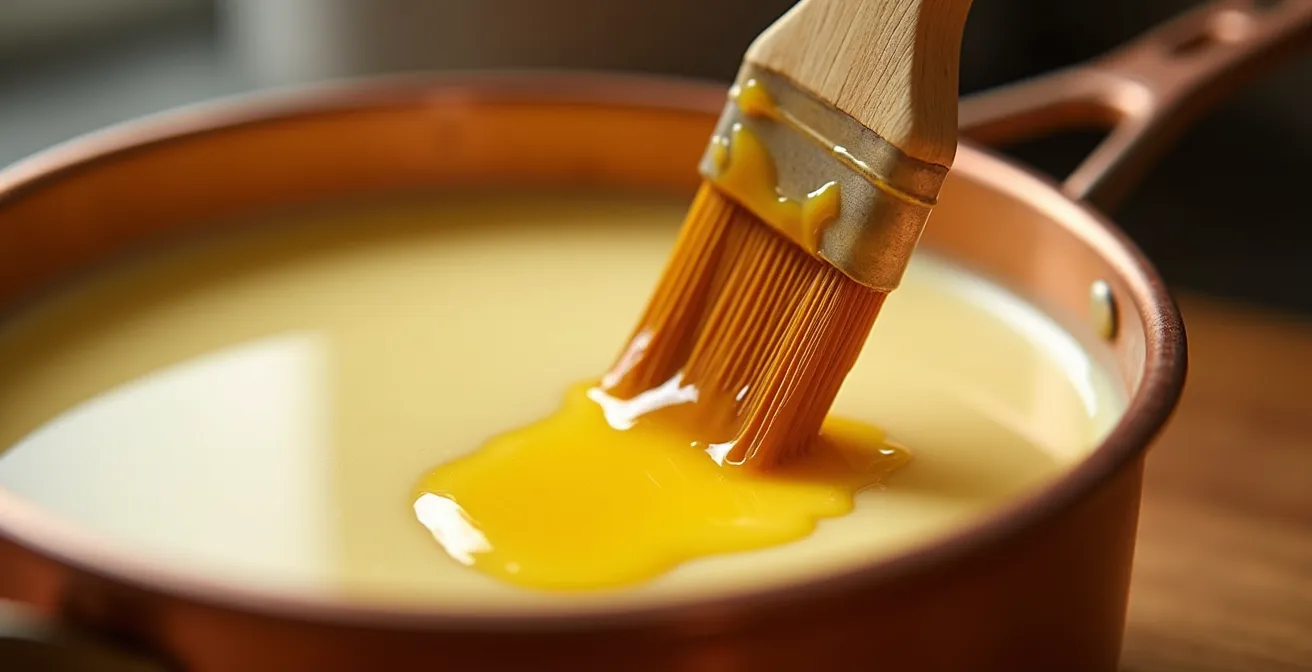
As you can see, the melted butter creates a glossy, protective film across the entire surface. To use this method, simply melt a tablespoon of unsalted butter and gently brush it over the hot custard immediately after it’s transferred to its cooling bowl. It’s an elegant, classic solution that elevates both the process and the final product.
Vanilla Bean: Steep in Milk or Add Seeds at the End?
The flavor of a custard is as important as its texture, with vanilla being the classic choice. The source of your vanilla—be it a whole bean, paste, or extract—significantly impacts the final result. For the most profound and complex flavor, a whole vanilla bean is unparalleled. To maximize its potential, the bean should be split lengthwise, its seeds scraped out, and both the pod and the seeds added to the milk at the very beginning of the process. Gently heating and steeping the pod in the milk allows the hundreds of aromatic compounds within the bean to fully infuse the liquid, creating a depth of flavor that cannot be achieved by adding it at the end.
Vanilla bean paste is a convenient and effective alternative, offering the visual appeal of real vanilla specks with a consistent and potent flavor. Pure vanilla extract, while the most affordable, lacks the complexity of its counterparts. Because its flavor is suspended in alcohol, it is volatile and can cook off if added too early. If using extract, it should always be whisked into the custard after it has been cooked and removed from the heat.
The following table breaks down the key differences between these common vanilla forms to help you make an informed choice based on your goals and budget.
| Vanilla Type | Flavor Release | Visual Impact | Cost-Effectiveness |
|---|---|---|---|
| Vanilla Bean | Complex, deep | Black specks | Most expensive |
| Vanilla Bean Paste | Strong, consistent | Black specks | Moderate cost |
| Pure Extract | Good but less complex | None | Most affordable |
Ultimately, steeping the bean and pod in the hot milk provides the most aromatic and layered vanilla profile, which is the hallmark of a high-quality French pâtisserie.
When to Strain Your Custard to Remove Chalaza and Lumps?
Straining is the ultimate insurance policy for a silky-smooth pastry cream. While perfect tempering and constant whisking can minimize lumps, straining guarantees a flawless texture. The ideal moment to strain is immediately after the custard has finished cooking, while it is still piping hot. At this stage, the cream is at its most fluid, allowing it to pass easily through a fine-mesh sieve. Waiting for it to cool will cause it to thicken, making the process difficult and less effective.
The primary purpose of straining is to remove any small bits of coagulated egg that may have formed despite your best efforts. It also serves to catch the chalazae, the ropey, white strands that anchor the yolk to the egg white. While completely edible, they don’t dissolve during cooking and can disrupt the perfectly smooth mouthfeel you’re aiming for. A final pass through a sieve ensures these are removed.
However, is it always necessary? For some applications, perhaps not. A rustic fruit tart might be forgiving of a less-than-perfect texture. Some chefs even prefer to skip this step, confident in their tempering technique. But for professional applications, especially for delicate glazes, mirror finishes, or fillings for choux pastry, straining is a non-negotiable step. Pushing the hot cream through a fine-mesh strainer with a spatula is the final act of refinement that separates a good custard from a great one.
The professional standard is to strain the hot custard directly into a clean bowl, and then immediately cover the surface to prevent a skin from forming as it cools. This two-step process—strain, then cover—is the final gatekeeper of quality control.
How to Fold Whipped Cream into Cold Custard for Diplomat Cream?
Diplomat cream, or crème diplomate, is a luscious combination of pastry cream and whipped cream. Its light, airy texture relies on a stable emulsion, which can easily be broken if the components are not handled correctly. The single most critical factor for success is temperature. To create a stable mixture, both the pastry cream and the whipped cream must be thoroughly chilled. As professional pastry chefs maintain, both components must be at 4°C (40°F) for a successful emulsion. If the pastry cream is even slightly warm, it will melt the fat in the whipped cream, causing the entire mixture to deflate and become soupy.
The second key to success is the folding technique. Cold pastry cream is very thick and dense, while whipped cream is light and fragile. Simply trying to fold them together at once will result in you overworking and deflating the whipped cream. The professional solution is to use a “sacrificial slurry”. This involves taking a small portion—about a quarter—of your whipped cream and vigorously whisking it into the cold pastry cream.
This initial addition is “sacrificed” to lighten the pastry cream’s dense texture, making it more receptive to the rest of the whipped cream. Once the base is loosened, the remaining whipped cream can be gently folded in with a spatula in two or three additions, preserving its volume and creating a light, homogenous, and stable diplomat cream. This method respects the delicate structure of each component and ensures a perfect final texture.
How Thick Should Pastry Cream Be to Support the Éclair Structure?
The central question of cornstarch versus flour comes into sharp focus when the custard must perform a structural role, as in an éclair. An éclair filling must be thick enough to hold its shape when piped and not ooze out when bitten, yet remain creamy and not pasty. Here, the choice of thickener is paramount to achieving this structural integrity.
Cornstarch, a pure starch, creates a tender, glossy gel. It provides a clean mouthfeel but can be brittle. Flour, which contains both starch and protein, creates a more robust, opaque, and stable gel. The proteins in flour add to the supportive network, resulting in a custard that holds its shape more reliably. For this reason, many classic French recipes for éclair filling call for flour or a combination of both. In fact, many professional pâtissiers recommend a blend of approximately 70% flour to 30% cornstarch. This ratio leverages the stability of flour with the superior texture and gloss of cornstarch.
Regardless of the thickener, the final consistency is judged by the “trail test.” After the custard has finished cooking and thickened, drag a finger across the back of the spatula or spoon used for stirring. The cream should be thick enough that it leaves a clear, defined trail that does not immediately fill back in. This indicates that the starch has fully gelatinized and the cream has reached the proper, pipeable consistency needed to support the delicate choux pastry of an éclair.
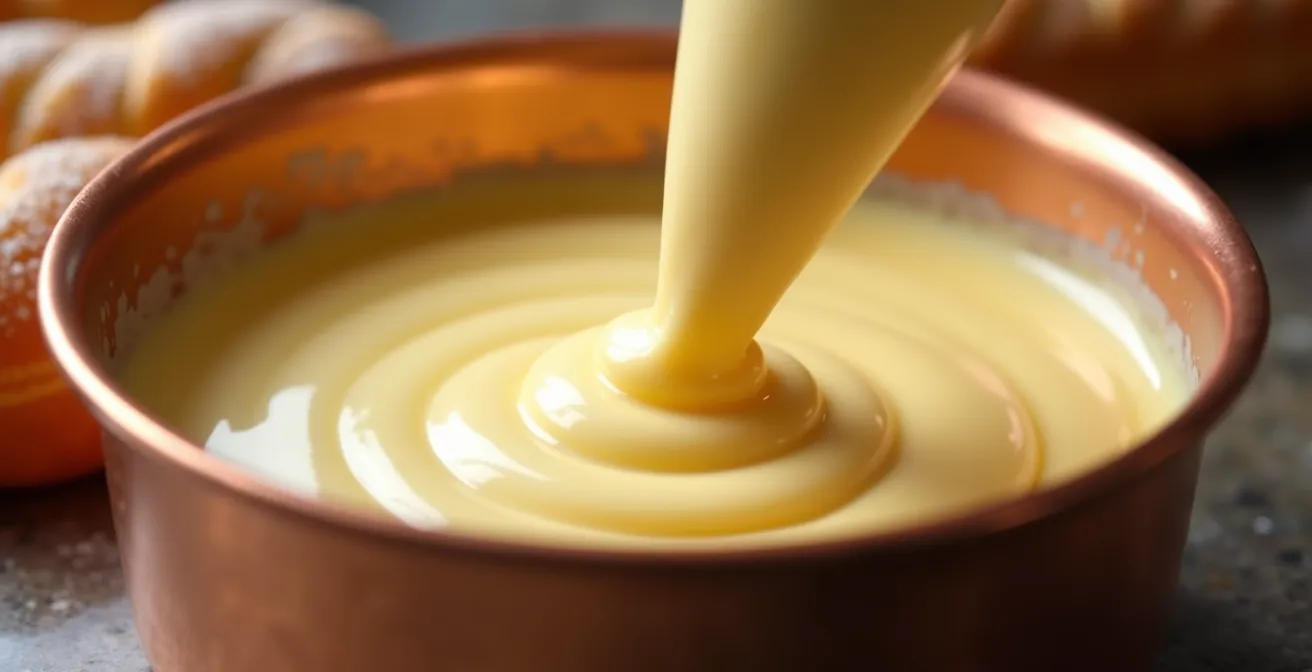
This visual cue is your most reliable indicator of success, confirming your pastry cream has the body and strength required for demanding applications.
Avocado vs Coconut Cream: Which Low-Carb Fat Emulsifies Best in Soups?
While our focus has been on sweet custards, the principles of thickening and emulsification extend to savory applications like creamy, low-carb soups. Here, traditional thickeners like flour are avoided, and fats are used to create richness and body. Avocado and coconut cream are popular choices, but they behave very differently when heated.
Avocado provides a thick, rich, and buttery mouthfeel, but it is extremely sensitive to heat. Its fats are prone to separating at temperatures approaching boiling, and its delicate compounds oxidize quickly, which can lead to discoloration and off-flavors. It is best whisked into a soup at the very end, after it has been removed from the heat. Coconut cream is more heat-stable, holding its emulsion up to around 80°C (176°F), and it offers a cleaner, lighter mouthfeel with a low risk of discoloration.
Interestingly, the most superior emulsifier in this context brings us back to our original subject: the egg yolk. Rich in lecithin, a powerful natural emulsifying agent, an egg yolk can be tempered into a hot soup base (just as with a sweet custard) to create an incredibly creamy, stable, and rich texture that is highly resistant to breaking or separating, even with gentle reheating.
| Fat Type | Heat Stability | Mouthfeel | Oxidation Risk |
|---|---|---|---|
| Avocado | Low – separates at boiling | Thick, rich | High – discolors quickly |
| Coconut Cream | Moderate – stable to 80°C | Clean, lighter | Low – color stable |
| Egg Yolk Addition | High – lecithin stabilizes | Ultra-creamy | Very low |
This demonstrates the versatility of custard techniques. The same principles that create a perfect crème pâtissière can be adapted to create a velvety, restaurant-quality soup, proving that mastering the fundamentals of emulsification is a universally valuable culinary skill.
Key Takeaways
- The choice between flour and cornstarch dictates the final structure; flour provides more support for fillings, while cornstarch offers a glossier, more delicate texture.
- Precise temperature control is the most critical element, from tempering eggs below their coagulation point to fully cooking the starch at 175-180°F (79-82°C).
- Finishing techniques like straining while hot and covering the surface (with plastic or butter) are non-negotiable for achieving a professionally smooth, flawless result.
Essential French Patisserie Tools: What Do You Really Need to Start Baking Like a Parisian?
While technique trumps tools, having the right equipment makes executing that technique infinitely easier and more reliable. You do not need a kitchen full of expensive gadgets to make excellent pastry cream, but a few key items are essential for consistency and control. These can be thought of in tiers, from the absolute must-haves to the nice-to-haves for those seeking perfection.
At the most basic level, you need three things: a heavy-bottomed saucepan to prevent scorching, a balloon whisk to ensure proper emulsification and aeration, and a heat-proof rubber or silicone spatula to scrape the bottom and corners of the pan where custard loves to catch and burn. These foundational tools are the bare minimum for success.
To elevate your results to a professional level, the next tier of investment is all about precision. This is where a reliable digital thermometer becomes indispensable. As one professional pastry chef noted in the Essential Baking Tools Guide:
A reliable digital thermometer is the single most important investment, more so than a fancy stand mixer or copper bowl.
– Professional Pastry Chef, Essential Baking Tools Guide
This single tool removes all guesswork, allowing you to know with certainty when your custard is safely cooked and your starch is fully activated. A fine-mesh sieve also belongs in this tier, acting as your quality control for ensuring absolute smoothness. For application, piping bags and an offset spatula are necessary for filling éclairs or spreading tarts cleanly. Ultimately, investing in tools that provide control over temperature and texture is the smartest way to start baking like a professional.
Stop guessing and start mastering. Choose your tools, control your temperatures, and apply these foundational techniques to transform your homemade fillings into patisserie-quality creations.