Chocolate Recipes
Working with chocolate transforms ordinary baking into an art form, yet many home cooks hesitate to explore its full potential. The gap between a simple chocolate cake and a professionally crafted dessert often comes down to understanding a few fundamental principles: how chocolate behaves under heat, why ratios matter in ganache, and which type of cocoa powder will deliver the flavor profile you’re seeking.
This comprehensive resource demystifies chocolate recipes by breaking down the core techniques that separate adequate results from exceptional ones. Whether you’re curious about tempering your first batch of chocolate, perfecting a silky ganache emulsion, or understanding why Dutch-process cocoa behaves differently than natural cocoa, you’ll find practical guidance rooted in both science and hands-on experience.
Understanding Chocolate Quality and Selection
The foundation of any successful chocolate recipe begins long before you turn on the oven. The quality and type of chocolate you choose directly impacts texture, flavor intensity, and how forgivingly the chocolate responds to heat.
The Impact of Cacao Percentage
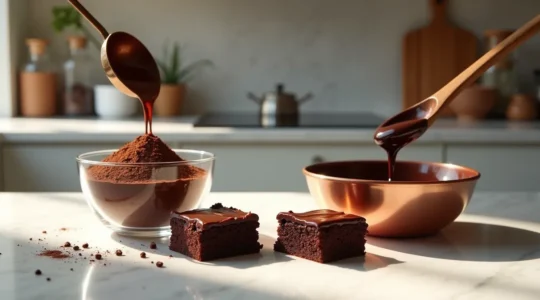
Cacao percentage indicates the proportion of cocoa solids and cocoa butter in your chocolate, with the remainder being sugar and often vanilla or lecithin. A 70% dark chocolate contains significantly less sugar than a 54% semisweet variety, which means it will taste more bitter and behave differently when melted. For ganache, higher percentages require slightly more cream to achieve a spreadable consistency, while lower percentages set firmer with the same liquid ratio.
Think of cacao percentage as the concentration dial for chocolate flavor. Home bakers often achieve professional depth simply by selecting a percentage that matches their intended use: 60-70% for rich truffles, 50-60% for balanced cakes, and 35-40% milk chocolate for subtle, creamy applications.
Sourcing Quality Couverture
Couverture chocolate differs from standard baking chocolate in its higher cocoa butter content, typically at least 32% cocoa butter. This extra fat gives couverture its characteristic fluidity when melted, making it ideal for coating, molding, and creating thin decorative elements. Professional chocolatiers rely on couverture because it creates a thinner shell with better snap and gloss.
Understanding single-origin nuances adds another layer of sophistication. Madagascar beans often deliver fruity, acidic notes, while Venezuelan chocolate tends toward earthy, nutty flavors. These origin-specific characteristics allow you to pair chocolate with complementary ingredients, much like selecting wine for a recipe.
The Art of Chocolate Tempering
Tempering often intimidates home bakers, yet it’s simply the process of organizing cocoa butter crystals into their most stable form. Untempered chocolate that sets at room temperature develops a dull, streaky appearance and soft texture. Properly tempered chocolate snaps cleanly, has a glossy sheen, and resists melting at room temperature.
The science centers on temperature control through specific ranges. Dark chocolate typically melts at 115-120°F, cools to 81-82°F to encourage stable crystal formation, then warms slightly to 88-90°F for working. This may seem fussy, but think of it like bread proofing: precise temperatures create reliable, professional results.
For beginners, the seeding method offers the most approachable path. Melt two-thirds of your chocolate, then add the remaining third in small pieces, stirring until melted by residual heat. This introduces pre-existing stable crystals that organize the entire batch. Test by dipping a knife edge: properly tempered chocolate sets with a uniform sheen within three minutes.
Molding techniques become accessible once you’ve mastered tempering. The chocolate must be fluid enough to release air bubbles when tapped but cool enough to set with the right crystal structure. This balance transforms basic molds into professional-looking bonbons and decorative elements.
Mastering Ganache Emulsions
Ganache represents the marriage of chocolate and cream, and like any successful relationship, it requires understanding the needs of both partners. At its core, ganache is an emulsion where fat from chocolate and cream combine with liquid to create a stable, homogeneous mixture.
The Crucial Ratio of Fat to Liquid
The fundamental ganache ratio is often expressed as parts chocolate to parts cream. A 1:1 ratio (equal weights) produces a truffle consistency that’s scoopable when set, while 2:1 chocolate to cream creates a firm ganache suitable for cutting into squares. For a pourable glaze, reverse the ratio to 1:2.
These ratios shift based on chocolate’s cacao percentage, since higher percentages contain less sugar and more cocoa solids. A 70% dark chocolate ganache with a 1:1 ratio will set softer than a 55% version at the same ratio, because the higher cocoa butter content in dark chocolate contributes more fat to the emulsion.
Temperature Control During Emulsion
Heat cream to approximately 180-190°F, just below boiling, then pour it over chopped chocolate. This temperature provides enough energy to melt the chocolate fully while creating the conditions for proper emulsification. Wait 60-90 seconds before stirring, allowing the chocolate to soften completely.
Stir from the center outward in small circles, gradually widening your motion. This technique, borrowed from professional kitchens, incorporates ingredients slowly and prevents the emulsion from breaking. A broken ganache appears grainy or separated, with visible fat pooling on the surface.
Advanced Techniques and Alternatives
Infusing flavors without breaking the emulsion requires gentle timing. Steep herbs, spices, or tea in the warm cream for 10-15 minutes before straining and reheating. Earl Grey, lavender, or vanilla beans release their aromatics into the cream’s fat, which then carries those flavors into the finished ganache.
Using glucose or butter for texture introduces professional refinement. A tablespoon of glucose syrup per cup of ganache extends shelf life and creates silkier texture, while a knob of butter at the end adds luxurious richness and improves pipability. Vegan alternatives for ganache typically substitute coconut cream or cashew cream for dairy, adjusting ratios to account for different fat contents.
Working with Cocoa Powder in Baking
Cocoa powder concentrates chocolate flavor without adding extra fat, making it indispensable for cakes, cookies, and brownies where you need intense chocolate taste without compromising texture.
Dutch-Process vs. Natural Cocoa
The distinction between these two types fundamentally affects both flavor and chemistry. Natural cocoa maintains the cocoa bean’s natural acidity (pH around 5.5), delivering bright, fruity chocolate notes. It reacts with baking soda to provide leavening and creates lighter-colored baked goods.
Dutch-process cocoa undergoes alkalization, neutralizing its acidity to a pH around 7. This process darkens the color and mellows the flavor, producing earthier, more rounded chocolate taste. Because it’s neutral, Dutch-process cocoa won’t react with baking soda, so recipes using it typically call for baking powder instead.
Techniques for Deeper Flavor
Blooming cocoa powder unlocks flavors that remain muted when cocoa meets cold ingredients. Mix cocoa with a small amount of boiling water or hot coffee, stirring into a paste. This hydrates the cocoa particles and activates flavor compounds, much like blooming spices in oil intensifies curry. The result is noticeably richer chocolate taste in your finished cake or brownie.
Black cocoa applications provide ultra-dark color and Oreo-like flavor. This heavily Dutched cocoa contains minimal fat and won’t provide structure on its own, so use it as 10-25% of your total cocoa, blending it with regular cocoa powder. It’s perfect for dramatic black cakes or intensely dark cookie dough.
Creating Classic Chocolate Desserts
Mastering specific classic dishes builds confidence and teaches transferable techniques. Chocolate mousse exemplifies this perfectly, combining several fundamental skills: creating stable emulsions, incorporating air for lightness, and balancing richness with texture.
The traditional mousse begins with a chocolate-egg yolk base, enriched with butter for smoothness. Safety with raw eggs concerns many home bakers, and rightfully so. Using pasteurized eggs eliminates risk entirely, or you can create a Swiss meringue mousse by heating egg whites with sugar to 160°F before whipping, then folding in melted chocolate and whipped cream.
Make-ahead timing strategy transforms chocolate desserts from stressful to strategic. Most chocolate mousse, ganache tarts, and flourless cakes actually improve after resting 24 hours in the refrigerator, as flavors meld and textures stabilize. This makes them ideal for dinner parties where advance preparation reduces last-minute pressure.
Selecting the right alcohol addition enhances without overwhelming. Dark rum complements milk chocolate, Cointreau brightens dark chocolate, and whiskey adds complexity to desserts with caramel or nuts. Use 1-2 tablespoons per cup of mousse or ganache as a starting point. Topping selection for contrast provides textural interest: flaky sea salt against smooth ganache, candied citrus peel beside rich mousse, or toasted nuts scattered over flourless cake.
Flavor Pairing and Development
Deepening flavor profiles in baking extends beyond using quality chocolate. The compound approach layers complementary tastes: a touch of espresso powder intensifies chocolate without adding coffee flavor, while vanilla amplifies sweetness perception, allowing you to reduce actual sugar.
Flavor pairing for artisan treats follows both science and intuition. Chocolate’s complex flavor profile contains over 600 compounds, with notes ranging from fruity to earthy to spicy. Citrus brightens dark chocolate’s bitterness, sea salt enhances sweetness perception, and chili adds warmth that makes chocolate taste richer.
Consider complementary pairings like chocolate with raspberry, hazelnut, or caramel, which reinforce existing flavor notes. Contrasting combinations create excitement: chocolate with black pepper, olive oil, or basil challenge expectations while remaining balanced. Start conservatively with unfamiliar pairings, adding gradually until you achieve harmony rather than competition.
Storage and Presentation
Understanding storage limits of cocoa products preserves your investment in quality ingredients. Solid chocolate bars properly wrapped and stored in a cool, dry place last up to two years, while cocoa powder remains potent for three years in an airtight container away from moisture. Ganache keeps refrigerated for two weeks or frozen for three months.
Temperature fluctuations cause bloom, the grayish coating that appears on chocolate’s surface. Sugar bloom occurs when moisture dissolves surface sugar, which recrystallizes upon drying. Fat bloom happens when cocoa butter melts and re-solidifies unevenly. Neither affects safety, but both impact appearance and texture.
Packaging for preservation and gifting combines function with aesthetics. Truffles and molded chocolates need protection from humidity and heat, making rigid boxes with minimal air space ideal. Layer pieces between parchment, and if shipping, include cooling packs during warm months. Clear cellophane showcases chocolate’s glossy finish while protecting it from fingerprints and moisture.
Elevating home desserts to professional standards ultimately comes down to understanding why techniques matter, not just following steps mechanically. Each principle in this resource builds upon the others: quality chocolate responds better to tempering, properly tempered chocolate creates superior ganache, and balanced ganache transforms simple cakes into memorable desserts. As you practice these techniques, you’ll develop the intuition that distinguishes confident chocolate work from tentative experimentation.
Cocoa Powder vs Real Chocolate: Which Delivers More Intense Cocoa Notes in Baking?
The secret to intense chocolate flavor isn’t choosing powder *or* bar, but mastering how to use both by understanding their underlying chemistry. Cocoa powder provides concentrated, sharp chocolate notes, while real chocolate (couverture) contributes fat, structure, and a glossy finish….
Read more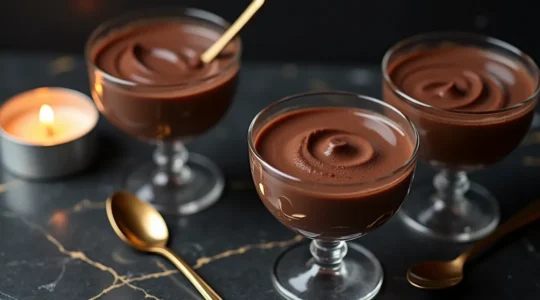
The Only 4-Ingredient Chocolate Mousse Recipe a French Chef Will Ever Use
The secret to authentic French chocolate mousse is not adding more ingredients like cream or butter, but mastering the technique with just four essential components. The texture is defined by the quality of the chocolate and the precision of the…
Read more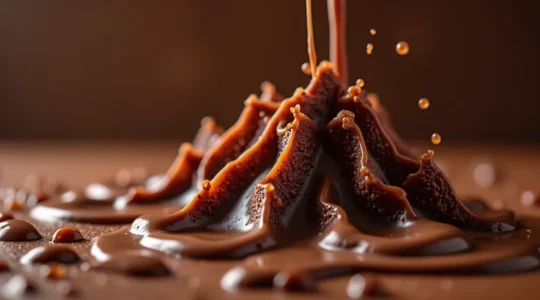
A Pastry Troubleshooter’s Guide: Why Your Ganache Splits and How to Rescue It
In summary: Broken ganache is a failed emulsion of fat and water, not a failed recipe. The cause is always an imbalance in ratio, temperature, or agitation. Temperature is critical: cream should be hot enough to melt the chocolate but…
Read more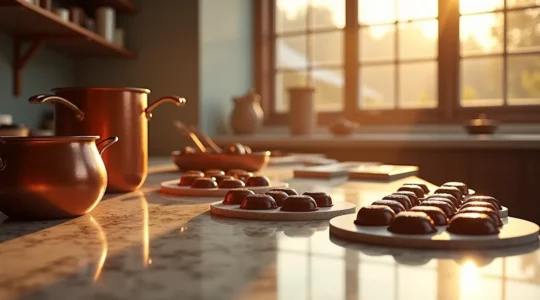
From Home Kitchen to Artisan Boutique: The Secrets to Crafting Exquisite Chocolates
In summary: Achieving a professional glossy finish and “snap” is not magic; it’s the science of controlled cocoa butter crystallization, known as tempering. The choice of material is critical: high-cocoa-butter couverture chocolate and rigid polycarbonate molds are non-negotiable for artisan…
Read more