The secret to delicious low-carb food isn’t the recipe, but mastering the science of texture.
- Learn to aggressively manage water content to prevent soggy vegetable substitutes and achieve a crisp, fluffy finish.
- Understand how to build stable emulsions and structural integrity in sauces and baked goods without carbs or gluten.
Recommendation: Stop following recipes blindly and start engineering your food’s mouthfeel for ultimate satisfaction.
If you’ve ever ended up with a sad, watery pile of mush when you were promised fluffy, grain-like cauliflower rice, you’re not just a victim of a bad recipe. You’re facing a fundamental challenge of low-carb cooking: texture engineering. The satisfying chew of pasta, the tender crumb of a cake, and the fluffiness of rice all come from starches and gluten—the very things your diet restricts. Simply swapping ingredients is a recipe for disappointment. The common advice to “squeeze out water” or “use a food processor” barely scratches the surface of the problem.
But what if the fix for mushy cauliflower rice held the key to solving every other low-carb texture problem? The real solution lies not in a single trick, but in understanding and controlling the physics of your ingredients. It’s about becoming a culinary innovator in your own kitchen. Mastering the principles of moisture management, cellular disruption, and structural binding will empower you to transform watery zucchini noodles, gritty almond flour cakes, and rubbery konjac pasta into dishes that are genuinely satisfying. This guide is your engineering manual, moving beyond simple substitution to true textural transformation.
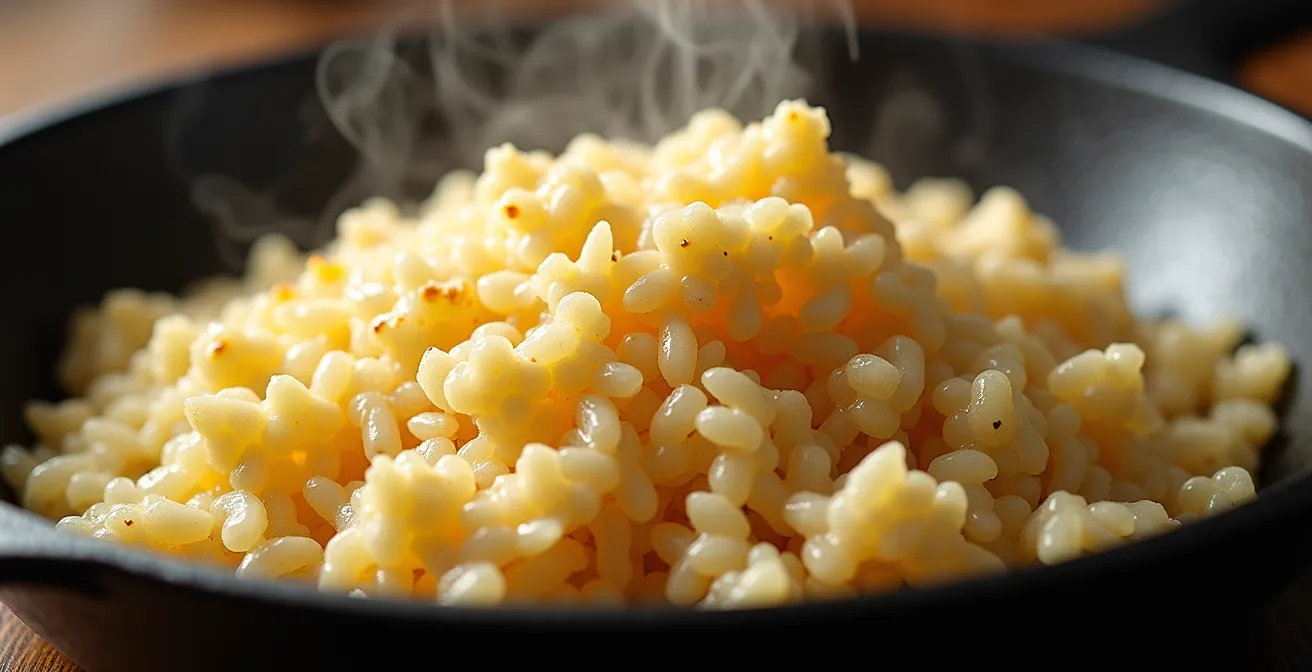
To begin, consider how technique directly impacts the texture of cauliflower rice, a principle that applies to all vegetable substitutes.
| Method | Grain Size | Best Use | Texture Result |
|---|---|---|---|
| Food Processor (Grating Disc) | Rice-sized uniform | Pilaf style | Light, fluffy, separate grains |
| Food Processor (S-Blade) | Couscous-fine | Binding dishes | Compact, tends to clump |
| Box Grater | Variable, larger | Stir-fries | Chunkier, more bite |
| Pre-packaged | Often too fine | Quick meals | Can turn mushy easily |
This guide will deconstruct the most common low-carb texture failures and provide you with the scientific principles and practical hacks to conquer them. Prepare to reverse-engineer your favorite meals for a low-carb lifestyle without compromise.
Table of Contents: A Low-Carb Texture Engineering Manual
- Salt Sweating: How to Prevent Zucchini Noodles From Becoming Watery Soup?
- Avocado vs Coconut Cream: Which Low-Carb Fat Emulsifies Best in Soups?
- Almond Flour Grittiness: How to Sift for a Finer Cake Crumb?
- How to Use Konjac Noodles Without the Rubber Band Texture?
- The Frico Method: How to Make Cheese Crisps That Stay Crunchy?
- Xanthan Gum vs Psyllium Husk: Which Binder Creates Better Bread Structure?
- Cashew vs Cauliflower Cream: Which Thickener Best Mimics Alfredo Sauce?
- Social Dieting: How to Eat Mediterranean at a Restaurant Without Breaking Your Diet?
Salt Sweating: How to Prevent Zucchini Noodles From Becoming Watery Soup?
The number one enemy of zucchini noodles (or “zoodles”) is water. Zucchini is over 90% water, and when heated, its cells burst and release this liquid, turning your vibrant pasta substitute into a diluted, soupy mess. The fix isn’t just cooking them less; it’s a preemptive strike using the principle of osmosis. By salting the raw noodles, you create a high-concentration saline environment on their surface. Nature abhors this imbalance, so water is drawn out from inside the zucchini cells to try and dilute the salt on the outside.
This “sweating” process is the most crucial step in mouthfeel engineering for high-water-content vegetables. Let the salted noodles sit for 20-30 minutes, and you’ll be shocked at the puddle of water that collects. After they’ve sweat, gently squeeze them in a clean tea towel to remove the expelled liquid. Only then are they ready for a quick pan-sear. This method ensures the final texture is al dente and toothsome, not waterlogged. The goal is a quick sear to heat them through, not to “cook” them in the traditional sense.

As you can see, the salt acts as a powerful agent for moisture management. This technique doesn’t just work for zucchini; it’s a foundational hack for eggplant, mushrooms, and any vegetable you want to brown rather than steam. By removing the internal water first, you allow the pan’s heat to work on caramelizing the vegetable’s natural sugars, developing deep flavor and a satisfying texture instead of just boiling it in its own juices.
Avocado vs Coconut Cream: Which Low-Carb Fat Emulsifies Best in Soups?
Creating creamy, luscious soups without starchy potatoes or flour requires mastering the art of the fat-based emulsion. In the low-carb world, avocado and coconut cream are two dominant players, especially as the Ketogenic Diet holds 37.2% of the low-carb diet market share, driving demand for high-fat solutions. But they are not interchangeable. Choosing the right one depends on understanding their unique properties and how they interact with heat and acid.
Coconut Cream is a powerhouse for creating stable emulsions. Its high saturated fat content means it can withstand higher temperatures without “breaking” or separating. This makes it ideal for simmering in soups and curries. When blended, it creates a velvety, rich mouthfeel that closely mimics dairy cream. However, its distinct tropical flavor is a strong consideration; it shines in Asian-inspired or sweet-leaning dishes but can clash with more traditional European flavor profiles.
Avocado, on the other hand, offers a more neutral, buttery flavor. It creates a beautiful, thick texture when blended into a soup *at the end of cooking*. Its fats are primarily monounsaturated, which are less stable under prolonged heat and can become bitter. The best practice is to cook your soup base, let it cool slightly, then blend in the fresh avocado. This technique preserves its delicate flavor and creamy texture, making it perfect for chilled soups like gazpacho or for finishing a warm soup just before serving.
As experts from Data Bridge Market Research note in their Global Low Carb Diet Market Report, this kind of ingredient innovation is key:
The development of innovative food processing techniques offers significant opportunities for enhancing taste, texture, and nutritional profile of low-carb products.
– Data Bridge Market Research, Global Low Carb Diet Market Report 2032
Almond Flour Grittiness: How to Sift for a Finer Cake Crumb?
A common complaint with low-carb baking is the gritty, sandy texture of cakes and muffins made with almond flour. Many recipes suggest sifting the flour, but this is a classic case of treating a symptom, not the cause. Sifting helps break up clumps, but it doesn’t change the fundamental particle size or, more importantly, the hydration properties of the flour. The real culprit behind grittiness is inadequate hydration.
Almond flour is essentially just ground nuts, full of protein and fiber that need time to absorb liquid. Unlike wheat flour’s fine starches, almond flour’s particles are larger and thirstier. The secret to a smooth, tender crumb is a technique from the world of bread making: the autolyse. This simply means mixing your almond flour with the liquid ingredients (like eggs, sour cream, or a liquid sweetener) and letting the batter rest for 15-30 minutes *before* adding leaveners and fats. This resting period allows the almond flour’s fiber and protein to fully saturate with moisture, softening the particles and eliminating that dreaded gritty mouthfeel.
Furthermore, the type of almond flour matters immensely. Always opt for super-fine blanched almond flour. “Blanched” means the skins have been removed. The skins contain tannins and extra fiber that actively resist hydration, contributing to a denser, grittier result. Unblanched flour (often called almond meal) is better suited for more rustic applications like coatings or crumble toppings, not for a delicate cake crumb. By combining the right type of flour with the autolyse technique, you are engineering the batter for a truly superior texture.
How to Use Konjac Noodles Without the Rubber Band Texture?
Konjac noodles (or shirataki) are a low-carb miracle: zero net carbs, zero calories, and all fiber. But for many, the experience is ruined by two things: a faint fishy odor from the packaging liquid and a texture that ranges from squeaky to unpleasantly rubbery. Both issues can be solved with a simple but non-negotiable texture reset protocol. The goal is to expel the original packing water and fundamentally alter the noodle’s surface structure.
The transformation from rubber band to a palatable pasta substitute requires heat and dehydration. Simply rinsing isn’t enough. You must follow a precise process to make them receptive to the flavors you want to add. This involves driving out the old water and preparing the surface to cling to sauce, rather than repel it. The slimy, rubbery feel is due to the glucomannan gel, which can be tamed with the right approach.

This visible change from glossy-wet to matte-dry is the moment of textural transformation. You are essentially “resetting” the noodle, creating a firmer, more pasta-like canvas that’s ready to absorb your sauce. Skipping this step is why so many konjac dishes fail, resulting in sauce that pools at the bottom of the bowl instead of clinging to the noodles.
Your 5-Step Konjac Noodle Texture Reset
- Rinse & Drain: Rinse the noodles under cold running water in a colander for at least 2 minutes. This is critical to wash away the alkaline solution they are packed in, which is the source of the odor.
- Dry Pan-Fry: Heat a non-stick skillet over medium-high heat. Add the drained noodles to the DRY pan (no oil). Pan-fry for 5-7 minutes, tossing frequently, until they stop steaming and make a slight squeaking sound against the pan.
- Acid Shock (Optional but Recommended): For an even better texture, remove the noodles from the heat and toss with a small amount of an acidic liquid, like a teaspoon of rice vinegar or lemon juice. This helps further break down the glucomannan gel.
- Build a Clingy Sauce: While the noodles rest, build a sauce that has some binding power. A small amount of xanthan gum, or emulsifiers like mustard or lecithin, will help it adhere to the now-receptive noodle surface.
- Combine & Serve: Add the texture-reset noodles to your prepared sauce and toss to coat thoroughly. The noodles will now absorb the flavor and provide a much more satisfying bite.
The Frico Method: How to Make Cheese Crisps That Stay Crunchy?
Cheese crisps, or frico, are a keto dieter’s staple. They promise a crunchy, savory snack that can replace crackers and chips. Yet, many homemade attempts result in crisps that are either greasy and floppy or burnt and bitter. The secret to a perfect, shatteringly crisp frico that stays crunchy for days lies in understanding the interplay of moisture, fat, and heat.
The ideal cheese for frico is a hard, aged cheese like Parmesan, Asiago, or Pecorino. These cheeses have two critical properties: low moisture content and a high protein-to-fat ratio. A younger, softer cheese like mozzarella or cheddar has too much water and fat, which will cause it to melt into a greasy pool rather than crisp up. The goal is to render the small amount of fat out of the cheese while the protein structure toasts and dehydrates, forming a delicate, crispy lattice.
The “Frico Method” is a low-and-slow approach. Follow these steps for perfect crisps:
- Preheat your oven to a moderate 375°F (190°C). Using high heat will burn the cheese before it has a chance to dehydrate properly.
- Line a baking sheet with parchment paper. This is non-negotiable, as it prevents sticking and wicks away the rendered fat.
- Spoon small, thin mounds of grated Parmesan onto the parchment, leaving ample space between them. A tablespoon per crisp is a good starting point. Keep the piles light and airy, not densely packed.
- Bake for 5-7 minutes. Watch them closely. They are done when the edges are golden brown and the bubbling in the center has mostly subsided.
- Let them cool completely on the baking sheet for a few minutes. They will crisp up significantly as they cool. Once firm, transfer them to a wire rack to finish cooling. Stored in an airtight container, they will stay perfectly crunchy.
This method ensures you are gently dehydrating the cheese, not frying it in its own fat. The result is a light, delicate crisp with intense flavor, perfect for dipping, topping salads, or enjoying on its own.
Xanthan Gum vs Psyllium Husk: Which Binder Creates Better Bread Structure?
Baking bread without gluten is like building a house without a frame. Gluten provides the elastic, web-like structure that traps gas from yeast or leaveners, allowing bread to rise and have a soft, chewy crumb. In low-carb baking, which relies on gluten-free flours like almond and coconut, we must introduce a binder to mimic this effect. The two most effective tools for this are xanthan gum and psyllium husk, but they serve different structural purposes.
Xanthan Gum is a powerful hydrocolloid that excels at creating viscosity and elasticity. A tiny amount can transform a watery batter into a thick, dough-like substance that can be shaped. It acts like a “glue,” providing the sticky, stretchy quality that gluten normally would. This makes it essential for creating a dough that can trap air bubbles and rise, resulting in a lighter, less dense loaf. It provides the “chew.”
Psyllium Husk, on the other hand, is a champion of moisture retention and structure. It’s an incredibly absorbent fiber that can hold many times its weight in water, forming a gel. This gel creates a soft, moist crumb and prevents low-carb breads from being dry and crumbly. It provides the “scaffolding” and keeps the bread from falling apart. While it provides some binding, its primary role is to create a pleasant, bread-like interior texture.
Case Study: The Binder Matrix
The best low-carb bread doesn’t use one or the other; it uses both in a synergistic “Binder Matrix.” Testing reveals that different flours have different needs. For example, highly absorbent coconut flour requires more psyllium husk (around 1-2 tsp per cup of flour) to combat its inherent dryness, while almond flour benefits greatly from the elasticity of xanthan gum (around 0.5 tsp per cup). An ideal all-purpose strategy combines both: using psyllium for a moist crumb and xanthan gum for the elastic structure, creating a final product that is far superior to using either binder alone.
Therefore, the question isn’t which one is better, but how they work together. For a truly bread-like structure, use psyllium husk to build the moist framework and xanthan gum to create the flexible webbing. This two-pronged approach is the cornerstone of successful low-carb bread engineering.
Cashew vs Cauliflower Cream: Which Thickener Best Mimics Alfredo Sauce?
A classic Alfredo sauce gets its luxurious, clingy texture from the emulsification of butter, heavy cream, and Parmesan cheese, often with a little help from the starch released by the pasta itself. Replicating this mouthfeel without the high carb count of dairy and pasta is a significant challenge. Soaked cashews and steamed cauliflower have emerged as the leading contenders for creating a convincing low-carb Alfredo base, each with distinct advantages and disadvantages.
Soaked Cashews are the king of creaminess. When soaked and blended at high speed, their high fat content creates an incredibly smooth, rich emulsion that closely mimics heavy cream. The flavor is mild, buttery, and slightly sweet, providing a perfect neutral canvas. However, cashews are not the lowest-carb nut. While still viable for a general low-carb diet, they can be problematic for strict keto followers, and their cost can be a factor.
Steamed Cauliflower is the stealthy, ultra-low-carb option. When steamed until very soft and blended with a small amount of liquid, it breaks down into a surprisingly thick and creamy puree. It’s virtually carb-free and inexpensive. The main challenge is flavor. Cauliflower has an inherent cruciferous taste that must be masked. This requires a more aggressive use of umami-rich ingredients like nutritional yeast, garlic, and even a touch of white miso paste to create a cheesy, savory profile. The texture is slightly less rich than cashew cream but can be incredibly effective when properly seasoned.
To truly mimic the binding power of pasta starch, a successful Alfredo hack often includes a secret ingredient: a tiny amount of a neutral starch like tapioca or arrowroot, or a hydrocolloid like xanthan gum. This gives the sauce that final “cling” that makes it coat the noodles perfectly.
- Base: Blend 1 cup of soaked raw cashews OR 2 cups of soft-steamed cauliflower with just enough liquid (water or unsweetened nut milk) to get the blender moving.
- Umami Boost: Add 2 tablespoons of nutritional yeast, 1-2 cloves of garlic, and a teaspoon of white miso paste to build a savory, cheesy flavor foundation.
- Stabilizer: Mix in 1 tablespoon of tapioca starch or 1/4 teaspoon of xanthan gum to replicate the binding effect of pasta water.
- High-Speed Blend: Process at the highest speed for 2-3 minutes. This is crucial for creating microscopic particles that result in a silky-smooth, not grainy, texture.
- Heat Gently: Warm the sauce over low heat, stirring constantly. Do not boil, as this can cause both cashew and cauliflower sauces to separate or change texture.
Key Takeaways
- Moisture is the enemy of crispness: Actively removing water via sweating or dry-frying is the first step to achieving good texture in vegetables.
- Binders are the architects of structure: Use psyllium husk for moisture and xanthan gum for elasticity to build a bread-like crumb without gluten.
- Fat and fiber are the keys to creaminess: High-speed blending of fats (like avocado, coconut) or fiber (like cauliflower, cashews) creates emulsions that replace dairy.
Social Dieting: How to Eat Mediterranean at a Restaurant Without Breaking Your Diet?
Maintaining a low-carb lifestyle isn’t just about what you cook at home; it’s about navigating the social world of restaurants without feeling deprived or derailing your progress. This is especially critical given that, according to a March 2024 WHO report, 1 in 8 people globally live with obesity, making mindful dietary choices more important than ever. A Mediterranean restaurant seems like a safe bet—olive oil, fresh fish, and vegetables—but hidden carbs and problematic cooking oils abound. Hacking the menu is a skill.
Your first move is to become a polite interrogator. Menu descriptions are marketing, not technical specs. The word “grilled” often means cooked on a griddle with cheap seed oils, not over an open flame with olive oil. Your go-to questions should be:
- “Could the chef please grill my fish/chicken with olive oil only?”
- “Can I swap the potatoes/rice for a double portion of the grilled vegetables or a side salad with olive oil and vinegar?”
- “Is there any sugar in the salad dressing or breading on the fish?”
The strategy is to frame your requests as swaps and additions, not subtractions. “Extra olives instead of croutons” is received better than “no croutons.” This positions you as an engaged diner, not a difficult one. For appetizers, focus on olives, grilled halloumi (if your carb budget allows), or salads. For your main, a simple grilled fish or souvlaki (without the pita) with a large Greek salad is a perfect choice. Be wary of sauces and dips; many, like some versions of tzatziki, can have added sugar or starches. A simple drizzle of high-quality olive oil and a squeeze of lemon is always your safest and most delicious bet.
Finally, manage your alcohol intake strategically. If you choose to have a glass of wine, opt for a dry red or white. Eat your protein and fat-heavy appetizers first. This helps buffer the alcohol’s impact on your blood sugar, allowing you to enjoy a social drink without majorly disrupting your metabolic state. Social dieting is not about restriction; it’s about making smart, informed choices that keep you on track while fully enjoying the experience.
Now that you have the engineering principles, it’s time to stop just eating and start designing. Apply these texture hacks to your next meal and reclaim the satisfaction you’ve been missing.
Frequently Asked Questions About Low-Carb Texture
Why does sifting alone not solve grittiness in almond flour?
Grittiness is primarily a hydration problem, not particle size. Sifting helps with clumping but doesn’t address the core issue of moisture absorption by the flour’s fiber and protein.
What’s the difference between blanched and unblanched almond flour texture?
Unblanched flour contains skin with tannins and extra fiber that resist hydration, leading to grittier, denser results compared to blanched flour, which is made from almonds with the skins removed.
How does pre-hydration (autolyse) improve texture?
Mixing almond flour with liquid ingredients and letting it rest allows the flour’s particles to fully absorb moisture, which softens the overall texture and eliminates the sandy or gritty mouthfeel in the final baked good.
What does ‘grilled’ really mean on menus?
It often means the item is cooked on a flat-top griddle, frequently using industrial seed oils rather than high-quality olive oil. It is always best to ask specifically for your food to be grilled with olive oil or dry-grilled.
How to politely modify orders at a restaurant?
Frame your requests as swaps rather than removals. For example, asking “Could I please get extra olives instead of the croutons?” is often received more positively by staff than a blunt “no croutons.”
What is the best strategy for alcohol when on a Mediterranean or low-carb diet?
To minimize the impact on blood sugar, eat your protein and fat-based foods first to buffer the glucose response. Then, if you choose to drink, limit yourself to one glass of a dry wine (like Sauvignon Blanc or Pinot Noir) consumed with your meal.